Xerox M118i PaperPort SE Getting Started Guide
Xerox M118i - WorkCentre B/W Laser Manual
 |
UPC - 095205219265
View all Xerox M118i manuals
Add to My Manuals
Save this manual to your list of manuals |
Xerox M118i manual content summary:
- Xerox M118i | PaperPort SE Getting Started Guide - Page 1
- Xerox M118i | PaperPort SE Getting Started Guide - Page 2
, optical, chemical, manual, or otherwise, without prior written consent from ScanSoft, Inc., 9 Centennial Drive, Peabody, Massachusetts 01960. Printed in the United States of America and the Netherlands. The software described in this book is furnished under license and may be used or copied only - Xerox M118i | PaperPort SE Getting Started Guide - Page 3
thumbnails 9 The Page View window 11 Acquiring Items 12 Scan to the PaperPort desktop 12 Print to PaperPort 13 Add PaperPort folders 13 Import files 14 Download pictures from your camera 14 Touching Up Images 14 Image editing tools 15 PaperPort Getting Started Guide iii - Xerox M118i | PaperPort SE Getting Started Guide - Page 4
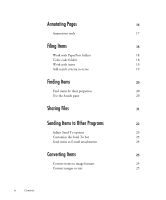
items by their properties 20 Use the Search pane 20 Sharing Files 21 Sending Items to Other Programs 22 Adjust Send To options 23 Customize the Send To bar 23 Send items as E-mail attachments 24 Converting Items 25 Convert items to image formats 25 Convert images to text 25 iv - Xerox M118i | PaperPort SE Getting Started Guide - Page 5
Welcome to the PaperPort Getting Started Guide. PaperPort provides the easiest way to turn paper into organized digital documents that everybody in an office can quickly find and use. PaperPort works with scanners, multifunction printers, and networked digital copiers to turn paper documents into - Xerox M118i | PaperPort SE Getting Started Guide - Page 6
. Help is available from the PaperPort Help menu. Additional technical support, including technical notes, frequently asked questions, software updates, and more is available on the PaperPort Help menu. Using release notes PaperPort Release Notes provide important information about this release - Xerox M118i | PaperPort SE Getting Started Guide - Page 7
to Know PaperPort This section introduces you to the different parts of PaperPort. Refer to the PaperPort Help for detailed can use to manage them. PaperPort offers all the tools necessary to organize, find, and use documents and images. Document thumbnails Desktop PaperPort Getting Started Guide - Xerox M118i | PaperPort SE Getting Started Guide - Page 8
view of your PaperPort folders, similar to the view you see in Windows Explorer. PaperPort installs a PaperPort folder named My PaperPort Documents into your My Documents folder. If you are using a multi-user system, each user has their own My PaperPort Documents folder. The My PaperPort Documents - Xerox M118i | PaperPort SE Getting Started Guide - Page 9
items, you do not have to use the My PaperPort Document folder to store them. You can add other local and network folders to PaperPort's Folder View. To • Scanned pages and photos • Photos from your digital camera • Image files in many formats, such as BMP, TIFF, JPEG, and MAX • PDF Image items - Xerox M118i | PaperPort SE Getting Started Guide - Page 10
or rotate it. Using thumbnails on the PaperPort desktop, you can also easily combine individual PaperPort Image items or PDF Image items into multi-page items. This feature is useful as an organizational tool if you are using a scanner that can only scan a page as a separate item. 10 Getting to Know - Xerox M118i | PaperPort SE Getting Started Guide - Page 11
enlarge or reduce the view for easy reading. To view an item in the Page View window, double-click a thumbnail, or select the item and click the Page button on the Command bar. Annotation Tools Image Editing Tools Click the PaperPort desktop button to toggle back to the PaperPort desktop at any - Xerox M118i | PaperPort SE Getting Started Guide - Page 12
desktop. • Drag or cut-and-paste images and documents from Windows Explorer, or other programs to the PaperPort desktop. • Download photos from a digital camera. Scan to the PaperPort desktop PaperPort is designed to work with TWAIN- and WIA-compatible scanners. Use the Scan pane to call up your - Xerox M118i | PaperPort SE Getting Started Guide - Page 13
use a high-speed, networked scanner to scan items to a networked folder and then add the folder to PaperPort. Print to PaperPort To bring items in from other programs, you can print them to the PaperPort desktop as PaperPort Image use new folders, mapped network drives, and started using PaperPort. - Xerox M118i | PaperPort SE Getting Started Guide - Page 14
not use a TWAIN or WIA device driver, use the photo download program that came with your camera to get your photos into your computer and drag and drop the photos to PaperPort. Refer to the PaperPort Help for more information. Touching Up Images When you display an image item in the Page View window - Xerox M118i | PaperPort SE Getting Started Guide - Page 15
it also to select part of an image before cropping or using the Remove Red Eye tool. Rotate an image Click the Rotate tool to rotate the selected item 90 degrees to the right. Straighten an Sometimes a document is crooked when scanned. When this image occurs, you can use the Straighten and Auto - Xerox M118i | PaperPort SE Getting Started Guide - Page 16
items, such as JPEG and Windows Bitmap files, annotations become a permanent part of the image when you save the item. For item types that cannot accept annotations, PaperPort automatically disables the annotation tools. Using PaperPort's annotation tools, you can add notes and text, highlight text - Xerox M118i | PaperPort SE Getting Started Guide - Page 17
annotation tool from the Annotation toolbar whenever you display an image item in the Page View window. Select Use this tool to select an annotation so that you can lets you paste the bitmapped image of your choice on the page, much like using a rubber stamp. PaperPort Getting Started Guide 17 - Xerox M118i | PaperPort SE Getting Started Guide - Page 18
content to other subfolders or PaperPort folders, create subfolders, and delete subfolders. Color-code folders You can change the color of a folder icon to one that helps you organize your items. Color-coding is useful when you want to find items quickly by importance, based on your own personal - Xerox M118i | PaperPort SE Getting Started Guide - Page 19
you want. When you copy an item to a new location, the original item remains in the original location. The name of each item appears below the thumbnail quickly locate the item. Add search criteria to items You can assign item properties to PaperPort Image items and PDF Image items, and then use the - Xerox M118i | PaperPort SE Getting Started Guide - Page 20
item by its item name. You can also search for PDF and PaperPort Image (.max) files by item properties, such as keywords and subject information. When , author, added comments or keywords, or text in annotations. Use the Search pane Use the Search pane to enter search criteria and select options for - Xerox M118i | PaperPort SE Getting Started Guide - Page 21
share files, images, and documents network, by adding the folders to your PaperPort Folder pane. With PaperPort, it is simple to set up a shared folder on a server or a PC that can act as a central repository for all important office documents. Each PaperPort client can connect to that folder and use - Xerox M118i | PaperPort SE Getting Started Guide - Page 22
send editable text to Word rather than a static image file. E-mail link MS Word link PaperPort supports a wide variety of programs including word processing, spreadsheet, fax, Internet e-mail, graphics, optical character recognition (OCR), and online services programs. Icons in the Send To bar - Xerox M118i | PaperPort SE Getting Started Guide - Page 23
bar You can change the way program icons appear on the Send To bar in a number of ways. Specifically, you can: • Add a program. If you have a it to the Send To bar by using the New Program Link wizard. • Remove a program icon. You can also remove seldom-used program icons from the Send To Guide 23 - Xerox M118i | PaperPort SE Getting Started Guide - Page 24
and PaperPort attaches the item to the new e-mail message. Use the e-mail link options to specify the file format of the attachments and other options. It is good practice to use an industry-standard or popular file format, such as JPEG and PDF, when - Xerox M118i | PaperPort SE Getting Started Guide - Page 25
automatically processes your scanned document using PaperPort's OCR software, launches your word processing program, and loads the scanned text into a document ready for editing. In the Page View window, PaperPort also allows you to copy text from part of an image item for use in a text editing
-
 1
1 -
 2
2 -
 3
3 -
 4
4 -
 5
5 -
 6
6 -
 7
7 -
8
-
9
-
10
-
11
-
12
-
13
-
14
-
15
-
16
-
17
-
18
-
19
-
20
-
21
-
22
-
23
-
24
-
25
 |
 |