Yamaha EMX62M Owner's Manual - Page 10
Power on, Sound output, Applying built-in effects, STEP 2 - 6 channel powered
 |
View all Yamaha EMX62M manuals
Add to My Manuals
Save this manual to your list of manuals |
Page 10 highlights
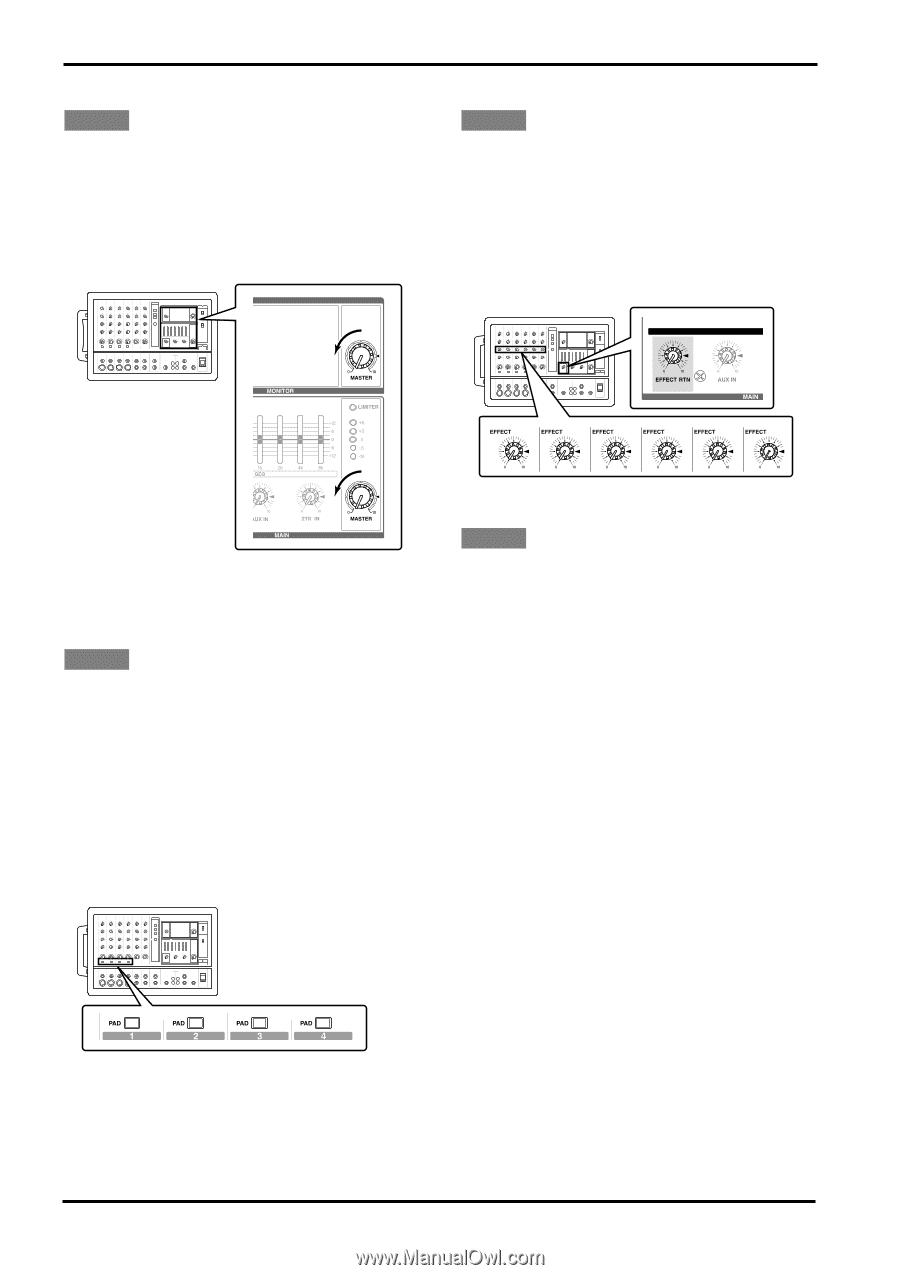
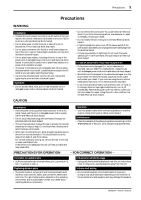
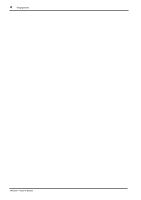
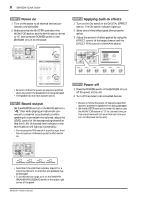
8 EMX62M Quick Guide STEP 2 Power on 1 Turn on the power to all external devices connected to the EMX62M. 2 Make sure that the MASTER controls in the MONITOR section and the MAIN section are set to "0," then press the POWER switch on the EMX62M to turn on the power. EMX62M STEP 4 Applying built-in effects 1 Turn on the ON switch in the DIGITAL EFFECT section. The ON switch indicator lights up. 2 Select one of three effect types, then press the switch. 3 Adjust the amount of effect applied by using the EFFECT control of the target channel and the EFFECT RTN control in the MAIN section. EMX62M • Be sure to follow the power up sequence specified above to prevent the speakers from being damaged. • The speakers do not have a power switch. STEP 3 Sound output Set the MASTER control in the MAIN section to "√ ," then while playing an instrument connected to a channel to be checked (or while speaking to a connected microphone), adjust the LEVEL control of the corresponding channel so that the 0 LED of the peak level indicator in the MAIN section will light up momentarily. • Do not press the PAD switch if sound is input from the microphone. Otherwise, press the PAD switch on. EMX62M STEP 5 Power off 1 Press the POWER switch of the EMX62M to turn off the power to the unit. 2 Turn off the power to all connected devices. • Be sure to follow the power off sequence specified above to prevent the speakers from being damaged. • Set the MASTER controls in the MAIN section and the MONITOR section to "0" for use next time (so that a loud noise will not sound the next time you turn on the power to the unit). • Note that if the LIMITER indicator stays lit for a long time, the built-in amplifier and speakers may be damaged. • To correct the low range, turn on the YAMAHA SPEAKER PROCESSING switch in the upper right corner of the panel. EMX62M-Owner's Manual
-
 1
1 -
2
-
3
-
4
-
 5
5 -
 6
6 -
 7
7 -
 8
8 -
 9
9 -
 10
10 -
 11
11 -
 12
12 -
 13
13 -
 14
14 -
 15
15 -
16
-
17
-
18
-
19
-
20
-
21
-
22
-
23
-
24
-
25
-
26
 |
 |