Yamaha PSR-E433 Owner's Manual - Page 28
Recording Your Performance, Track Structure of a Song, Quick Recording - user guide
 |
View all Yamaha PSR-E433 manuals
Add to My Manuals
Save this manual to your list of manuals |
Page 28 highlights
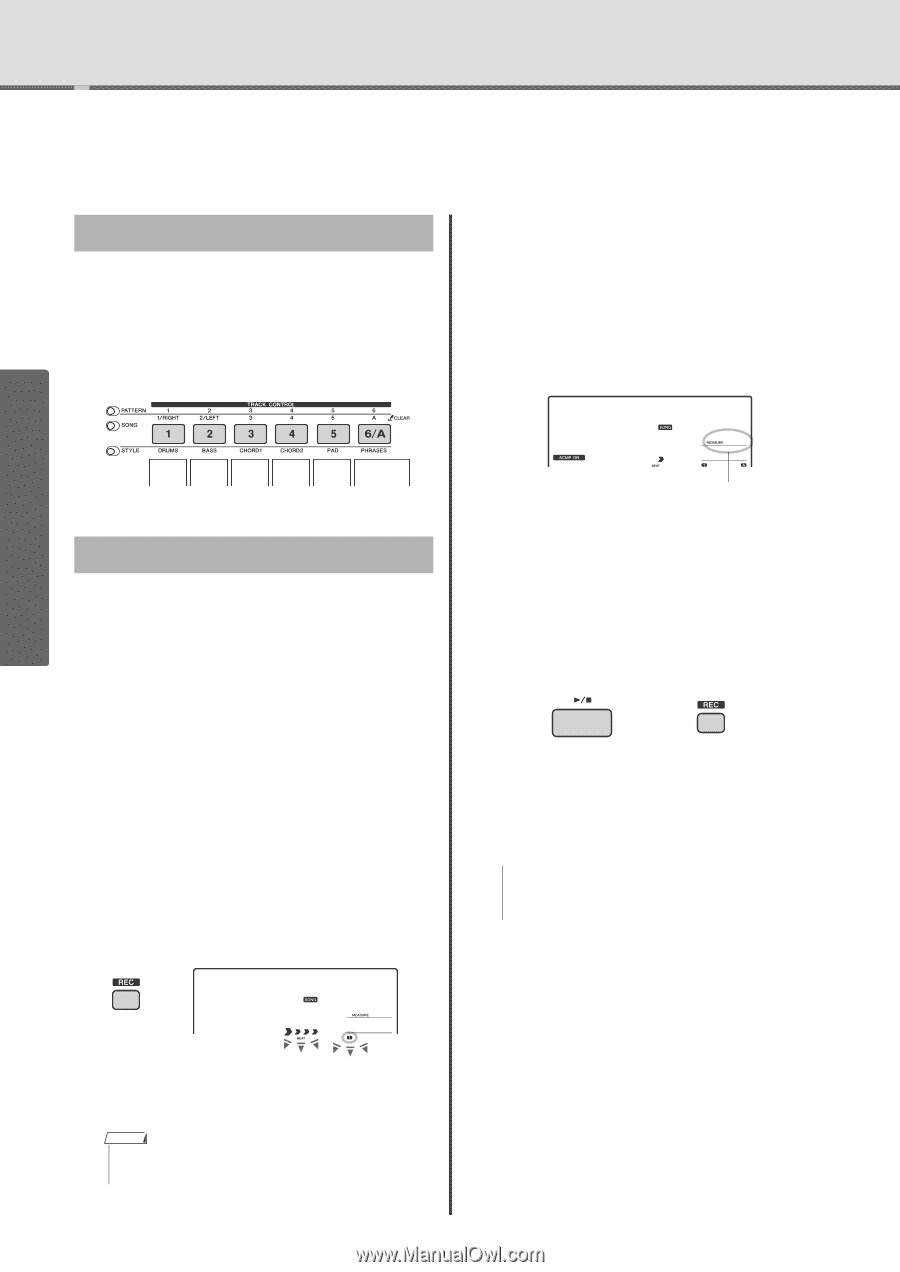
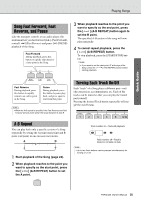
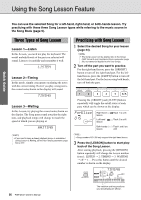
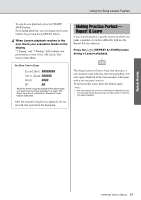
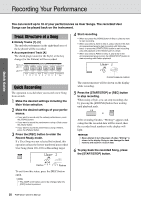
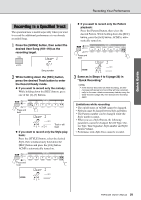
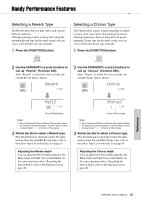
Recording Your Performance Quick Guide You can record up to 10 of your performances as User Songs. The recorded User Songs can be played back on the instrument. Track Structure of a Song Melody Tracks [1]-[5] The melody performance in the right-hand area of the keyboard will be recorded. Accompaniment Track [A] The chord progression (for the Style) or the key change (for the Pattern) will be recorded. Track 1 Track 2 Track 3 Track 4 Track 5 Accompaniment Track 4 Start recording. • When you press the [SONG] button in Step 2, play any note to start recording. • When you select a Style in Step 2, play a chord in the Auto Accompaniment area to start recording with Style playback, or press the [START/STOP] button to start recording only with playback of the Rhythm part of a Style. • When you select a Pattern in Step 2, play a key in the Accompaniment area or press the [START/STOP] button to start recording with Pattern playback. User 1 rEC 003 Current measure number Quick Recording The operation is useful when you record a new Song from scratch. 1 Make the desired settings including the Main Voice selection. 2 Make the desired settings of your performance. • If you want to record only the melody performance, press the [SONG] button. • If you want to record the performance using a Style, press the [Style] button. • If you want to record the performance using a Pattern, press the [Pattern] button. 3 Press the [REC] button to enter the Record Ready mode. If a User Song was not selected beforehand, this operation selects the lowest-numbered unrecorded User Song (from 101-110) as Recording target. User 1 rEC 001 Flashes Flashes The current measure will be shown on the display while recording. 5 Press the [START/STOP] or [REC] button to stop recording. When using a Style, you can stop recording also by pressing the [ENDING] button then waiting until playback ends. or After recording finishes, "Writing!" appears indicating that the recorded data will be stored, then the recorded track numbers in the display will light. NOTICE • Never attempt to turn the power off when "Writing!" is shown in the display. Doing so can damage the flash memory and result in a loss of data. 6 To play back the recorded Song, press the [START/STOP] button. To exit from this status, press the [REC] button again. NOTE • The ACMP on/off status cannot be changed after the [REC] button is pressed. 28 PSR-E433 Owner's Manual
-
 1
1 -
2
-
3
-
4
-
5
-
6
-
7
-
8
-
9
-
10
-
11
-
12
-
13
-
14
-
15
-
16
-
17
-
18
-
19
-
20
-
21
-
22
-
 23
23 -
 24
24 -
 25
25 -
 26
26 -
 27
27 -
 28
28 -
 29
29 -
 30
30 -
 31
31 -
 32
32 -
 33
33 -
34
-
35
-
36
-
37
-
38
-
39
-
40
-
41
-
42
-
43
-
44
-
45
-
46
-
47
-
48
-
49
-
50
-
51
-
52
-
53
-
54
-
55
-
56
-
57
-
58
-
59
-
60
-
61
-
62
-
63
-
64
-
65
-
66
-
67
-
68
 |
 |