1994 Honda Civic Owner's Manual - Page 76
1994 Honda Civic Manual
Page 76 highlights
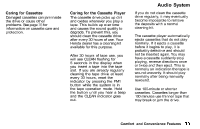
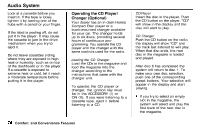
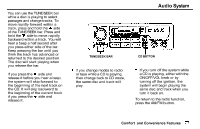
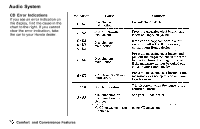
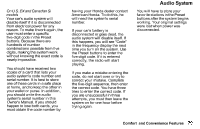
Audio System Look at a cassette before you insert it. If the tape is loose, tighten it by turning one of the hubs with a pencil or your finger. If the label is peeling off, do not put it in the player. It may cause the cassette to jam in the drive mechanism when you try to eject it. Do not leave cassettes sitting where they are exposed to high heat or humidity, such as on top of the dashboard or in the player. If a cassette is exposed to extreme heat or cold, let it reach a moderate temperature before putting it in the player. Operating the CD Player/ Changer (Optional) Your dealer has an in-dash Honda Compact Disc player or a trunk-mounted changer available for your car. The changer holds up to six discs, providing several hours of continuous programming. You operate the CD player and the changer with the same controls used for the radio. Loading the CD Changer Load the CDs in the magazine and load the magazine into the changer according to the instructions that came with the changer unit. To operate the CD player or changer, the ignition key must be in the ACCESSORY (I) or ON (II). If you were listening to a cassette tape, eject it before listening to a CD. CD Player Insert the disc in the player. Push the CD button on the player, "CD" will show in the display and the disc will start to play. CD Changer Push the CD button on the radio, the display will show "CD" and the track last listened to will play. When that disc ends, the next disc in the magazine is loaded and played. After disc 6 has completed the system will return to disc 1. To make your own disc selection, push one of the corresponding preset buttons. Your selection will appear in the display and start playing. If you try to select an empty slot in the magazine, the system will select and play the first track of the next disc in the magazine. Comfort and Convenience Features
-
 1
1 -
2
-
3
-
4
-
5
-
6
-
7
-
8
-
9
-
10
-
11
-
12
-
13
-
14
-
15
-
16
-
17
-
18
-
19
-
20
-
21
-
22
-
23
-
24
-
25
-
26
-
27
-
28
-
29
-
30
-
31
-
32
-
33
-
34
-
35
-
36
-
37
-
38
-
39
-
40
-
41
-
42
-
43
-
44
-
45
-
46
-
47
-
48
-
49
-
50
-
51
-
52
-
53
-
54
-
55
-
56
-
57
-
58
-
59
-
60
-
61
-
62
-
63
-
64
-
65
-
66
-
67
-
68
-
69
-
70
-
 71
71 -
 72
72 -
 73
73 -
 74
74 -
 75
75 -
 76
76 -
 77
77 -
 78
78 -
 79
79 -
 80
80 -
 81
81 -
82
-
83
-
84
-
85
-
86
-
87
-
88
-
89
-
90
-
91
-
92
-
93
-
94
-
95
-
96
-
97
-
98
-
99
-
100
-
101
-
102
-
103
-
104
-
105
-
106
-
107
-
108
-
109
-
110
-
111
-
112
-
113
-
114
-
115
-
116
-
117
-
118
-
119
-
120
-
121
-
122
-
123
-
124
-
125
-
126
-
127
-
128
-
129
-
130
-
131
-
132
-
133
-
134
-
135
-
136
-
137
-
138
-
139
-
140
-
141
-
142
-
143
-
144
-
145
-
146
-
147
-
148
-
149
-
150
-
151
-
152
-
153
-
154
-
155
-
156
-
157
-
158
-
159
-
160
-
161
-
162
-
163
-
164
-
165
-
166
-
167
-
168
-
169
-
170
-
171
-
172
-
173
-
174
-
175
-
176
-
177
-
178
-
179
-
180
-
181
-
182
-
183
-
184
-
185
-
186
-
187
-
188
-
189
-
190
-
191
-
192
-
193
-
194
-
195
-
196
-
197
-
198
-
199
-
200
-
201
-
202
-
203
-
204
-
205
-
206
-
207
-
208
-
209
-
210
 |
 |
