2009 Volvo XC90 Owner's Manual - Page 81
2009 Volvo XC90 Manual
Page 81 highlights
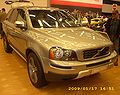
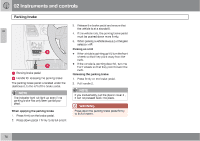
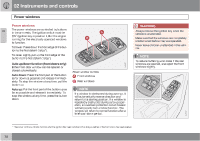
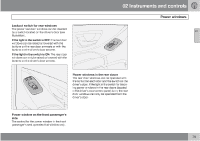
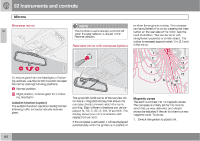
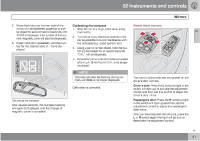
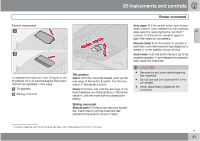
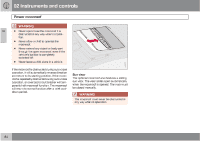
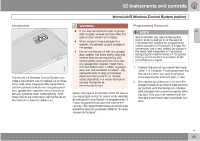
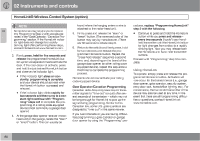
02 Instruments and controls Mirrors 2. Press the button on the rear side of the mirror with straightened paperclip or similar object for approximately 3 seconds until ZONE is displayed. The number of the current magnetic zone will also be displayed. 3. Press the button repeatedly until the number for the desired zone (1 - 15) is displayed. Calibrating the compass 1. Stop the car in a large, open area, away from traffic. 2. Turn off as many electrical devices in the car as possible to avoid interference with the compass (e.g. audio system, etc). 3. Using a pen or similar object, hold the button (1) depressed for at least 6 seconds. "CAL" will be displayed. 4. Drive slowly in a circle at a maximum speed of 5 m.p.h. (8 km/h) until CAL is no longer displayed. Power door mirrors 02 C A L C A L Z O N E NOTE This step can also be done by driving normally until CAL is no longer displayed. The mirror control switches are located on the driver's door armrest. Driver's side: Press the L button (a light in the switch will light up) to activate the adjustment control and then use this control to adjust the driver's door mirror. Passenger's door: Press the R button (a light in the switch will light up) and then use the adjustment control to adjust the passenger's door mirror. After you have adjusted the mirror(s), press the L or R switch again (the light will go out) to deactivate the adjustment control. Z O N E Calibration is complete. G026950 Calibrating the compass After several seconds, the compass heading will again be displayed, and the change of magnetic zones is complete. G029575 81
-
 1
1 -
2
-
3
-
4
-
5
-
6
-
7
-
8
-
9
-
10
-
11
-
12
-
13
-
14
-
15
-
16
-
17
-
18
-
19
-
20
-
21
-
22
-
23
-
24
-
25
-
26
-
27
-
28
-
29
-
30
-
31
-
32
-
33
-
34
-
35
-
36
-
37
-
38
-
39
-
40
-
41
-
42
-
43
-
44
-
45
-
46
-
47
-
48
-
49
-
50
-
51
-
52
-
53
-
54
-
55
-
56
-
57
-
58
-
59
-
60
-
61
-
62
-
63
-
64
-
65
-
66
-
67
-
68
-
69
-
70
-
71
-
72
-
73
-
74
-
75
-
 76
76 -
 77
77 -
 78
78 -
 79
79 -
 80
80 -
 81
81 -
 82
82 -
 83
83 -
 84
84 -
 85
85 -
 86
86 -
87
-
88
-
89
-
90
-
91
-
92
-
93
-
94
-
95
-
96
-
97
-
98
-
99
-
100
-
101
-
102
-
103
-
104
-
105
-
106
-
107
-
108
-
109
-
110
-
111
-
112
-
113
-
114
-
115
-
116
-
117
-
118
-
119
-
120
-
121
-
122
-
123
-
124
-
125
-
126
-
127
-
128
-
129
-
130
-
131
-
132
-
133
-
134
-
135
-
136
-
137
-
138
-
139
-
140
-
141
-
142
-
143
-
144
-
145
-
146
-
147
-
148
-
149
-
150
-
151
-
152
-
153
-
154
-
155
-
156
-
157
-
158
-
159
-
160
-
161
-
162
-
163
-
164
-
165
-
166
-
167
-
168
-
169
-
170
-
171
-
172
-
173
-
174
-
175
-
176
-
177
-
178
-
179
-
180
-
181
-
182
-
183
-
184
-
185
-
186
-
187
-
188
-
189
-
190
-
191
-
192
-
193
-
194
-
195
-
196
-
197
-
198
-
199
-
200
-
201
-
202
-
203
-
204
-
205
-
206
-
207
-
208
-
209
-
210
-
211
-
212
-
213
-
214
-
215
-
216
-
217
-
218
-
219
-
220
-
221
-
222
-
223
-
224
-
225
-
226
-
227
-
228
-
229
-
230
-
231
-
232
-
233
-
234
-
235
-
236
-
237
-
238
-
239
-
240
-
241
-
242
-
243
-
244
-
245
-
246
-
247
-
248
-
249
-
250
-
251
-
252
-
253
-
254
-
255
-
256
-
257
-
258
-
259
-
260
-
261
-
262
-
263
-
264
-
265
-
266
-
267
-
268
-
269
-
270
-
271
-
272
-
273
-
274
-
275
-
276
-
277
-
278
-
279
-
280
-
281
-
282
 |
 |