3Ware 9550SXU-8LP User Guide - Page 138
Configuring a New Unit, Configuration Options When Creating a Unit, Drives to be included in the unit
 |
UPC - 693494978100
View all 3Ware 9550SXU-8LP manuals
Add to My Manuals
Save this manual to your list of manuals |
Page 138 highlights
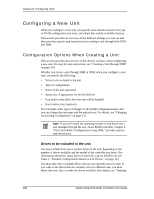
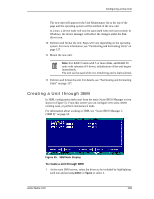
Chapter 8. Configuring Units Configuring a New Unit When you configure a new unit, you specify some details related to the type of RAID configuration you want, and others that enable or disable features. This section provides an overview of the different settings you can use and then provides step-by-step instructions for creating a unit through both 3DM and 3BM. Configuration Options When Creating a Unit This section provides an overview of the choices you have when configuring a new unit. For step-by-step instructions, see "Creating a Unit through 3DM" on page 130. Whether you create a unit through 3BM or 3DM, when you configure a new unit, you specify the following: • Drives to be included in the unit • Type of configuration • Name of the unit (optional) • Stripe size, if appropriate for the RAID level • Unit policies that affect how the unit will be handled • Boot volume size (optional) You can make some types of changes to the RAID configuration later, and you can change the unit name and the unit policies. For details, see "Changing An Existing Configuration" on page 151. Note: If you will install the operating system on and boot from a unit managed through the new 3ware RAID controller, Chapter 3, "First-Time RAID Configuration Using 3BM," provides step-bystep instructions. Drives to be included in the unit You may include from one to sixteen drives in the unit, depending on the number of drives available and the model of the controller you have. (For information about how many drives to select for a given RAID level, see Table 3, "Possible Configurations Based on # of Drives," on page 10.) You may only select available drives that are not currently part of a unit. If you want to use drives that are currently part of a different unit, you must delete that unit, first, to make the drives available. (For details, see "Deleting 128 3ware Serial ATA RAID Controller User Guide
-
 1
1 -
2
-
3
-
4
-
5
-
6
-
7
-
8
-
9
-
10
-
11
-
12
-
13
-
14
-
15
-
16
-
17
-
18
-
19
-
20
-
21
-
22
-
23
-
24
-
25
-
26
-
27
-
28
-
29
-
30
-
31
-
32
-
33
-
34
-
35
-
36
-
37
-
38
-
39
-
40
-
41
-
42
-
43
-
44
-
45
-
46
-
47
-
48
-
49
-
50
-
51
-
52
-
53
-
54
-
55
-
56
-
57
-
58
-
59
-
60
-
61
-
62
-
63
-
64
-
65
-
66
-
67
-
68
-
69
-
70
-
71
-
72
-
73
-
74
-
75
-
76
-
77
-
78
-
79
-
80
-
81
-
82
-
83
-
84
-
85
-
86
-
87
-
88
-
89
-
90
-
91
-
92
-
93
-
94
-
95
-
96
-
97
-
98
-
99
-
100
-
101
-
102
-
103
-
104
-
105
-
106
-
107
-
108
-
109
-
110
-
111
-
112
-
113
-
114
-
115
-
116
-
117
-
118
-
119
-
120
-
121
-
122
-
123
-
124
-
125
-
126
-
127
-
128
-
129
-
130
-
131
-
132
-
 133
133 -
 134
134 -
 135
135 -
 136
136 -
 137
137 -
 138
138 -
 139
139 -
 140
140 -
 141
141 -
 142
142 -
 143
143 -
144
-
145
-
146
-
147
-
148
-
149
-
150
-
151
-
152
-
153
-
154
-
155
-
156
-
157
-
158
-
159
-
160
-
161
-
162
-
163
-
164
-
165
-
166
-
167
-
168
-
169
-
170
-
171
-
172
-
173
-
174
-
175
-
176
-
177
-
178
-
179
-
180
-
181
-
182
-
183
-
184
-
185
-
186
-
187
-
188
-
189
-
190
-
191
-
192
-
193
-
194
-
195
-
196
-
197
-
198
-
199
-
200
-
201
-
202
-
203
-
204
-
205
-
206
-
207
-
208
-
209
-
210
-
211
-
212
-
213
-
214
-
215
-
216
-
217
-
218
-
219
-
220
-
221
-
222
-
223
-
224
-
225
-
226
-
227
-
228
-
229
-
230
-
231
-
232
-
233
-
234
-
235
-
236
-
237
-
238
-
239
-
240
-
241
-
242
-
243
-
244
-
245
-
246
-
247
-
248
-
249
-
250
-
251
-
252
-
253
-
254
-
255
-
256
-
257
-
258
-
259
-
260
-
261
-
262
-
263
-
264
-
265
-
266
-
267
-
268
-
269
-
270
-
271
-
272
 |
 |
