AIWA CX-NMT50 Operating Instructions - Page 24
Connecting, Optional, Equipment, Listening, To External, Sources
 |
View all AIWA CX-NMT50 manuals
Add to My Manuals
Save this manual to your list of manuals |
Page 24 highlights
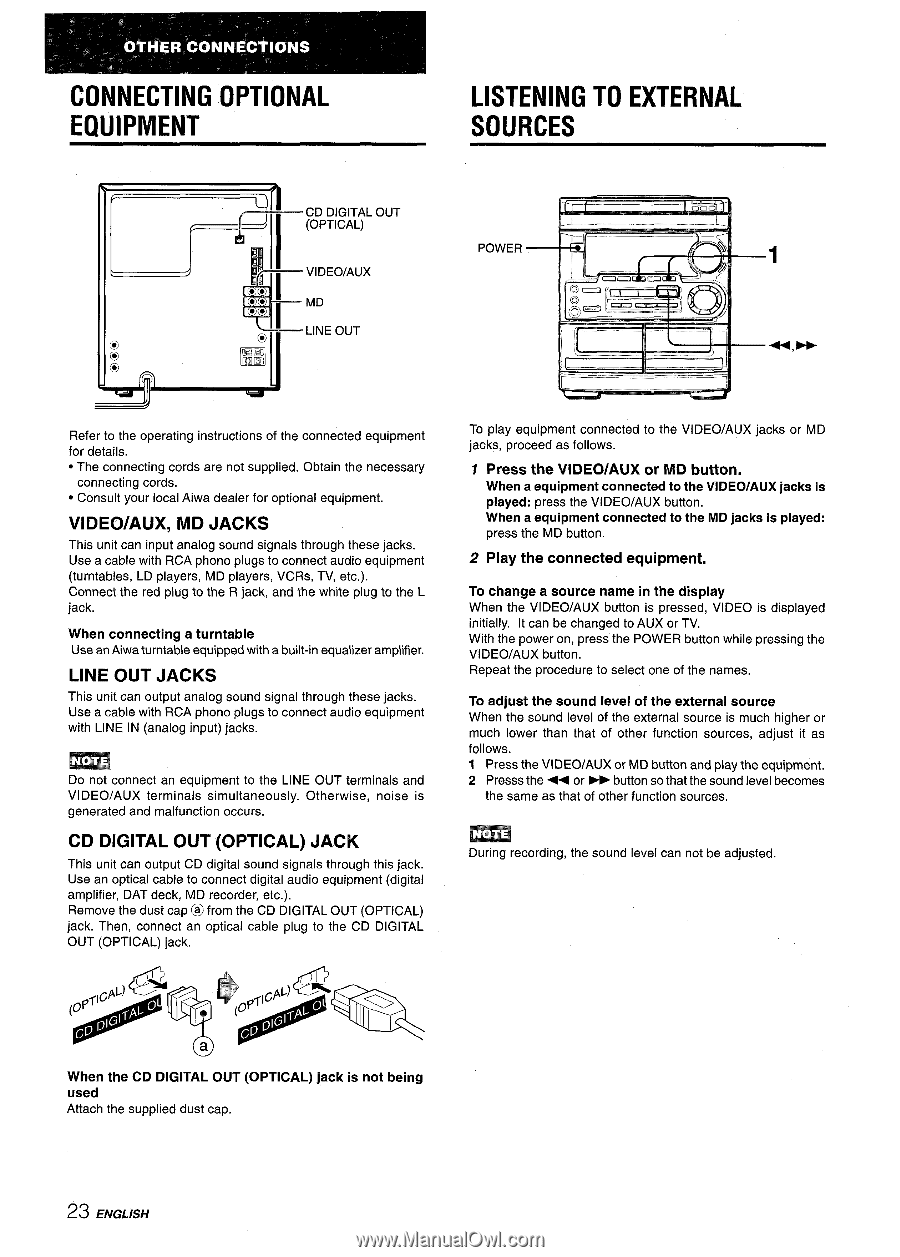
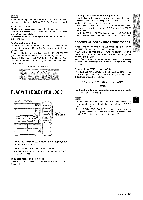
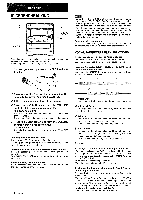
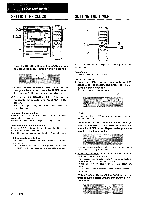
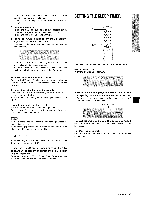
CONNECTING OPTIONAL EQUIPMENT LISTENING TO EXTERNAL SOURCES - CD DIGITAL OUT (OPTICAL) - VIDEO/AUX - MD -LINEOUT POWER Refer to the operating instructions of the connected equipment for details. q The connecting cords are not supplied. Obtain the necessary connecting cords. q Consult your local Aiwa dealer for optional equipment. VIDEWAUX, MD JACKS This unit can input analog sound signals through these jacks. Use a cable with RCA phono plugs to connect audio equipment (turntables, LD piayers, MD players, VCRs, TV, etc.). Connect the red plug to the R jack, and Ihe white plug to the L jack. When connecting a turntable Use an Aiwa turntable equipped with a built-in equalizer amplifier. LINE OUT JACKS This unit can output analog sound signal through these jacks. Use a cable with RCA phono plugs to connect audio equipment with LINE IN (analog input) jacks. m Do not connect an equipment to the LINE OUT terminals and VI DEO/AUX terminals simultaneously. Otherwise, noise is generated and malfunction occurs. CD DIGITAL OUT (OPTICAL) JACK This unit can output CD digital sound signals through this jack. Use an optical cable to connect digital audio equipment (digital amplifier, DAT deck, MD recorder, etc.). Remove the dust cap @ from the CD DIGITAL OUT (OPTICAL) jack. Then, connect an optical cable plug to the CD DIGITAL OUT (OPTICAL) jack. To play equipment connected to the VIDEO/AUX jacks or MD jacks, proceed as follows. 1 Press the VIDEO/AUX or MD button. When a equipment connected to the VIDEO/AUX jacks is played: press the VIDEO/AUX button. When a equipment connected to the MD jacks is played: press the MD button. 2 Play the connected equipment. To change a source name in the display When the VIDEO/AUX button is pressed, VIDEO is displayed initially. It can be changed to AUX or TV. With the power on, press the POWER button while pressing the VIDEO/AUX button. Repeat the procedure to select one of the names. To adjust the sound level of the external source When the sound level of the external source is much higher or much lower than that of other function sources, adjust it as follows. 1 Press the VI DEO/AUX or MD button and play the equipment. 2 Presss the < or > button so that the sound level becomes the same as that of other function sources. m During recording, the sound level can not be adjusted. When the CD DIGITAL OUT (OPTICAL) jack is not being used Attach the supplied dust cap. 23 ENGLISH
-
 1
1 -
2
-
3
-
4
-
5
-
6
-
7
-
8
-
9
-
10
-
11
-
12
-
13
-
14
-
15
-
16
-
17
-
18
-
 19
19 -
 20
20 -
 21
21 -
 22
22 -
 23
23 -
 24
24 -
 25
25 -
 26
26 -
 27
27 -
 28
28 -
 29
29 -
30
-
31
-
32
-
33
-
34
-
35
-
36
-
37
-
38
-
39
-
40
-
41
-
42
-
43
-
44
-
45
-
46
-
47
-
48
-
49
-
50
-
51
-
52
-
53
-
54
-
55
-
56
-
57
-
58
-
59
-
60
-
61
-
62
-
63
-
64
-
65
-
66
-
67
-
68
-
69
-
70
-
71
-
72
-
73
-
74
-
75
-
76
-
77
-
78
-
79
-
80
 |
 |