Acer Veriton 3200 Veriton 3200 User Guide - Page 64
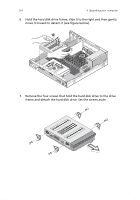
Remove the four screws that hold the hard disk drive to the drive
 |
View all Acer Veriton 3200 manuals
Add to My Manuals
Save this manual to your list of manuals |
Page 64 highlights
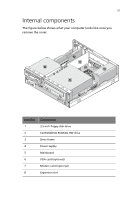
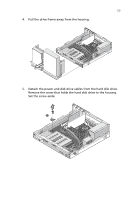
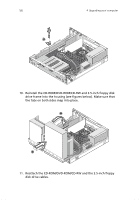
54 4 Upgrading your computer 6. Hold the hard disk drive frame, slide it to the right and then gently move it inward to detach it (see figure below). 7. Remove the four screws that hold the hard disk drive to the drive frame and detach the hard disk drive. Set the screws aside.
-
 1
1 -
2
-
3
-
4
-
5
-
6
-
7
-
8
-
9
-
10
-
11
-
12
-
13
-
14
-
15
-
16
-
17
-
18
-
19
-
20
-
21
-
22
-
23
-
24
-
25
-
26
-
27
-
28
-
29
-
30
-
31
-
32
-
33
-
34
-
35
-
36
-
37
-
38
-
39
-
40
-
41
-
42
-
43
-
44
-
45
-
46
-
47
-
48
-
49
-
50
-
51
-
52
-
53
-
54
-
55
-
56
-
57
-
58
-
 59
59 -
 60
60 -
 61
61 -
 62
62 -
 63
63 -
 64
64 -
 65
65 -
 66
66 -
 67
67 -
 68
68 -
 69
69 -
70
-
71
-
72
-
73
-
74
-
75
-
76
-
77
-
78
-
79
-
80
-
81
-
82
-
83
-
84
-
85
-
86
-
87
-
88
-
89
-
90
-
91
-
92
-
93
-
94
-
95
-
96
 |
 |
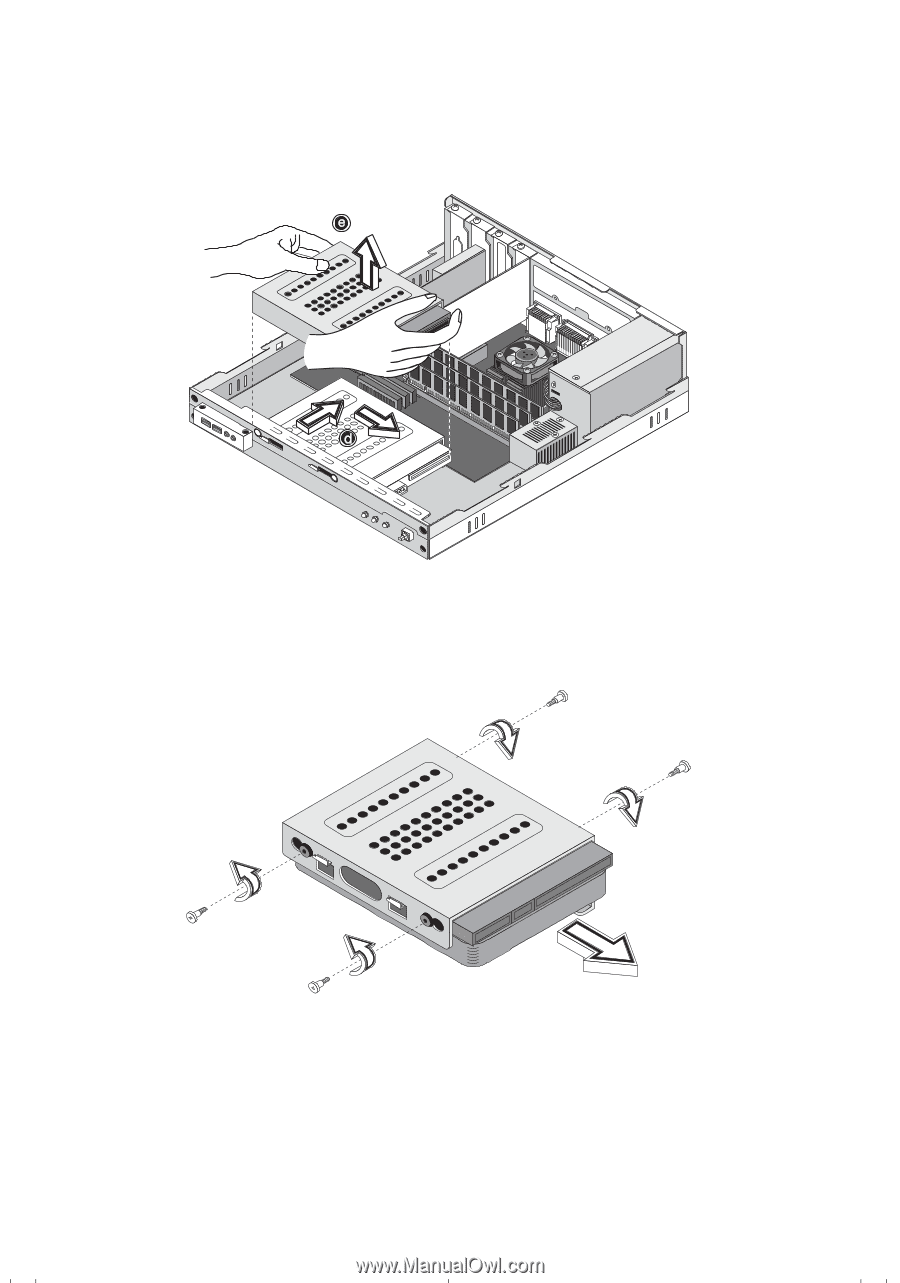
4 Upgrading your computer
54
6.
Hold the hard disk drive frame, slide it to the right and then gently
move it inward to detach it (see figure below).
7.
Remove the four screws that hold the hard disk drive to the drive
frame and detach the hard disk drive. Set the screws aside.