Acer Veriton 3200 Veriton 3200 User Guide - Page 80
See Mainboard layout on for the location
 |
View all Acer Veriton 3200 manuals
Add to My Manuals
Save this manual to your list of manuals |
Page 80 highlights
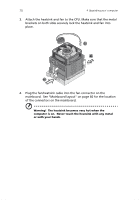
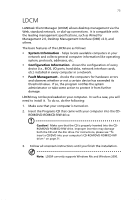
70 4 Upgrading your computer 3. Attach the heatsink and fan to the CPU. Make sure that the metal brackets on both sides securely lock the heatsink and fan into place. 4. Plug the fan/heatsink cable into the fan connector on the mainboard. See "Mainboard layout" on page 60 for the location of the connectors on the mainboard. Warning! The heatsink becomes very hot when the computer is on. Never touch the heatsink with any metal or with your hands.
-
 1
1 -
2
-
3
-
4
-
5
-
6
-
7
-
8
-
9
-
10
-
11
-
12
-
13
-
14
-
15
-
16
-
17
-
18
-
19
-
20
-
21
-
22
-
23
-
24
-
25
-
26
-
27
-
28
-
29
-
30
-
31
-
32
-
33
-
34
-
35
-
36
-
37
-
38
-
39
-
40
-
41
-
42
-
43
-
44
-
45
-
46
-
47
-
48
-
49
-
50
-
51
-
52
-
53
-
54
-
55
-
56
-
57
-
58
-
59
-
60
-
61
-
62
-
63
-
64
-
65
-
66
-
67
-
68
-
69
-
70
-
71
-
72
-
73
-
74
-
 75
75 -
 76
76 -
 77
77 -
 78
78 -
 79
79 -
 80
80 -
 81
81 -
 82
82 -
 83
83 -
 84
84 -
 85
85 -
86
-
87
-
88
-
89
-
90
-
91
-
92
-
93
-
94
-
95
-
96
 |
 |

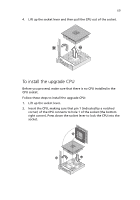
4 Upgrading your computer
70
3.
Attach the heatsink and fan to the CPU. Make sure that the metal
brackets on both sides securely lock the heatsink and fan into
place.
4.
Plug the fan/heatsink cable into the fan connector on the
mainboard.
See “Mainboard layout” on page 60 for the location
of the connectors on the mainboard.
Warning!
The heatsink becomes very hot when the
computer is on.
Never touch the heatsink with any metal
or with your hands.