Acer Z120 User Guide - Page 20
Managing contacts, Adding a contact
 |
View all Acer Z120 manuals
Add to My Manuals
Save this manual to your list of manuals |
Page 20 highlights
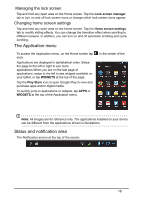
Managing contacts Managing your contacts Your smartphone features an address book that allows you to save contacts to either the internal memory or onto your SIM card. Open the Contacts application from the Application menu or tap from the Dialer to view your contacts. If you don't have any contacts stored on your phone, you can import your Google account contacts, add a new contact or import contacts from your SIM or SD card. Open the Contacts application from the Application menu and then tap to add a contact, to search for a contact, or tap the Menu button to open the menu. Adding a contact Tap to add a new contact. You may also scan a person's profile barcode to add the person to your contact list or group. To create a contact, first choose where you want to store the contact's information. You will then be asked to enter the contact's information, such as name, address, and phone number. You may scroll down the page and tap Add another field to add things such as: • IM addresses. • Add any personal notes about the contact. • Phonetic name • Link a website To assign an image to your contact, tap the silhouette and select whether to take a photo or select an image from your smartphone's picture gallery. When done, click Done at the top of the screen. Tapping on the contacts name will bring up their profile. Tap the menu button while viewing a contact's profile to edit, share, delete, or print the contact. You may also set a ringtone for the contact, or associate the contact with a SIM card. Tip: You may also create a contact from an already dialed or received number, see "Saving a dialed number to contacts" on page 22. 20
-
 1
1 -
2
-
3
-
4
-
5
-
6
-
7
-
8
-
9
-
10
-
11
-
12
-
13
-
14
-
 15
15 -
 16
16 -
 17
17 -
 18
18 -
 19
19 -
 20
20 -
 21
21 -
 22
22 -
 23
23 -
 24
24 -
 25
25 -
26
-
27
-
28
-
29
-
30
-
31
-
32
-
33
-
34
-
35
-
36
-
37
-
38
-
39
-
40
-
41
-
42
-
43
-
44
-
45
-
46
-
47
-
48
-
49
-
50
-
51
-
52
-
53
-
54
-
55
-
56
-
57
-
58
-
59
-
60
-
61
-
62
-
63
 |
 |
