Acer Z120 User Guide - Page 35
Camcorder settings menu, Shooting a video, Supported formats, Viewing photos and videos
 |
View all Acer Z120 manuals
Add to My Manuals
Save this manual to your list of manuals |
Page 35 highlights
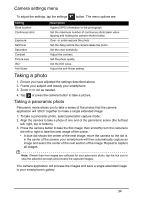
Note: Panoramic images work best with static outdoor scenes. Objects to close to the camera or large straight edges may confuse the detection process. Camcorder settings menu Select the camcorder from the camera mode. To adjust the settings, tap the settings button to adjust the Camera settings, set the Time lapse interval, add Silly faces, apply a Color effect, or set the White balance. The menu options are: Setting Description Video quality Set the video quality. Store location Append GPS information to the video. Exposure Over- or under-expose the photo. Scene mode Set the scene mode: • Auto • Night Video duration Set the maximum video duration Microphone Turn the microphone on or off. Saturation Set the color sensitivity. Contrast Adjust the contrast. Anti-flicker Adjust the anti-flicker setting. Shooting a video 1. Frame your subject and steady your smartphone and zoom in or out as needed. 2. Tap to start recording. Tap or press again to stop recording. Supported formats Type Image Video Formats JPEG, GIF, PNG, BMP MPEG-4, H.263, H.264 Viewing photos and videos After you have taken your photo or video, it is automatically saved. Once you have taken a photo or video, you can view it in Gallery by tapping the thumbnail in the lower-right corner. Alternatively, open the Applications menu and tap Gallery. From Gallery you can share the file directly using various services. Note: Share options vary depending on the file type. 35
-
 1
1 -
2
-
3
-
4
-
5
-
6
-
7
-
8
-
9
-
10
-
11
-
12
-
13
-
14
-
15
-
16
-
17
-
18
-
19
-
20
-
21
-
22
-
23
-
24
-
25
-
26
-
27
-
28
-
29
-
 30
30 -
 31
31 -
 32
32 -
 33
33 -
 34
34 -
 35
35 -
 36
36 -
 37
37 -
 38
38 -
 39
39 -
 40
40 -
41
-
42
-
43
-
44
-
45
-
46
-
47
-
48
-
49
-
50
-
51
-
52
-
53
-
54
-
55
-
56
-
57
-
58
-
59
-
60
-
61
-
62
-
63
 |
 |
