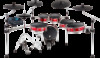
Alesis Strike Pro Kit User Manual - Page 15
Auto-Mapping Samples to an Instrument, Velocity Ranges - manual
 |
View all Alesis Strike Pro Kit manuals
Add to My Manuals
Save this manual to your list of manuals |
Page 15 highlights
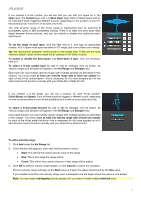
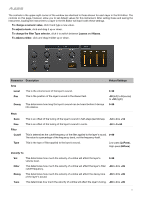
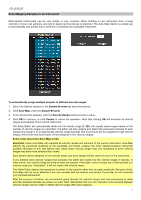
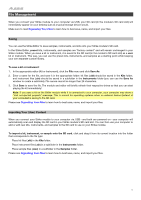
Auto-Mapping Samples to an Instrument Multi-sample instruments can be very simple or very complex. When building a new instrument from a large collection of your own samples, any help to speed up the process is important. The Auto-Map feature is a great way to automatically and quickly turn a collection of samples into a playable instrument. To automatically assign multiple samples to different velocity ranges: 1. Select the desired samples in the Sample Browser (as described above). 2. Click Auto-Map under the Sample Browser. 3. In the window that appears, click the Velocity Ranges field and enter a value. 4. Click OK to continue, or click Cancel to cancel the operation. Note that clicking OK will overwrite all velocity ranges and samples of the current instrument. The Strike Editor will automatically divide the full velocity range (1-127) into equally sized ranges based on the number of velocity ranges you specified. The editor will also analyze and detect the perceived loudness of each sample and assign it to an appropriate velocity range (samples that sound loud will be assigned to high velocity ranges, while those that sound quiet will be assigned to low velocity ranges). Some notes about how Auto-Map works: Important: Using Auto-Map will overwrite all velocity ranges and samples of the current instrument. Auto-Map detects the perceived loudness of the sample(s) and favors creating the most natural-sounding instrument possible. Because of this, this feature may create fewer velocity ranges than you requested or some velocity ranges may have more samples than others. Each sample will be assigned to one velocity range, and each sample will be used only once in the instrument. If you entered more velocity ranges than samples, the editor will create only the velocity ranges it requires. In other words, any velocity range will have at least one sample. If the editor cannot assign any of the samples to a velocity range you "requested," it will not create that velocity range. The Strike Editor detects the perceived loudness of the sample rather than its peak amplitude. Because of this, Auto-Map will not be as effective if you use samples that are already normalized. If possible, do not normalize your samples beforehand. After the process is finished, we recommend going through the velocity ranges and auto-previewing to make sure the assigned samples are where you want them. Remember that you can manually move samples between velocity ranges well as create or delete velocity ranges after auto-mapping. 15
-
 1
1 -
2
-
3
-
4
-
5
-
6
-
7
-
8
-
9
-
 10
10 -
 11
11 -
 12
12 -
 13
13 -
 14
14 -
 15
15 -
 16
16 -
 17
17 -
 18
18 -
 19
19 -
 20
20
 |
 |
