Alesis Strike Pro Kit User Manual - Page 7
Velocity To, To change a numeric value
 |
View all Alesis Strike Pro Kit manuals
Add to My Manuals
Save this manual to your list of manuals |
Page 7 highlights
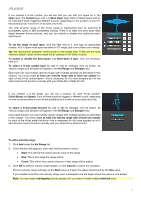
The two layers of each zone have identical controls for you to adjust the sound. Adjust these settings in the panel in the lower half of the window. To change a numeric value, click it and type a new value. To adjust a knob, click and drag it up or down. To change the filter Type selector, click it to switch between Lopass and Hipass. To adjust a slider, click and drag it slider up or down. Parameter Description Values/Settings Amp Level This is the volume level of the layer's sound. 0-99 Pan This is the position of the layer's sound in the stereo field. -50 (left) to 0 (center) to +50 (right) Decay This determines how long the layer's sound can be heard before it decays 0-99 into silence. The 0 and 99 settings essentially disable the decay stage of the envelope, allowing the complete sample to play. Pitch Semi This is an offset of the tuning of the layer's sound in half-steps (semitones). -12 to 0 to +12 Fine This is an offset of the tuning of the layer's sound in cents. -50 to 0 +50 Filter Cutoff This is determines the cutoff frequency of the filter applied to the layer's sound. 0-99 The value is a percentage of the frequency band, not the frequency itself. Type This is the type of filter applied to the layer's sound. Low-pass (LoPass), High-pass (HiPass) Velocity To Vol This determines how much the velocity of a strike will affect the layer's 0-99 volume level. Use this to set the responsiveness and loudness of an instrument (instead of adjusting the kit's trigger settings). Filter This determines how much the velocity of a strike will affect the layer's filter -99 to 0 to +99 cutoff frequency. Decay This determines how much the velocity of a strike will affect the decay time -99 to 0 to +99 of the layer's sound. Tune This determines how much the velocity of a strike will affect the layer's tuning. -99 to 0 to +99 7
-
 1
1 -
 2
2 -
 3
3 -
 4
4 -
 5
5 -
 6
6 -
 7
7 -
 8
8 -
 9
9 -
 10
10 -
 11
11 -
 12
12 -
13
-
14
-
15
-
16
-
17
-
18
-
19
-
20
 |
 |
