Alesis Strike Pro Special Edition Strike Pro Special Edition - Module User Gui - Page 23
Sample Mode, Recording Samples
 |
View all Alesis Strike Pro Special Edition manuals
Add to My Manuals
Save this manual to your list of manuals |
Page 23 highlights
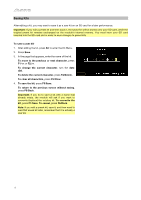
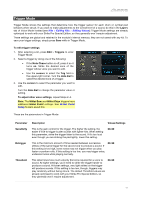
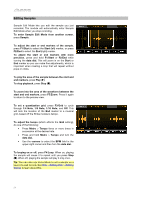
Sample Mode You can use your Strike module to record, edit, and save samples from another audio source. You can then assign those samples as instruments in a kit or play them back as loops or backing tracks. Recording Samples Sample Record Mode contains controls for recording from an audio source connected to the Strike module's Aux In or Strike module's own internal audio signal. To record a sample: 1. Press Record () to enter Sample Record Mode. 2. Turn the data dial to select the source you want to record: • Aux Input: the signal sent into the aux in (on the rear panel). • Internal: the module's internal audio signal (i.e., you playing the Strike Pro Special Edition). • Aux+Internal: the signal sent into the aux in (on the rear panel) as well as the module's internal audio signal (i.e., you playing the Strike Pro Special Edition). 3. If you selected Aux Input or Aux+Internal, use a 1/8" (3.5 mm) stereo/TRS cable to connect your audio source to the aux in. 4. Turn the data dial to select the channels you want to record: • Stereo: the left and right channels in stereo. • Mono Left: the left channel only. • Mono Right: the right channel only. • Mono Summed: both channels summed into a mono signal. 5. Play your Aux source and/or Strike Pro Special Edition to check that the volume level is sufficient. 6. Press the Record () button to start recording. The button in the display will light red and the Time Remaining counter will start counting. Note: The time limit for the sample will be based on how much space is available on your SD card. 7. Play your audio source and/or play your Strike Pro Special Edition. 8. Press the Record () or Stop () button to stop recording and enter Sample Edit Mode. 9. If you are recording from the Aux Input, stop its playback, and/or turn the Aux In knob back down. 23
-
 1
1 -
2
-
3
-
4
-
5
-
6
-
7
-
8
-
9
-
10
-
11
-
12
-
13
-
14
-
15
-
16
-
17
-
 18
18 -
 19
19 -
 20
20 -
 21
21 -
 22
22 -
 23
23 -
 24
24 -
 25
25 -
 26
26 -
 27
27 -
 28
28 -
29
-
30
-
31
-
32
 |
 |
