Asus P5GD2 Deluxe P5GD2 Premium user''s manual - Page 139
Repeat step c to set the second, third, and fourth drive.
 |
View all Asus P5GD2 Deluxe manuals
Add to My Manuals
Save this manual to your list of manuals |
Page 139 highlights
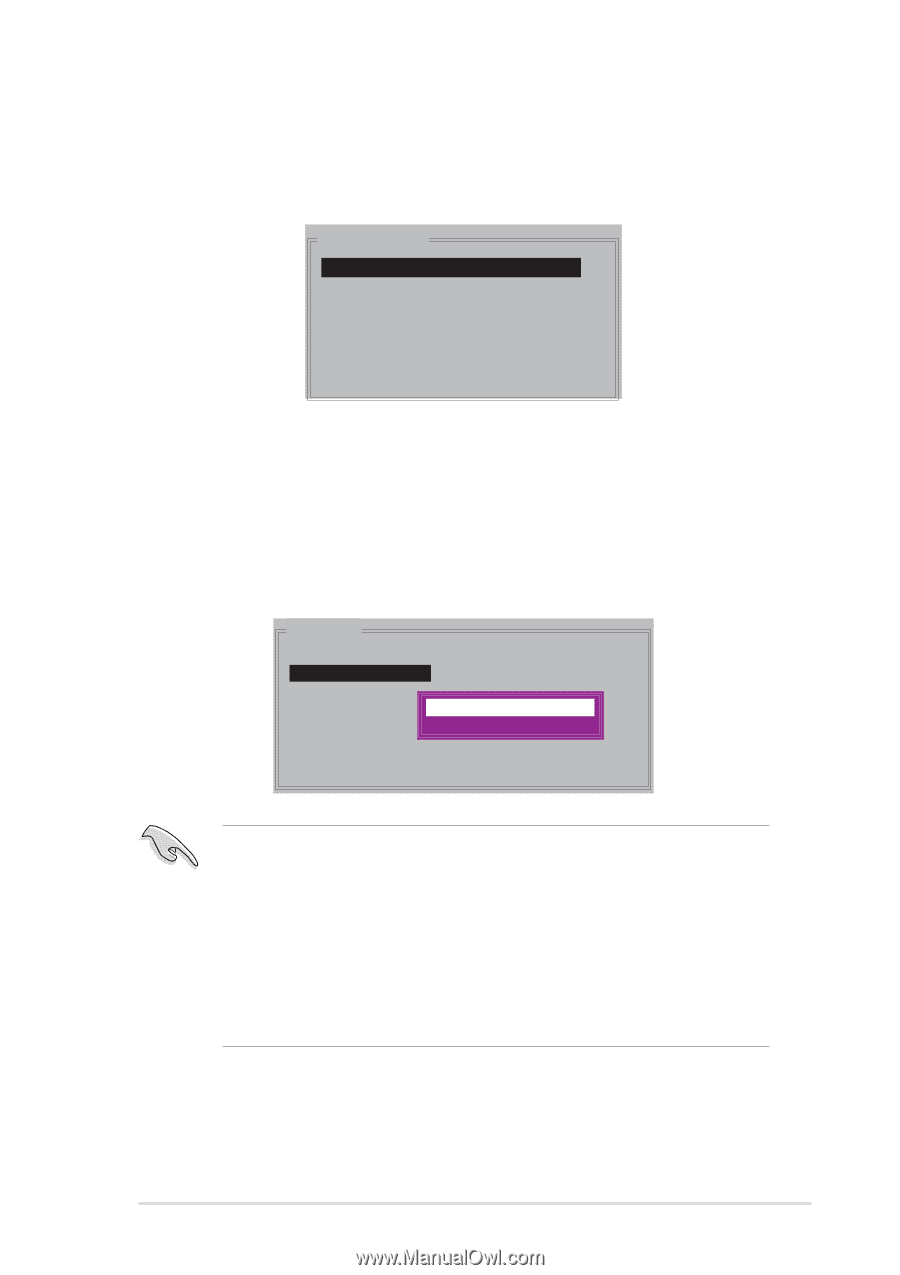
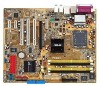
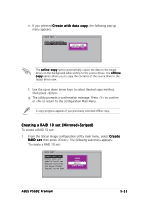
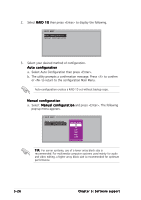
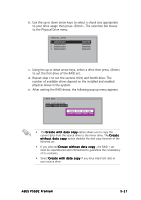
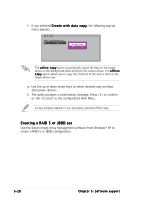
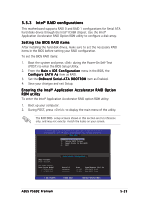
b. Use the up or down arrow keys to select a chunk size appropriate to your drive usage then press . The selection bar moves to the Physical Drive menu. PHYSICAL DRIVE 0 XXXXXXXXXXX 1 XXXXXXXXXXX 2 XXXXXXXXXXX 3 XXXXXXXXXXX XXXXXXMB XXXXXXMB XXXXXXMB XXXXXXMB c. Using the up or down arrow keys, select a drive then press to set the first drive of the RAID set. d. Repeat step c to set the second, third, and fourth drive. The number of available drives depend on the installed and enabled physical drives in the system. e. After setting the RAID drives, the following pop-up menu appears. MAIN MENU Auto configuration Manual configuration Create with data copy Create without data copy • The C r e a t e w i t h d a t a c o p y option allows you to copy the current data from the source drive to the mirror drive. The C r e a t e w i t h o u t d a t a c o p y option disables the disk copy function of the Mirrored set. • If you selected C r e a t e w i t h o u t d a t a c o p y , the RAID 1 set must be repartitioned and reformatted to guarantee the consistency of its contents. • Select C r e a t e w i t h d a t a c o p y if you have important data in your source drive. ASUS P5GD2 Premium 5-27
-
 1
1 -
2
-
3
-
4
-
5
-
6
-
7
-
8
-
9
-
10
-
11
-
12
-
13
-
14
-
15
-
16
-
17
-
18
-
19
-
20
-
21
-
22
-
23
-
24
-
25
-
26
-
27
-
28
-
29
-
30
-
31
-
32
-
33
-
34
-
35
-
36
-
37
-
38
-
39
-
40
-
41
-
42
-
43
-
44
-
45
-
46
-
47
-
48
-
49
-
50
-
51
-
52
-
53
-
54
-
55
-
56
-
57
-
58
-
59
-
60
-
61
-
62
-
63
-
64
-
65
-
66
-
67
-
68
-
69
-
70
-
71
-
72
-
73
-
74
-
75
-
76
-
77
-
78
-
79
-
80
-
81
-
82
-
83
-
84
-
85
-
86
-
87
-
88
-
89
-
90
-
91
-
92
-
93
-
94
-
95
-
96
-
97
-
98
-
99
-
100
-
101
-
102
-
103
-
104
-
105
-
106
-
107
-
108
-
109
-
110
-
111
-
112
-
113
-
114
-
115
-
116
-
117
-
118
-
119
-
120
-
121
-
122
-
123
-
124
-
125
-
126
-
127
-
128
-
129
-
130
-
131
-
132
-
133
-
 134
134 -
 135
135 -
 136
136 -
 137
137 -
 138
138 -
 139
139 -
 140
140 -
 141
141 -
 142
142 -
 143
143 -
 144
144 -
145
-
146
-
147
-
148
-
149
-
150
-
151
-
152
 |
 |