Asus RS163-E4 RX4 User Guide - Page 53
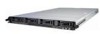
Push the SAS/SATA2 Backplane
 |
View all Asus RS163-E4 RX4 manuals
Add to My Manuals
Save this manual to your list of manuals |
Page 53 highlights
2. Push the SAS/SATA2 Backplane as shown until it is firmly seated. 3. Fasten the screws. 4. Insert the bridge cards. 5. Reinstall the Bridge cards cover, use cross screw driver to fasten it. 6. Connect all the fan cables and 8-pin power cable. ASUS RS163-E4/RX4 2-33
-
 1
1 -
2
-
3
-
4
-
5
-
6
-
7
-
8
-
9
-
10
-
11
-
12
-
13
-
14
-
15
-
16
-
17
-
18
-
19
-
20
-
21
-
22
-
23
-
24
-
25
-
26
-
27
-
28
-
29
-
30
-
31
-
32
-
33
-
34
-
35
-
36
-
37
-
38
-
39
-
40
-
41
-
42
-
43
-
44
-
45
-
46
-
47
-
 48
48 -
 49
49 -
 50
50 -
 51
51 -
 52
52 -
 53
53 -
 54
54 -
 55
55 -
 56
56 -
 57
57 -
 58
58 -
59
-
60
-
61
-
62
-
63
-
64
-
65
-
66
-
67
-
68
-
69
-
70
-
71
-
72
-
73
-
74
-
75
-
76
-
77
-
78
-
79
-
80
-
81
-
82
-
83
-
84
-
85
-
86
-
87
-
88
-
89
-
90
-
91
-
92
-
93
-
94
-
95
-
96
-
97
-
98
-
99
-
100
-
101
-
102
-
103
-
104
-
105
-
106
-
107
-
108
-
109
-
110
-
111
-
112
-
113
-
114
-
115
-
116
-
117
-
118
-
119
-
120
-
121
-
122
-
123
-
124
-
125
-
126
-
127
-
128
-
129
-
130
-
131
-
132
-
133
-
134
-
135
-
136
-
137
-
138
-
139
-
140
-
141
-
142
-
143
-
144
-
145
-
146
-
147
-
148
-
149
-
150
-
151
-
152
-
153
-
154
-
155
-
156
-
157
-
158
-
159
-
160
-
161
-
162
-
163
-
164
-
165
-
166
-
167
-
168
 |
 |

ASUS RS163-E4/RX4
±-33
2. Push the SAS/SATA2 Backplane
as shown until it is firmly seated.
3. Fasten the screws.
4. Insert the bridge cards.
5. Reinstall the Bridge cards cover,
use cross screw driver to fasten
it.
6. Connect all the fan cables and
8-pin power cable.