Asus S3N User Manual - Page 21
Left Side
 |
View all Asus S3N manuals
Add to My Manuals
Save this manual to your list of manuals |
Page 21 highlights
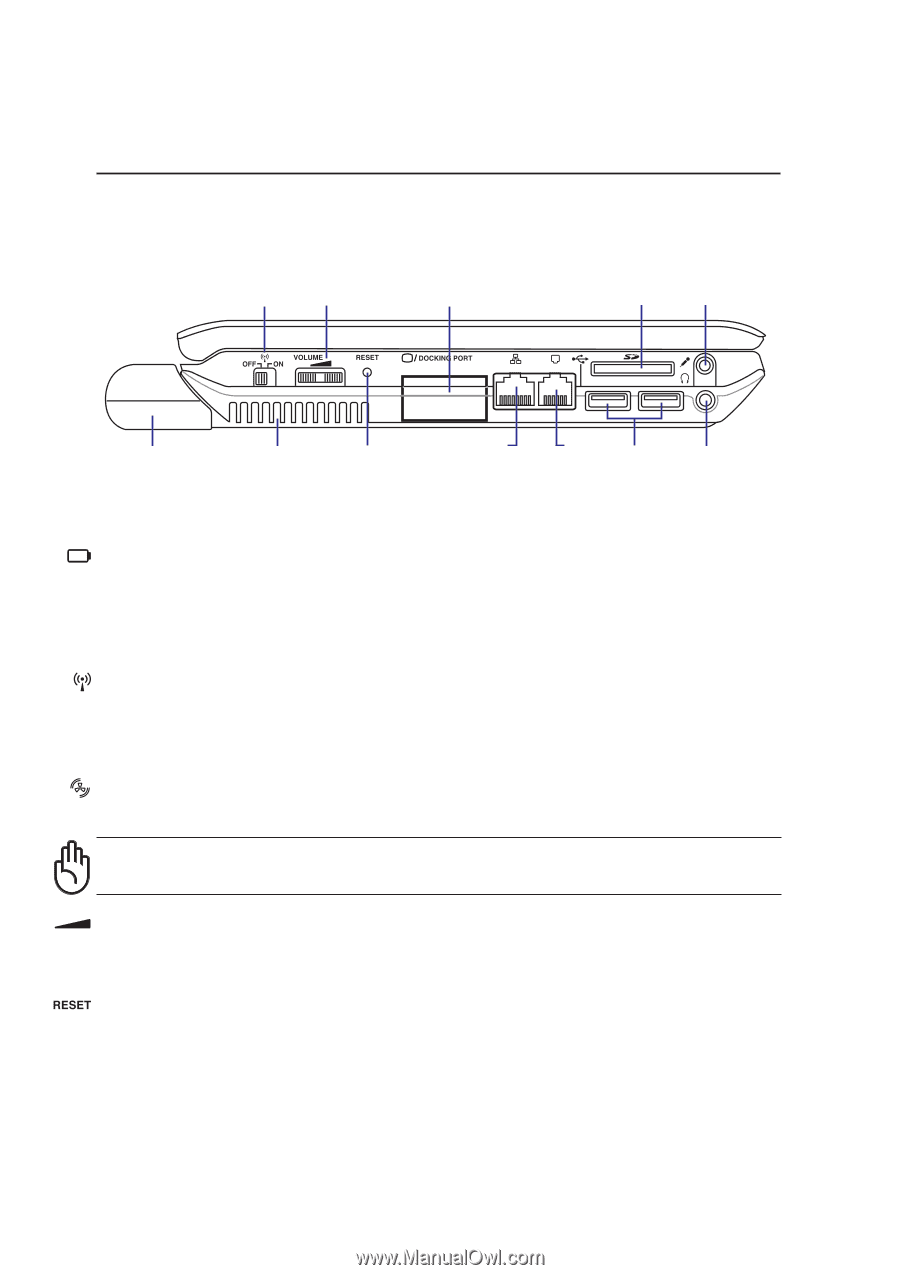
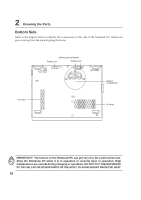
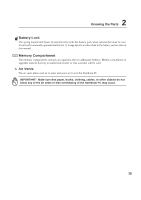
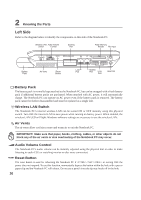
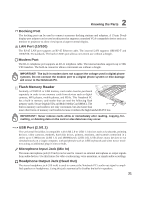
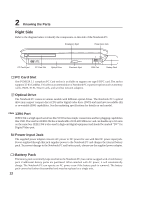
2 Knowing the Parts Left Side Refer to the diagram below to identify the components on this side of the Notebook PC. Wireless LAN Audio Volume Switch Control Docking Port Flash Memory Reader Mic Input Battery Pack Air Vents Reset Button LAN Port Modem Port USB Head Out Port Battery Pack The battery pack is normally kept attached to the Notebook PC, but can be swapped with a fresh battery pack if additional battery packs are purchased. When attached with AC power, it will automatically charge. The Notebook PC can operate on AC power even if the battery pack is removed. The battery pack cannot be further disassembled and must be replaced as a single unit. Wireless LAN Switch The Notebook PC's internal wireless LAN can be turned ON or OFF instantly using this physical switch. Turn OFF the internal LAN to save power when running on battery power. When enabled, the wireless LAN LED will light. Windows software settings are necessary to use the wireless LAN. Air Vents The air vents allow cool air to enter and warm air to exit the Notebook PC. IMPORTANT! Make sure that paper, books, clothing, cables, or other objects do not block any of the air vents or else overheating of the Notebook PC may occur. Audio Volume Control The Notebook PC's audio volume can be instantly adjusted using the physical dial in order to make listening to audio CD's or watching movies on disc more convenient. Reset Button The reset button is used for rebooting the Notebook PC if or turning OFF the power does not respond. To use this function, momentarily depress the button within the hole with a pen or paper clip and the Notebook PC will reboot. Do not use a pencil since the tip may break off in the hole. 20
-
 1
1 -
2
-
3
-
4
-
5
-
6
-
7
-
8
-
9
-
10
-
11
-
12
-
13
-
14
-
15
-
 16
16 -
 17
17 -
 18
18 -
 19
19 -
 20
20 -
 21
21 -
 22
22 -
 23
23 -
 24
24 -
 25
25 -
 26
26 -
27
-
28
-
29
-
30
-
31
-
32
-
33
-
34
-
35
-
36
-
37
-
38
-
39
-
40
-
41
-
42
-
43
-
44
-
45
-
46
-
47
-
48
-
49
-
50
-
51
-
52
-
53
-
54
-
55
-
56
-
57
-
58
-
59
-
60
-
61
-
62
-
63
-
64
-
65
-
66
-
67
-
68
-
69
-
70
-
71
-
72
-
73
-
74
 |
 |