Asus TS300-E10-PS4 User Manual - Page 36
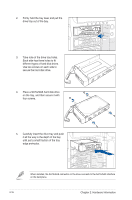
Removing the backplane, 2.5.4 Installing a hot-swap SATA/SAS hard disk drive
 |
View all Asus TS300-E10-PS4 manuals
Add to My Manuals
Save this manual to your list of manuals |
Page 36 highlights
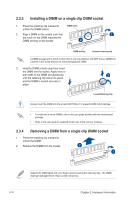
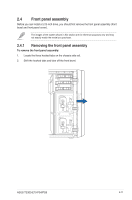
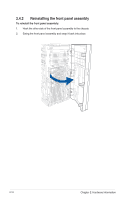
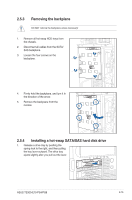
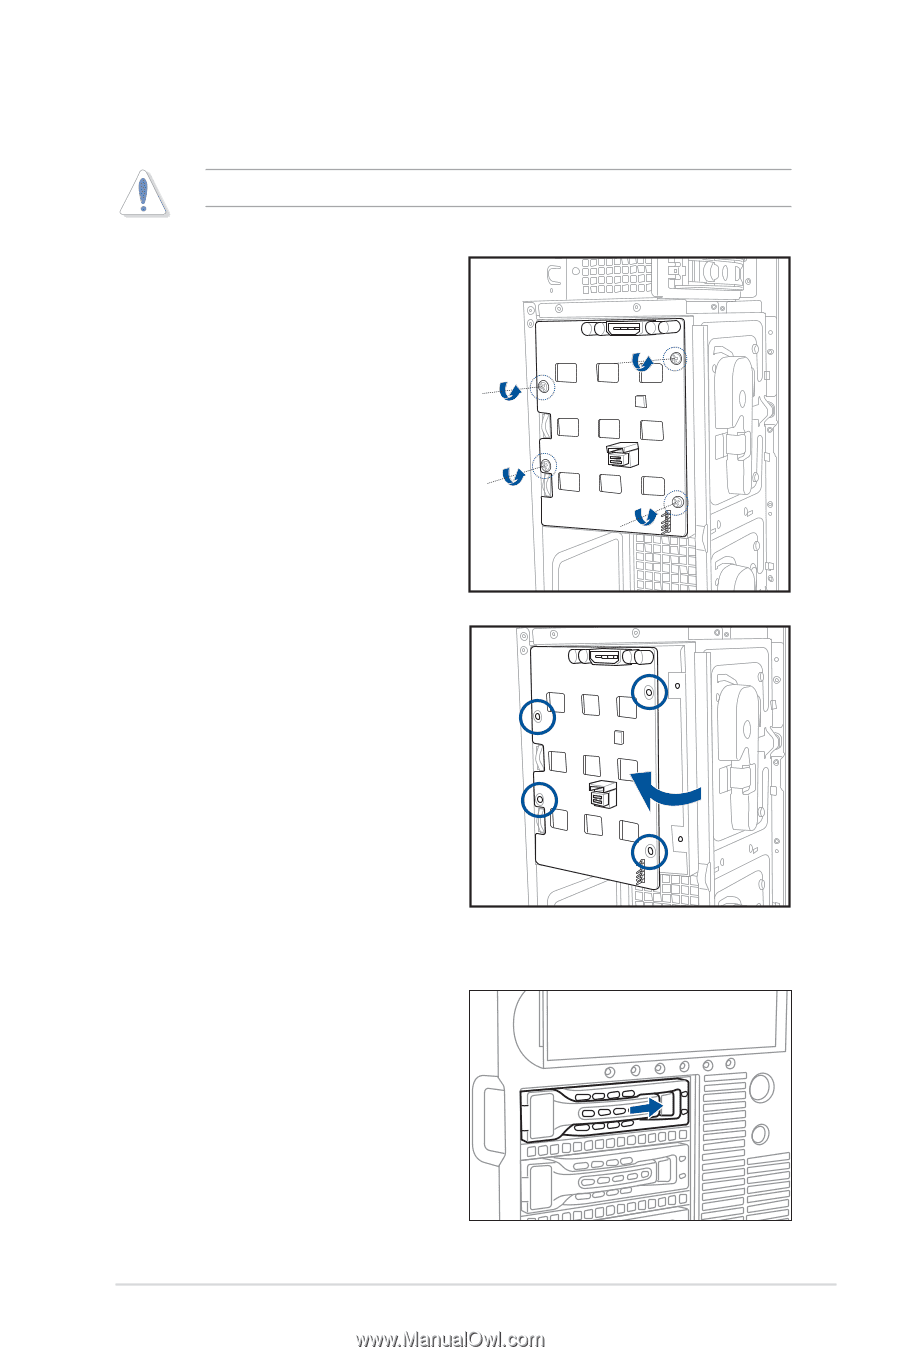
2.5.3 Removing the backplane DO NOT remove the backplane unless necessary! 1. Remove all hot-swap HDD trays from the chassis. 2. Disconnect all cables from the SATA/ SAS backplane. 3. Loosen the four screws on the backplane. 4. Firmly hold the backplane, and turn it in the direction of the arrow. 5. Remove the backplane from the module. 2.5.4 Installing a hot-swap SATA/SAS hard disk drive 1. Release a drive tray by pushing the spring lock to the right, and then pulling the tray lever outward. The drive tray ejects slightly after you pull out the lever. ASUS TS300-E10-PS4/PS8 2-15
-
 1
1 -
2
-
3
-
4
-
5
-
6
-
7
-
8
-
9
-
10
-
11
-
12
-
13
-
14
-
15
-
16
-
17
-
18
-
19
-
20
-
21
-
22
-
23
-
24
-
25
-
26
-
27
-
28
-
29
-
30
-
 31
31 -
 32
32 -
 33
33 -
 34
34 -
 35
35 -
 36
36 -
 37
37 -
 38
38 -
 39
39 -
 40
40 -
 41
41 -
42
-
43
-
44
-
45
-
46
-
47
-
48
-
49
-
50
-
51
-
52
-
53
-
54
-
55
-
56
-
57
-
58
-
59
-
60
-
61
-
62
-
63
-
64
-
65
-
66
-
67
-
68
-
69
-
70
-
71
-
72
-
73
-
74
-
75
-
76
-
77
-
78
-
79
-
80
-
81
-
82
-
83
-
84
-
85
-
86
-
87
-
88
-
89
-
90
-
91
-
92
-
93
-
94
-
95
-
96
-
97
-
98
-
99
-
100
-
101
-
102
-
103
-
104
-
105
-
106
-
107
-
108
-
109
-
110
-
111
-
112
-
113
-
114
-
115
-
116
-
117
-
118
-
119
-
120
-
121
-
122
-
123
-
124
-
125
-
126
-
127
-
128
-
129
-
130
-
131
-
132
-
133
-
134
-
135
-
136
-
137
-
138
-
139
-
140
-
141
-
142
-
143
-
144
-
145
-
146
-
147
-
148
-
149
-
150
-
151
-
152
-
153
-
154
-
155
-
156
-
157
-
158
-
159
-
160
-
161
-
162
-
163
 |
 |
2-15
ASUS TS300-E10-PS4/PS8
2.5.3
Removing the backplane
DO NOT remove the backplane unless necessary!
1.
Remove all hot-swap HDD trays from
the chassis.
2.
Disconnect all cables from the SATA/
SAS backplane.
3.
Loosen the four screws on the
backplane.
4.
Firmly hold the backplane, and turn it in
the direction of the arrow.
5.
Remove the backplane from the
module.
2.5.4
Installing a hot-swap SATA/SAS hard disk drive
1.
Release a drive tray by pushing the
spring lock to the right, and then pulling
the tray lever outward. The drive tray
ejects slightly after you pull out the lever.