Behringer iNUKE NU3000DSP Manual - Page 2

Table of Contents - amplifier

Page 2 highlights

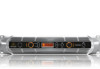
2 iNUKE NU6000DSP/NU3000DSP/NU1000DSP User Manual Table of Contents Thank you 2 Important Safety Instructions 3 Legal Disclaimer 3 Limited Warranty 3 1. Introduction 5 1.1 Before you get started 5 2. Control Elements 5 2.1 Front panel 5 2.2 Rear panel 6 3. DSP Processor 6 3.1 Processor Functionality 6 3.2 Front Panel control 6 3.3 BEHRINGER Amp Remote Software 10 4. Applications 16 4.1 Bi-amping 16 5. Installation 18 5.1 Rack mounting 18 5.2 Connections 18 6. Specifications 19 Thank you Thank you for choosing a BEHRINGER iNUKE DSP power amplifier. This piece of high-end gear was developed for professional use in live applications, and this amplifier incorporates many ground-breaking features that will make it a useful, dependable, and flexible part of your sound system. The iNUKE DSP amps feature an onboard Digital Signal Processor for precise, customized control. Multiple routing options, from dual mono to bridged operation, to special functions dedicated to bi-amping applications, give this amplifier unprecedented flexibility. Even better, all of these functions can be controlled remotely from a PC via the downloadable BEHRINGER Amp Remote control software. This manual first describes the panel controls and connection points before delving into the DSP functionality. Special sections describe how you can program the DSP by using either the amp's front panel controls, or by using the Amp Remote software. Read this manual and have fun as you become an iNUKE DSP Power User!

  • 1
  • 2
  • 3
  • 4
  • 5
  • 6
  • 7
  • 8
  • 9
  • 10
  • 11
  • 12
  • 13
  • 14
  • 15
  • 16
  • 17
  • 18
  • 19
  • 20
  • 21
  • 22

2
iNUKE NU6000DSP/NU3000DSP/NU1000DSP User Manual
Thank you
Thank you for choosing a BEHRINGER iNUKE DSP power amplifier. This piece of
high-end gear was developed for professional use in live applications, and this
amplifier incorporates many ground-breaking features that will make it a useful,
dependable, and flexible part of your sound system.
The iNUKE DSP amps feature an onboard Digital Signal Processor for precise,
customized control. Multiple routing options, from dual mono to bridged
operation, to special functions dedicated to bi-amping applications, give this
amplifier unprecedented flexibility. Even better, all of these functions can be
controlled remotely from a PC via the downloadable BEHRINGER Amp Remote
control software.
This manual first describes the panel controls and connection points before
delving into the DSP functionality. Special sections describe how you can
program the DSP by using either the amp's front panel controls, or by using the
Amp Remote software.
Read this manual and have fun as you become an iNUKE DSP Power User!
Table of Contents
Thank you
.......................................................................
2
Important Safety Instructions
......................................
3
Legal Disclaimer
.............................................................
3
Limited Warranty
...........................................................
3
1.
Introduction
...............................................................
5
1.1
Before you get started
......................................................
5
2.
Control Elements
.......................................................
5
2.1
Front panel
............................................................................
5
2.2
Rear panel
.............................................................................
6
3.
DSP Processor
............................................................
6
3.1
Processor Functionality
....................................................
6
3.2
Front Panel control
............................................................
6
3.3
BEHRINGER Amp Remote Software
...........................
10
4.
Applications
.............................................................
16
4.1
Bi-amping
............................................................................
16
5.
Installation
...............................................................
18
5.1
Rack mounting
...................................................................
18
5.2
Connections
.......................................................................
18
6.
Specifications
...........................................................
19