Belkin F5D7000 User Manual - Page 9
Using The Belkin Wireless Lan Configuration Utility, Installing And Setting Up The Card - wireless lan card driver
 |
View all Belkin F5D7000 manuals
Add to My Manuals
Save this manual to your list of manuals |
Page 9 highlights
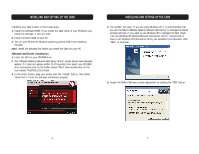
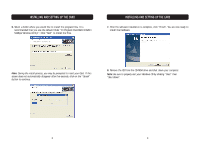
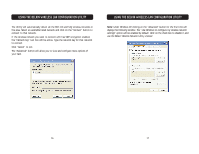
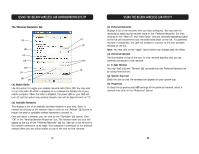
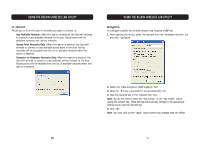
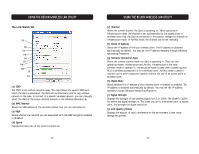
INSTALLING AND SETTING UP THE CARD Connecting to your Wireless Network If you already have a wireless router or an access point in your home or office, the Card will automatically attempt to connect to your wireless network. In most cases, the Card will be able to connect to your network automatically. If your wireless network is using encryption, you will need to set the encryption settings of your Card to match that of your wireless network. For information about configuring your Card, see the next section in this manual. Uninstalling the Software and Drivers If you need to remove the software and drivers for any reason, you can easily accomplish this in one of two ways. You can insert the software CD and click on the "Uninstall" option in the menu, or you can go to the Windows Control Panel and select the "Add/Remove Programs" option. The Belkin Wizard will walk you through the removal process. USING THE BELKIN WIRELESS LAN CONFIGURATION UTILITY Proceed with the following instructions for configuring your network profiles. The instructions explain how to open the Utility and how to use it to configure a network profile. When you launch the Wireless LAN Utility (the Utility), you will be presented with the "Connect to Wireless Network" screen. The following small icon will also be present in your system tray. Once installed, the Wireless LAN Utility will automatically display when Windows boots up. The Utility can be set to always show up in your system tray. You can hide the icon if you right-click on it in your system tray. Although no icon will be displayed, your preferred network will continue to be managed by the Card. The system tray icon can be re-enabled from the Wireless LAN Configuration Utility, available from the Control Panel. Single-clicking on the icon in the system tray will open the window. Note: You may double-click on the Utility icon on your system tray to go directly to the "Advanced Configuration" window. 14 15
-
 1
1 -
2
-
3
-
 4
4 -
 5
5 -
 6
6 -
 7
7 -
 8
8 -
 9
9 -
 10
10 -
 11
11 -
 12
12 -
 13
13 -
 14
14 -
15
-
16
-
17
-
18
-
19
 |
 |
