Bernina 531 Manual - Page 11
downwards, between, tension, discs, Bobbin, Threading, Thread, Shuttle
 |
View all Bernina 531 manuals
Add to My Manuals
Save this manual to your list of manuals |
Page 11 highlights
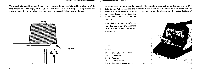
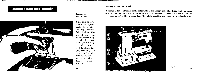
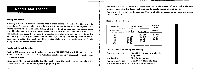
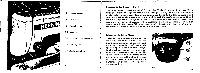
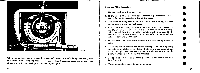
winding, turn with your right hand the handwheel release screw 60 as far as possible towards you, at the same time holding the handwheel 11 firmly with your left hand. Slip the bobbin 26 onto the bobbin shaft 16 projecting out from the stand below the handwheel, and turn it slowly until the small pin mounted on the bobbin shaft engages in the slot of the metal bobbin. This pin ensures that the bobbin turns with the shaft. Bringing the thread to the bobbin is simple. From the thread reel placed on the pin 22, pass the thread first through the eye 8 located at the back, then through the eye 8a, and from there downwards between the tension discs of the bobbin tensioning device 24 unto the bobbin 26. The motor can then be started by a slight pressure un the knee lever or foot plate. Care must be taken never to fill the bobbin right to the rim. After finishing the winding operation, tighten the handwheel release screw 60 again. if Inserting the Bobbin In the Case end Threading the Bobbin Thread Replacing Bobbin Case in Shuttle 1 viz. S When replacing bobbin in case, make sure that bobbin turns in the direction of the arrow when thread is pulled. After insertion of bobbin, pass thread through slot 27, below tension spring 28 and allow it to come out at the end of tension spring 29. Insertion of the bobbin case is possible only when the needle is in its raised position. The case is held by the opened latch 21 as when removing it (Fig. 5). The index finger and thumb of the left hand hold the hinged latch so that the bobbin case finger 30 (Fig. 7) points upward and engages the recess in the shuttle race cover, Then place the bobbin case on the shuttle pin as far as it will ga. Now release latch and make sure that it is properly closed. If the hinged latch does not close completely, thread ends or fluff have collected at the base of the shuttle pin and must be removed. 17
-
 1
1 -
2
-
3
-
4
-
5
-
 6
6 -
 7
7 -
 8
8 -
 9
9 -
 10
10 -
 11
11 -
 12
12 -
 13
13 -
 14
14 -
 15
15 -
 16
16 -
17
-
18
-
19
-
20
-
21
-
22
-
23
-
24
-
25
-
26
-
27
-
28
-
29
-
30
-
31
-
32
-
33
-
34
-
35
-
36
-
37
-
38
-
39
-
40
-
41
-
42
-
43
-
44
-
45
-
46
-
47
-
48
-
49
-
50
-
51
-
52
-
53
-
54
 |
 |
