Bernina 531 Manual - Page 37
Sewing, Buttons
 |
View all Bernina 531 manuals
Add to My Manuals
Save this manual to your list of manuals |
Page 37 highlights
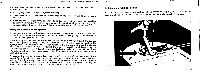
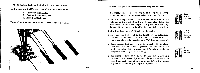
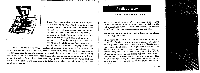
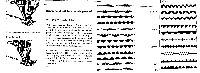
7. Set zigzag knob 12 again to No. 2 and sew the second bead over a length somewhat shorter than the first bead. Last needle hole on the left. 8. Set zigzag knob 12 again at twice the bead width and sew the end stitches. Again pull material back somewhat to shorten the feed. Last needle hloe on the left. 9. Set zigzag knob at zero and sew a few fastening stitches again pulling the cloth lightly towards you to shorten the feed. 10. Finally cut be buttonhole as when sewn automatically (see paragraph 6, page 61). Last stitch on left Last 1 WWI on left Sewing on Buttons 1. Position needle to stitch on left. 2. Lower feed dog by turning knob 17 (Fig. 2) to the right until darning symbol appears. ki. J1 40 • - _ • or • 5 'Cr
-
 1
1 -
2
-
3
-
4
-
5
-
6
-
7
-
8
-
9
-
10
-
11
-
12
-
13
-
14
-
15
-
16
-
17
-
18
-
19
-
20
-
21
-
22
-
23
-
24
-
25
-
26
-
27
-
28
-
29
-
30
-
31
-
 32
32 -
 33
33 -
 34
34 -
 35
35 -
 36
36 -
 37
37 -
 38
38 -
 39
39 -
 40
40 -
 41
41 -
 42
42 -
43
-
44
-
45
-
46
-
47
-
48
-
49
-
50
-
51
-
52
-
53
-
54
 |
 |

7.
Set
zigzag
knob
12
again
to
No.
2
and
sew
the
second
bead
over
a
length
somewhat
shorter
than
the
first
bead.
Last
needle
hole
on
the
left.
8.
Set
zigzag
knob
12
again
at
twice
the
bead
width
and
sew
the
end
stitches.
Again
pull
material
back
somewhat
to
shorten
the
feed.
Last
needle
hloe
on
the
left.
9.
Set
zigzag
knob
at
zero
and
sew
a
few
fastening
stitches
again
pulling
the
cloth
lightly
towards
you
to
shorten
the
feed.
10.
Finally
cut
be
buttonhole
as
when
sewn
automatically
Last
stitch
on
left
1.
Position
needle
to
stitch
on
left.
2.
Lower
feed
dog
by
turning
knob
appears.
Sewing
on
Buttons
17
(Fig.
2)
to
the
right
until
darning
symbol
•
(see
paragraph
6,
page
61).
Last
5
1
WWI
on
left
40
•
-
_
'Cr
ki.
J1
•
or