Bernina 531 Manual - Page 18
Forward, Backward, Sewing, Adjustment, Stitch, lengths
 |
View all Bernina 531 manuals
Add to My Manuals
Save this manual to your list of manuals |
Page 18 highlights
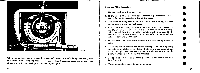
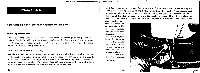
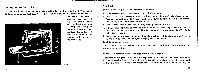
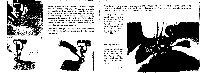
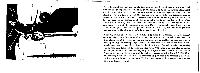
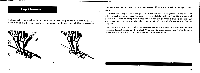
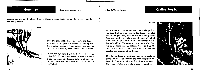
Lowering the Feed Dog Fig. 16 At the right-hand bottom portion of the machine is placed a control knob 17 designed to lower or raise the feed dog. According to whether the knob is moved to the left or the right, the symbol showing that the feed dog is in operative posi- tion, i.e. that the machine is ready for sewing, or the symbol showing that the feed dog is lowered and the machine set for 47 darning will appear in the window 46. 15 17 Fig. 16 stn Plain Stitch For plain stitching, adjust the machine as follows: 1. Raise take-up lever approximately to its highest point. 2. Insert plain stitch presser foot. (for ordinary plain stitch work, the zigzag presser foot may be used as well). Thread needle from front to back. Pass top and bottom threads together back under the presser foot. 3. Turn control knob to the left to bring sewing symbol into sight. 4. Adjust stitch regulator so that the zero mark of the stitch length dial is above the line mark on the right-hand side. This is possible only if the screw 14 (Fig. 2) is not quite screwed in. 5. Set zigzag knob to zero. In this position, the machine will do plain sewing. As soon as the knob is turned to the right, a zigzag stitch will result. 6. Slide on sewing table. Make sure that the balance wheel is always turned in the direction of the arrow, i.e towards the operator. Forward and Backward Sewing and Adjustment of Stitch lengths According to the position of the stitch regulator 15 the machine will sew forward or backward, making long or short stitches. If the stitch regulator lever 15 is depressed so that the zero line of the stitch length dial 47 is above the line mark on the side, the 31
-
 1
1 -
2
-
3
-
4
-
5
-
6
-
7
-
8
-
9
-
10
-
11
-
12
-
 13
13 -
 14
14 -
 15
15 -
 16
16 -
 17
17 -
 18
18 -
 19
19 -
 20
20 -
 21
21 -
 22
22 -
 23
23 -
24
-
25
-
26
-
27
-
28
-
29
-
30
-
31
-
32
-
33
-
34
-
35
-
36
-
37
-
38
-
39
-
40
-
41
-
42
-
43
-
44
-
45
-
46
-
47
-
48
-
49
-
50
-
51
-
52
-
53
-
54
 |
 |
