Bernina 531 Manual - Page 34
Buttonhole, inlay
 |
View all Bernina 531 manuals
Add to My Manuals
Save this manual to your list of manuals |
Page 34 highlights
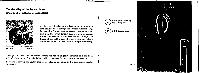
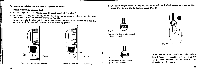
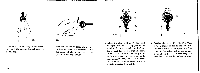
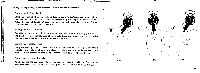
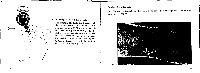
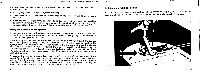
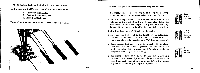
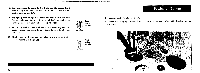
For the next buttonhole the zig-zag lever 12a and the lever 13115 have to be adjusted as follows: 1. Set zig-zag lever 12a again against the stop I. 2. Turn lever 13 to the left until the white lines of the levers 13 and 12 are opposite each other. 3. Push the stitch length lever 16 upwards as far as it will go. Now the machine is again adjusted for buttonhole sewing and the handling of the zig-zag lever 12a is again effected as stated under " the step by step sewing of the buttonhole". Sewing the buttonhole In one operation In contrast to the described method, the buttonhole can easily be sewn in one operation, i. e. without stopping the machine after the different working steps. The buttonhole is sewn in one operation us follows; After having set the machine for buttonhole sewing and having pressed the zig-zag lever 12a against the stop I (Fig. 39), start the machine and keep en holding the zig-zag lever 12a. As soon as the desired length of bead is reached, move the zig-zag lever 12a with a firm movement against the stop II (Fig. 38), and because only a few stitches are necessary for stitching the fastening ends, move the zig-zag lever 12a corresponding to the sewing speed (Fig. 39) at once again to stop 1, and press it against this stop. As soon as the second, righthand bead has reached the length of the first lefthand one except for a few stitches, move the zig-zag lever once again to stop II, arid since also only a few stitches are required for the second fastening, move the zig-zag lever immediately quite to the right in accordance with the sewing speed, i. e. beyond stop I, by drawing the zig-zag lever 12a towards you, i.e. to the front. 62 B. Buttonhole with cord inlay As inlay, use thin cotton cord and put it, as shown in Fig. 43, on the nose at the back end of the buttonhole foot and sew the buttonhole in the described manner. F Is 43 kat Y• • 63
-
 1
1 -
2
-
3
-
4
-
5
-
6
-
7
-
8
-
9
-
10
-
11
-
12
-
13
-
14
-
15
-
16
-
17
-
18
-
19
-
20
-
21
-
22
-
23
-
24
-
25
-
26
-
27
-
28
-
 29
29 -
 30
30 -
 31
31 -
 32
32 -
 33
33 -
 34
34 -
 35
35 -
 36
36 -
 37
37 -
 38
38 -
 39
39 -
40
-
41
-
42
-
43
-
44
-
45
-
46
-
47
-
48
-
49
-
50
-
51
-
52
-
53
-
54
 |
 |
