Black & Decker GH710 Type 1 Manual - GH710 - Page 7
Operating Instructions
 |
View all Black & Decker GH710 manuals
Add to My Manuals
Save this manual to your list of manuals |
Page 7 highlights
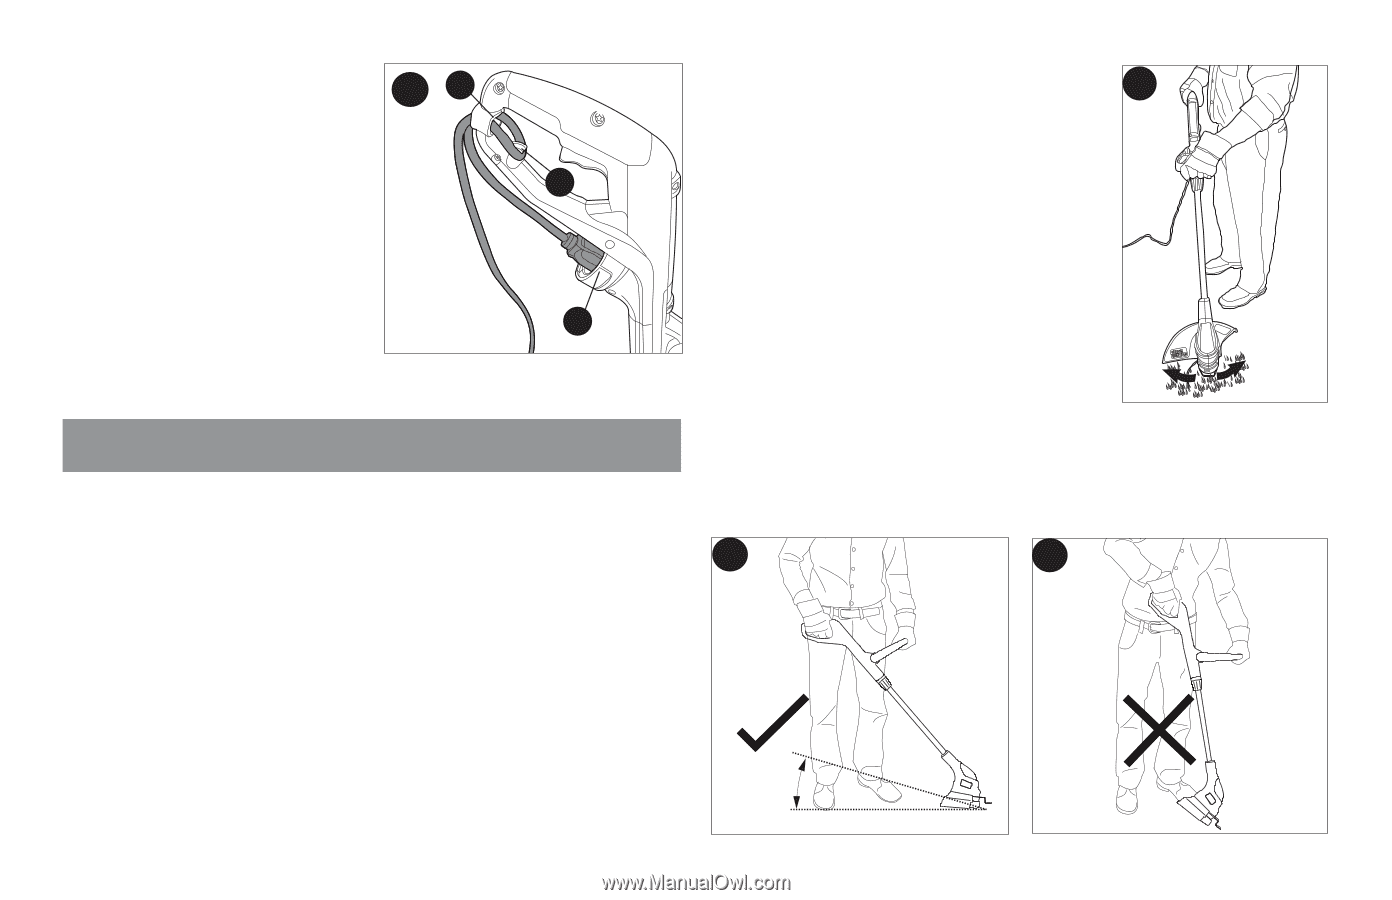
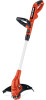
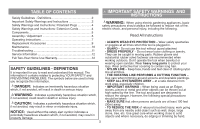
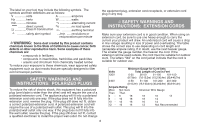
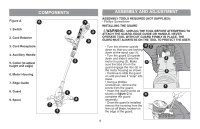
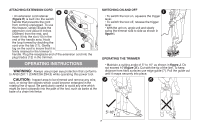
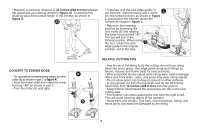
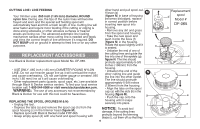
ATTACHING EXTENSION CORD H 10 • An extension cord retainer (figure H) is built into the switch handle that prevents the cord from coming unplugged. To use this feature, simply double the 11 extension cord about 8 inches (203mm) from the end, and insert it into the slot (10) in the end of the handle area. Hook the loop formed by doubling the cord over the tab (11). Gently 12 tug on the cord to insure that it is firmly retained in the trimmerʼs handle. Plug the receptacle end of the extension cord into the plug blades (12) in the trimmer. OPERATING INSTRUCTIONS WARNING: Always use proper eye protection that conforms to ANSI Z87.1 (CAN/CSA Z94.3) while operating this power tool. CAUTION: Inspect area to be trimmed and remove any wire, cord, or string-like objects which could become entangled in the rotating line or spool. Be particularly careful to avoid any wire which might be bent outwardly into the path of the tool, such as barbs at the base of a chain link fence. SWITCHING ON AND OFF I • To switch the tool on, squeeze the trigger lever. • To switch the tool off, release the trigger lever. • With the unit on, angle unit and slowly swing the trimmer side to side as shown in figure I. OPERATING THE TRIMMER • Maintain a cutting angle of 5° to 10° as shown in figure J. Do not exceed 10°(figure J1). Cut with the tip of the line. To keep distance from hard surfaces use edge guide (7). Pull the guide out until it snaps securely into place. J J1 5O-10O 7
-
 1
1 -
 2
2 -
 3
3 -
 4
4 -
 5
5 -
 6
6 -
 7
7 -
 8
8 -
 9
9 -
 10
10 -
 11
11 -
 12
12 -
13
-
14
-
15
-
16
-
17
-
18
-
19
-
20
-
21
-
22
-
23
-
24
-
25
-
26
-
27
-
28
-
29
-
30
-
31
-
32
-
33
-
34
-
35
-
36
-
37
-
38
-
39
-
40
 |
 |