Black & Decker GH710 Type 1 Manual - GH710 - Page 8
from the ground. - parts
 |
View all Black & Decker GH710 manuals
Add to My Manuals
Save this manual to your list of manuals |
Page 8 highlights
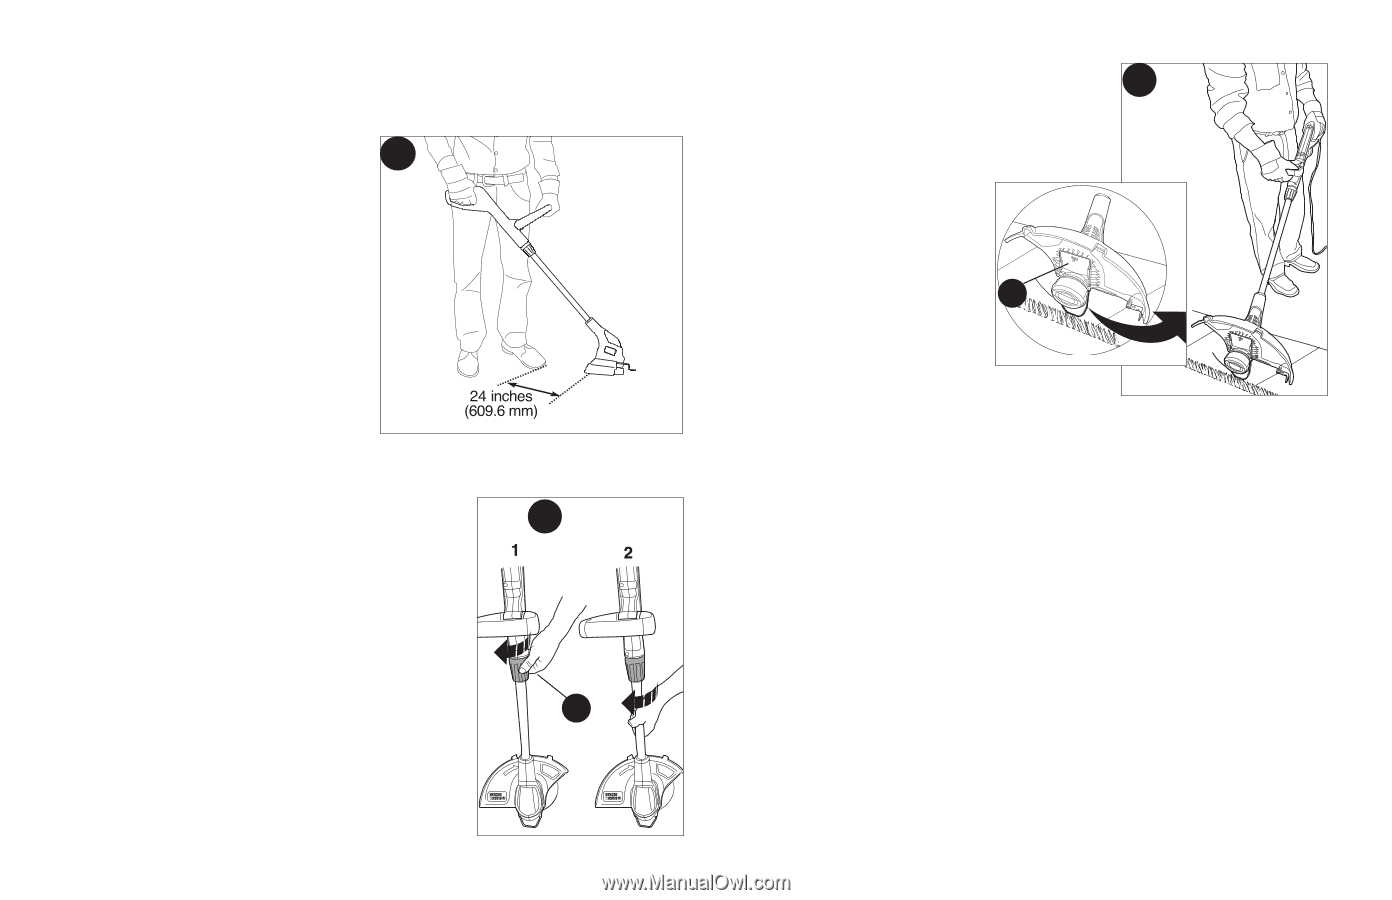
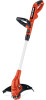
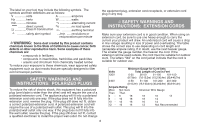
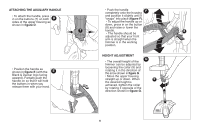
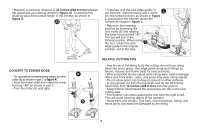
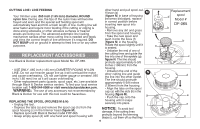
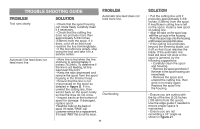
• Maintain a minimum distance of 24 inches (609.6 mm) between the guard and your feet as shown in figure J2. To acheive this distance adjust the overall height of the trimmer as shown in figure G. J2 • If desired, pull the wire edge guide (7) out from the motor housing until it clicks L into the locked position as shown in figure L and position the trimmer above the surface as shown in figure L. • Return to the trimming position by loosening the lock collar (9) and rotating the lower housing back 180°. The tool will lock in the trimmer position. When using the tool, retract the wire 7 edge guide to the original position, out of the way. CONVERT TO EDGING MODE K • To operate as a maintenance edger, turn the collar (9) as shown in part 1 of figure K. • Hold the metal shaft and rotate the lower housing 180° as shown in part 2. • Turn the collar (9) until tight. 9 HELPFUL CUTTING TIPS • Use the tip of the string to do the cutting; do not force string head into uncut grass. Use edge guide along such things as fences, houses and flower beds for best practices. • Wire and picket fences cause extra string wear, even breakage. Stone and brick walls, curbs, and wood may wear string rapidly. • Do not allow spool cap to drag on ground or other surfaces. • In long growth cut from the top down and do not lift trimmer head more than 12 inches (304.8 mm) from the ground. • Keep trimmer tilted toward the area being cut; this is the best cutting area. • The trimmer cuts when passing the unit from the right to left. This will avoid throwing debris at the operator. • Avoid trees and shrubs. Tree bark, wood moldings, siding, and fence posts can easily be damaged by the string. 8
-
 1
1 -
2
-
 3
3 -
 4
4 -
 5
5 -
 6
6 -
 7
7 -
 8
8 -
 9
9 -
 10
10 -
 11
11 -
 12
12 -
 13
13 -
14
-
15
-
16
-
17
-
18
-
19
-
20
-
21
-
22
-
23
-
24
-
25
-
26
-
27
-
28
-
29
-
30
-
31
-
32
-
33
-
34
-
35
-
36
-
37
-
38
-
39
-
40
 |
 |