Brother International 2340CV Users Manual - English and Spanish - Page 10
II. Preparation before threading
 |
View all Brother International 2340CV manuals
Add to My Manuals
Save this manual to your list of manuals |
Page 10 highlights
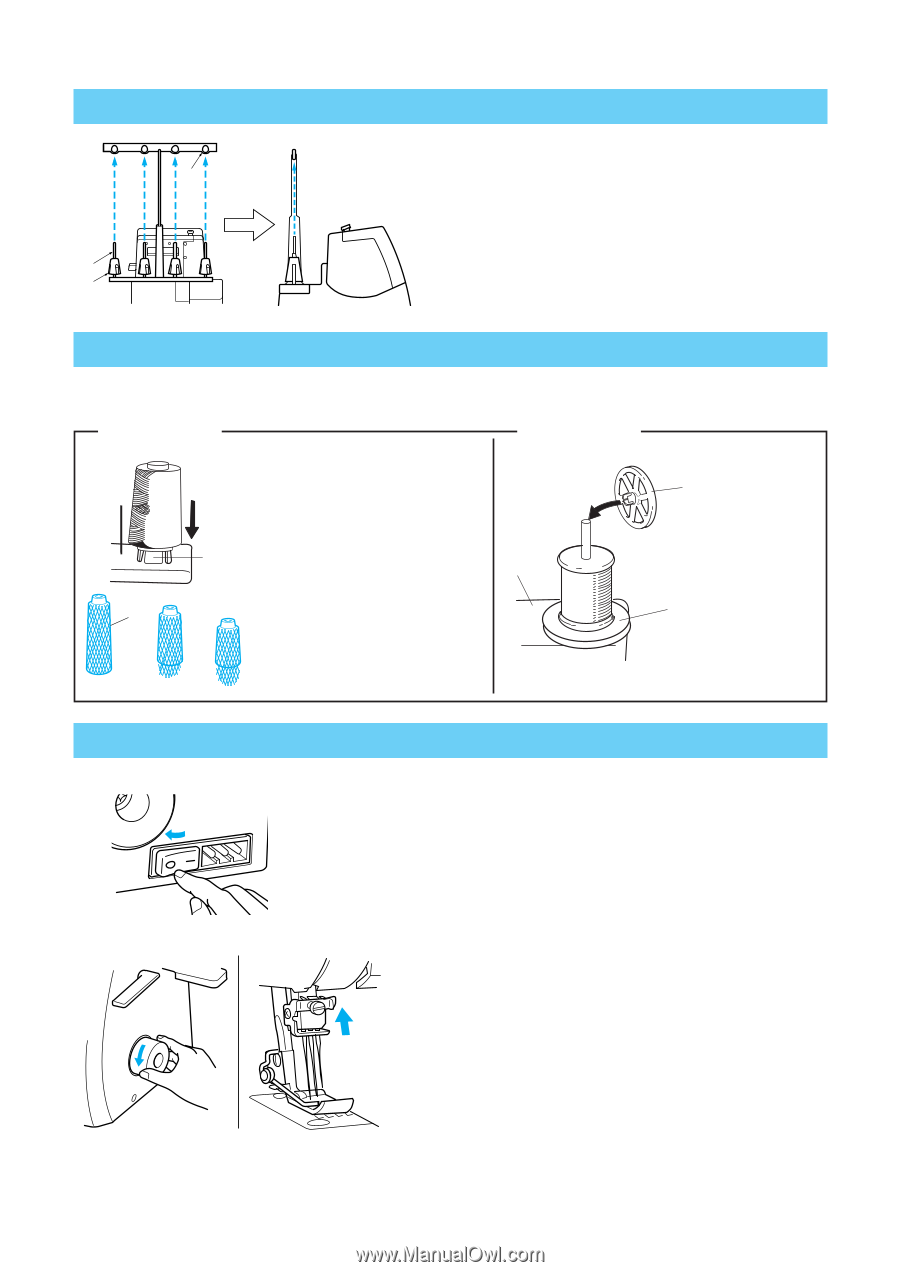
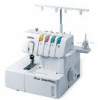
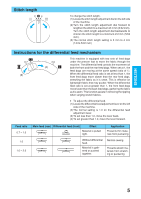
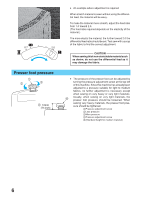
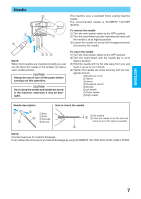
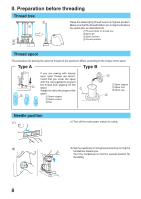
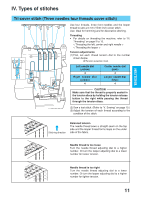
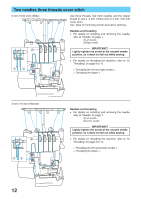
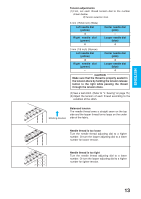
II. Preparation before threading Thread tree 4 1 2 3 Raise the telescoping thread tree to its highest position. Make sure that the thread holders are in alignment above the spool pins as illustrated left. 1 Thread holder on thread tree 2 Spool pin 3 Spool cushion 4 Correct position Thread spool The procedure for placing the spool of thread on the spool pin differs according to the shape of the spool. Type A Type B 1 3 If you are sewing with loosely spun nylon thread, we recom- mend that you cover the spool with the net supplied to prevent 2 the thread from slipping off the spool. 1 Adapt the net to the shape of the spool. 1 Spool support 2 Spool cushion 3 Net 3 1 Spool support 2 Spool mat 3 Spool cap 2 Needle position (1) (1) Turn off the main power switch for safety. (2) (2) Set the needle bar in its highest position by turning the handwheel toward you. Turn the handwheel to find the easiest position for threading. 8
-
 1
1 -
2
-
3
-
4
-
 5
5 -
 6
6 -
 7
7 -
 8
8 -
 9
9 -
 10
10 -
 11
11 -
 12
12 -
 13
13 -
 14
14 -
 15
15 -
16
-
17
-
18
-
19
-
20
-
21
-
22
-
23
-
24
-
25
-
26
-
27
-
28
-
29
-
30
-
31
-
32
-
33
-
34
-
35
-
36
-
37
-
38
-
39
-
40
 |
 |