Brother International 2340CV Users Manual - English and Spanish - Page 12
Looper threading
 |
View all Brother International 2340CV manuals
Add to My Manuals
Save this manual to your list of manuals |
Page 12 highlights
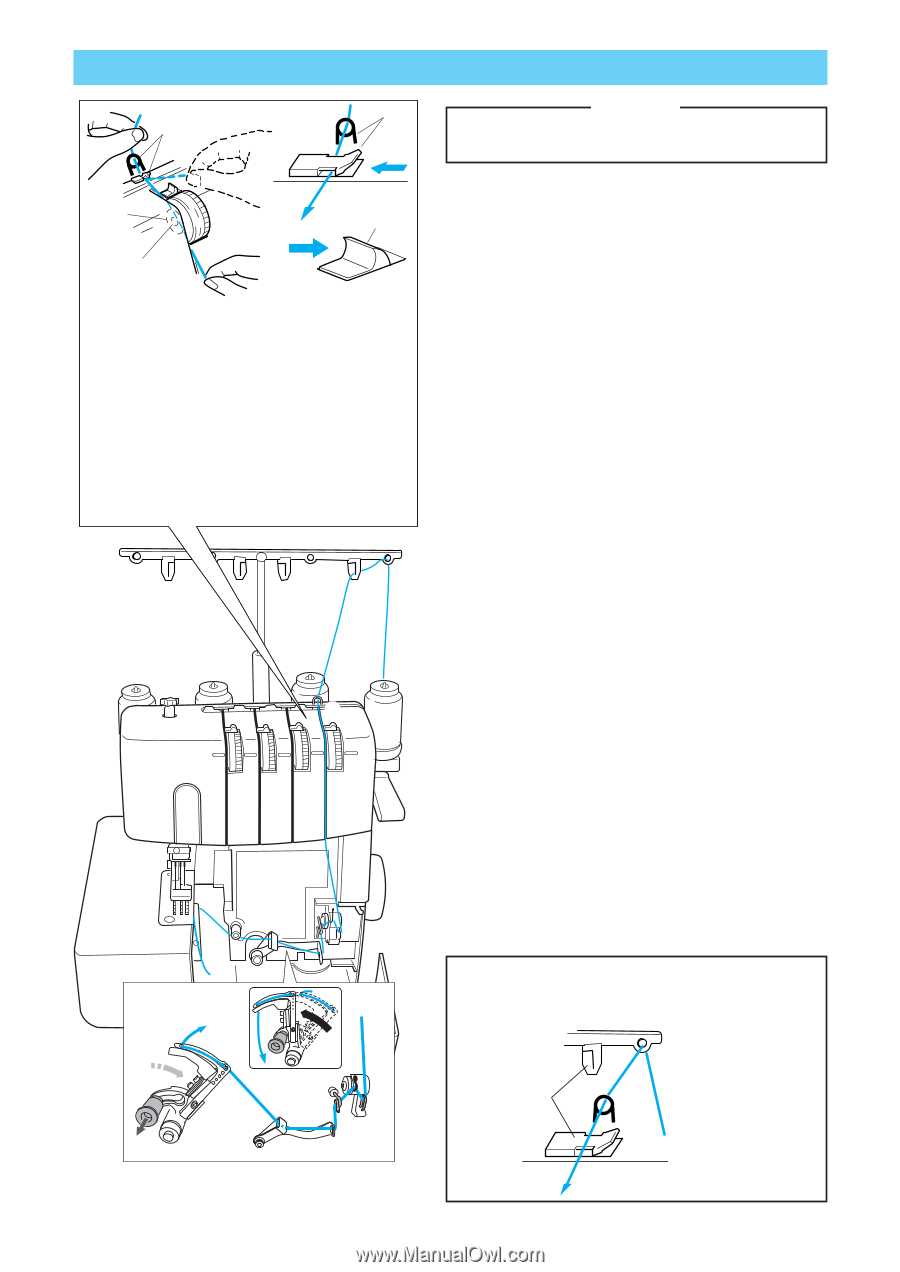
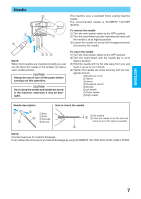
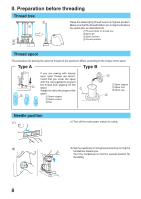
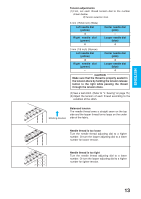
Looper threading 3 3 CAUTION Always be sure to turn off the power before carrying out the following operation. 6 A 5 4 B 4 • Pass each thread from 3 to 4 as shown in this illustration. • Pass the thread through the proper thread guide. • Slide and hold the thread tension release button to the right, then pass the thread through the tension disc which is in the channel next to the tension adjustment dial. Release the button. A Tension disk B Thread tension release button 1 2 3 4 5 (1) Follow the procedure described below to thread the looper. 1 Open the front cover by sliding to the right and guiding the top toward you. 2 Run the thread in the sequence illustrated, following the blue color and the numbers next to each threading point. (1-0) 3 After running the thread to 0, pull the release lever A, and then run the thread through B and C. 4 With about 10 cm (4 inch) of thread pulled through the eye of the needle, as shown by D in the illustration, move the looper back in the direction of the arrow to lock it. 5 Close the front cover. C A 10 B D 7 08 6 9 NOTE: When using thick thread, such as decorative thread, as the looper thread, run the thread as shown in the illustration. A Do not run the thread through A.
-
 1
1 -
2
-
3
-
4
-
5
-
6
-
 7
7 -
 8
8 -
 9
9 -
 10
10 -
 11
11 -
 12
12 -
 13
13 -
 14
14 -
 15
15 -
 16
16 -
 17
17 -
18
-
19
-
20
-
21
-
22
-
23
-
24
-
25
-
26
-
27
-
28
-
29
-
30
-
31
-
32
-
33
-
34
-
35
-
36
-
37
-
38
-
39
-
40
 |
 |