Brother International 2340CV Users Manual - English and Spanish - Page 14
Two needles three threads cover stitch - cover stitch machine
 |
View all Brother International 2340CV manuals
Add to My Manuals
Save this manual to your list of manuals |
Page 14 highlights
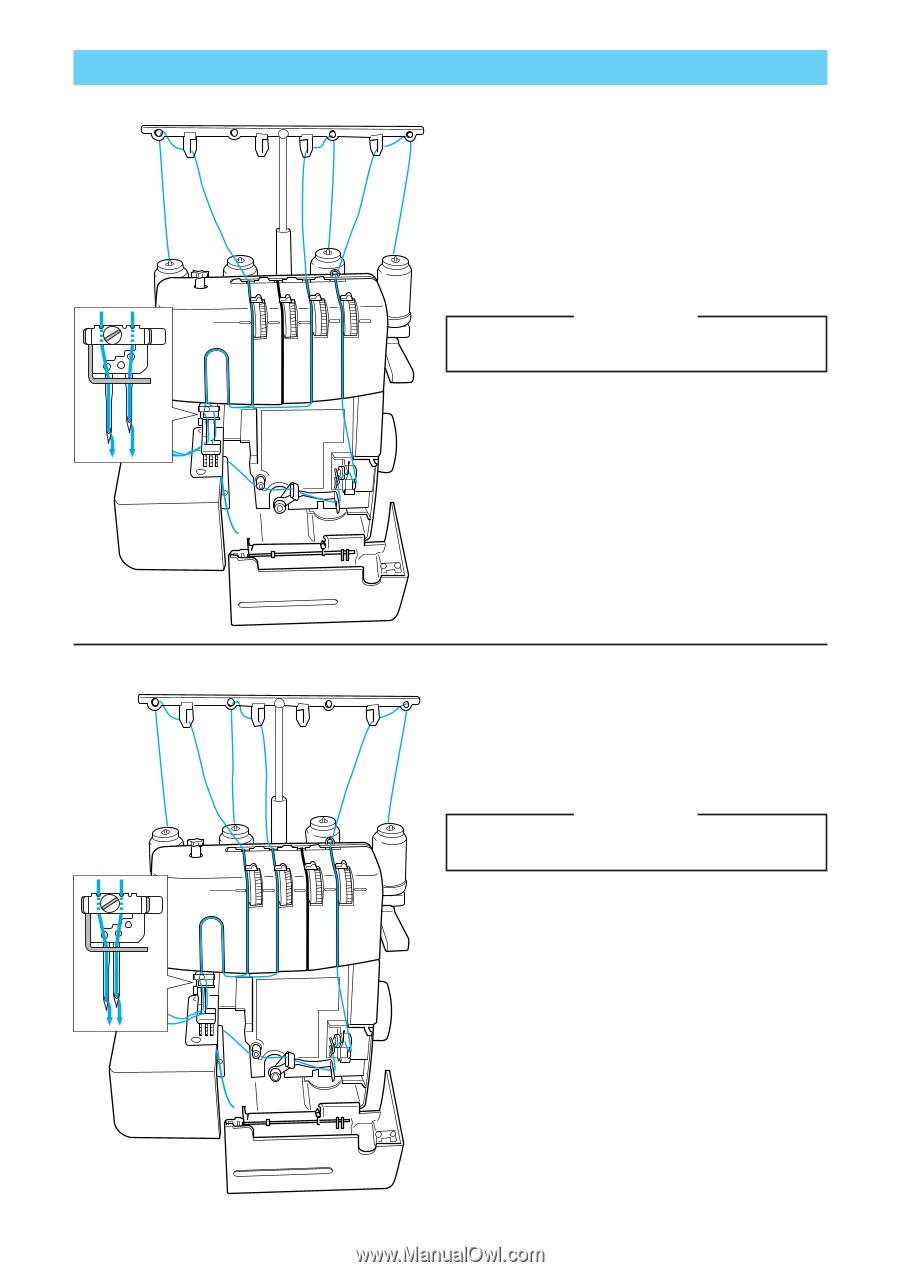
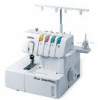
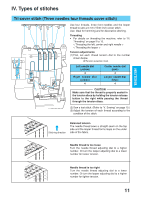
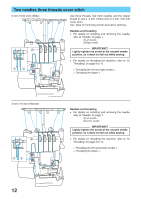
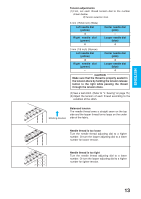
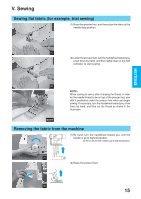
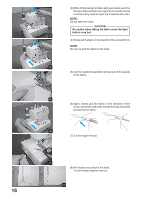
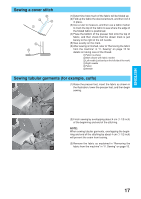
Two needles three threads cover stitch 6 mm (15/64 inch) (Wide) Use three threads, two front needles and the looper thread to sew a 6 mm (15/64 inch) or 3 mm (1/8 inch) cover stitch. Use: Ideal for hemming and for decorative stitching. Needles and threading • For details on installing and removing the needle, refer to "Needle" on page 7. 1 Left needle 2 Right needle A IMPORTANT!! Lightly tighten the screw at the unused needle position, so it does not fall out while sewing. 12 • For details on threading the machine, refer to "III. Threading" on page 9 to 10. < Threading the left and right needle > < Threading the looper > 3 mm (1/8 inch) (Narrow) A 34 Needles and threading • For details on installing and removing the needle, refer to "Needle" on page 7. 3 Left needle 4 Center needle IMPORTANT!! Lightly tighten the screw at the unused needle position, so it does not fall out while sewing. • For details on threading the machine, refer to "III. Threading" on page 9 to 10. < Threading the left and center needle > < Threading the looper > 12
-
 1
1 -
2
-
3
-
4
-
5
-
6
-
7
-
8
-
 9
9 -
 10
10 -
 11
11 -
 12
12 -
 13
13 -
 14
14 -
 15
15 -
 16
16 -
 17
17 -
 18
18 -
 19
19 -
20
-
21
-
22
-
23
-
24
-
25
-
26
-
27
-
28
-
29
-
30
-
31
-
32
-
33
-
34
-
35
-
36
-
37
-
38
-
39
-
40
 |
 |