Brother International 2340CV Users Manual - English and Spanish - Page 19
Sewing tubular garments for example, cuffs, Sewing a cover stitch - 2 3 4 cover stitch machine
 |
View all Brother International 2340CV manuals
Add to My Manuals
Save this manual to your list of manuals |
Page 19 highlights
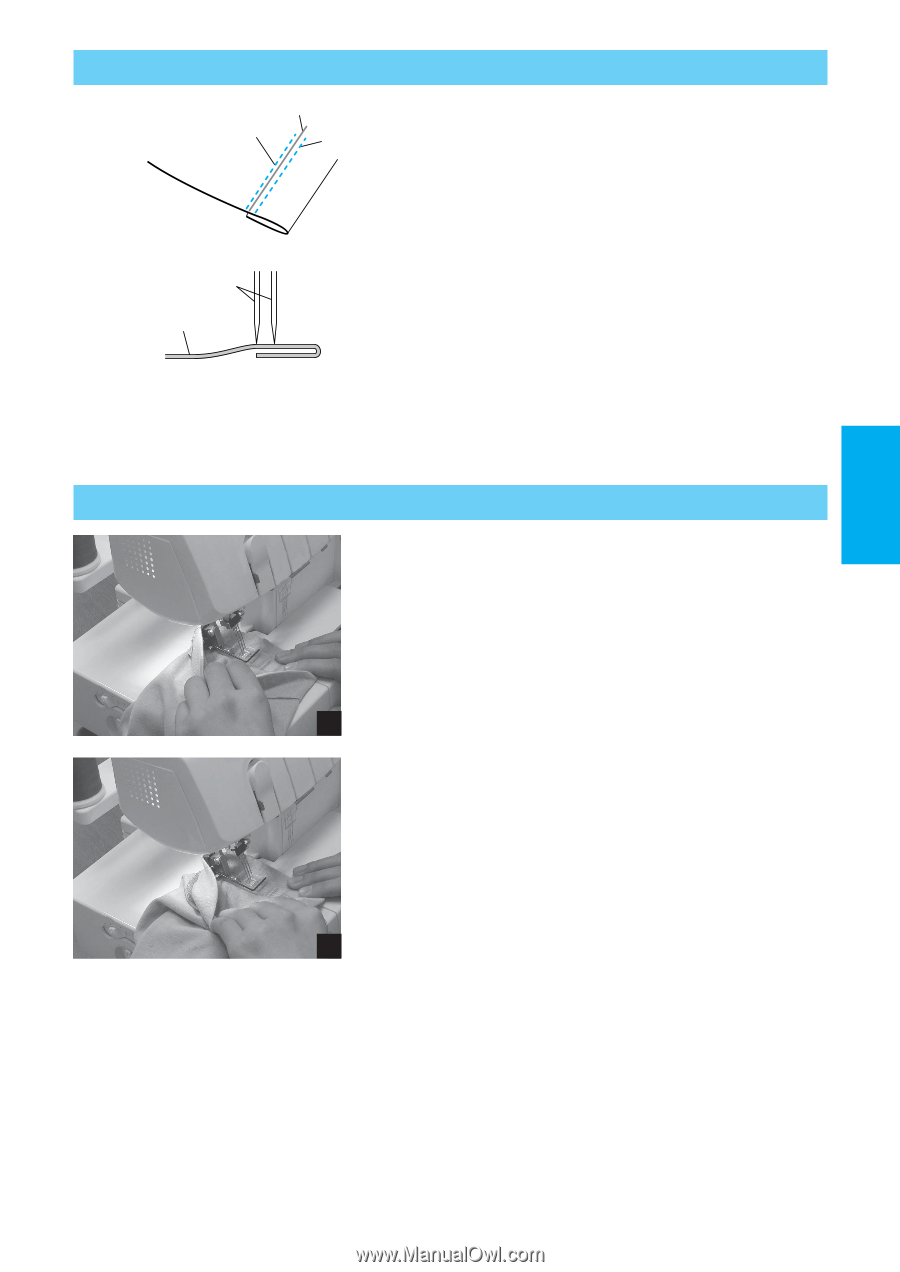
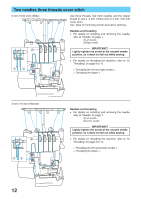
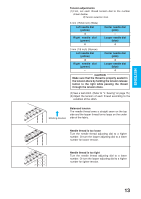
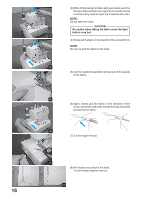
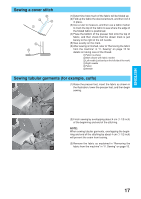
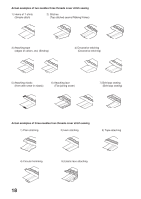
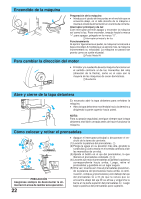
ENGLISH Sewing a cover stitch 2 3 4 1 6 5 (1) Determine how much of the fabric will be folded up. (2) Fold up the fabric the desired amount, and then iron it in place. (3) Use a ruler to measure, and then use a fabric marker to mark the top of the fabric to see where the edge of the folded fabric is positioned. (4) Place the bottom of the presser foot onto the top of fabric, and then check that the drawn mark is just barely to the right of the left needle. (5) Sew exactly on the mark. (6) After sewing is finished, refer to "Removing the fabric from the machine" in "V. Sewing" on page 15 for details on taking care of the thread. 1 Fabric (surface) 2 Mark drawn with fabric marker 3 Left needle (just barely on the left side of the mark) 4 Right needle 5 Fabric 6 Needle Sewing tubular garments (for example, cuffs) (1) Raise the presser foot, insert the fabric as shown in the illustration, lower the presser foot, and then begin sewing. (1) (2) Finish sewing by overlapping about 4 cm (1-1/2 inch) of the beginning and end of the stitching. NOTE: When sewing tubular garments, overlapping the beginning and end of the stitching by about 4 cm (1-1/2 inch) will prevent the seam from tearing. (3) Remove the fabric as explained in "Removing the (2) fabric from the machine" in "V. Sewing" on page 15. 17
-
 1
1 -
2
-
3
-
4
-
5
-
6
-
7
-
8
-
9
-
10
-
11
-
12
-
13
-
 14
14 -
 15
15 -
 16
16 -
 17
17 -
 18
18 -
 19
19 -
 20
20 -
 21
21 -
 22
22 -
 23
23 -
 24
24 -
25
-
26
-
27
-
28
-
29
-
30
-
31
-
32
-
33
-
34
-
35
-
36
-
37
-
38
-
39
-
40
 |
 |