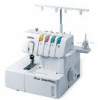
Brother International 2340CV Users Manual - English and Spanish - Page 15
Make sure that the thread is properly seated
 |
View all Brother International 2340CV manuals
Add to My Manuals
Save this manual to your list of manuals |
Page 15 highlights
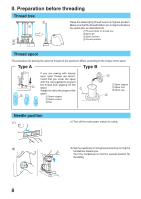
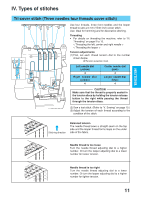
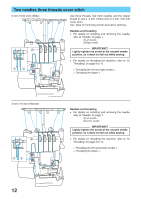
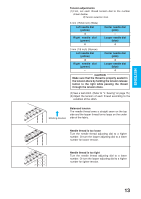
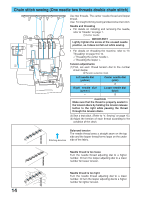
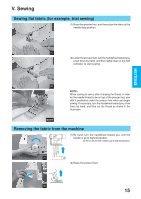
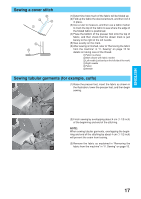
ENGLISH Tension adjustments (1) First, set each thread tension dial to the number shown below. A Tension selection mark 6 mm (15/64 inch) (Wide) Left needle dial (yellow) 4 Right needle dial (green) 4 Center needle dial (pink) - Looper needle dial (blue) 4 3 mm (1/8 inch) (Narrow) Left needle dial (yellow) 4 Right needle dial (green) - Center needle dial (pink) 4 Looper needle dial (blue) 4 CAUTION Make sure that the thread is properly seated in the tension discs by holding the tension release button to the right while passing the thread through the tension discs. (2) Sew a test stitch. (Refer to "V. Sewing" on page 15.) (3) Adjust the tension of each thread according to the condition of the stitch. Stitching direction Balanced tension The needle thread sews a straight seam on the top side and the looper thread forms loops on the under side of the fabric. Needle thread is too loose Turn the needle thread adjusting dial to a higher number. Or turn the looper adjusting dial to a lower number for looser tension. Needle thread is too tight Turn the needle thread adjusting dial to a lower number. Or turn the looper adjusting dial to a higher number for tighter tension. 13
-
 1
1 -
2
-
3
-
4
-
5
-
6
-
7
-
8
-
9
-
 10
10 -
 11
11 -
 12
12 -
 13
13 -
 14
14 -
 15
15 -
 16
16 -
 17
17 -
 18
18 -
 19
19 -
 20
20 -
21
-
22
-
23
-
24
-
25
-
26
-
27
-
28
-
29
-
30
-
31
-
32
-
33
-
34
-
35
-
36
-
37
-
38
-
39
-
40
 |
 |
