Brother International CS-6000/6000b/6000t Operation Manual - Page 16
Using the needle threader for models, equipped with the needle threader
 |
View all Brother International CS-6000/6000b/6000t manuals
Add to My Manuals
Save this manual to your list of manuals |
Page 16 highlights
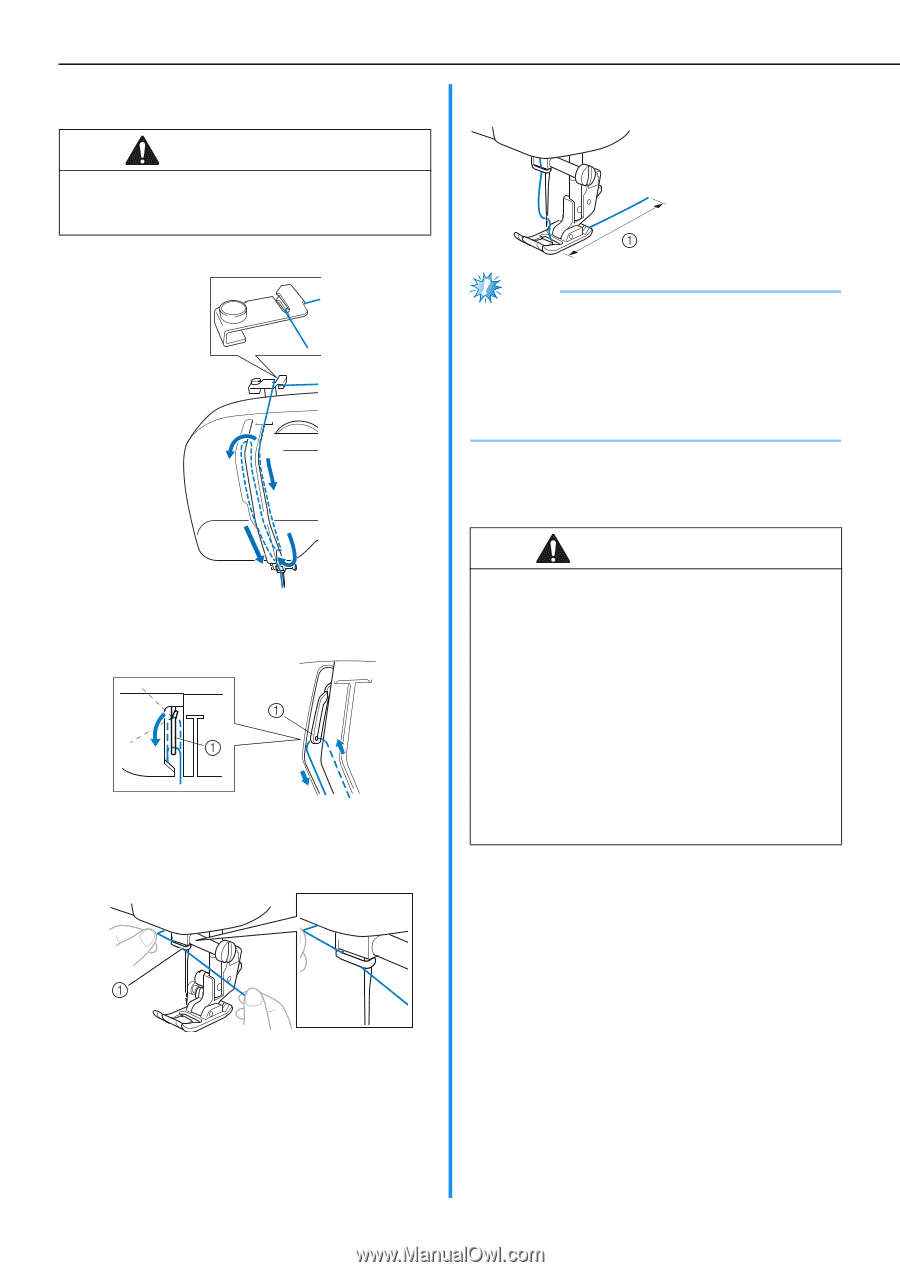
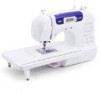
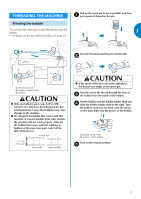
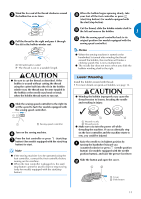
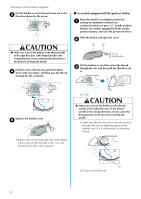
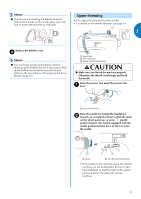
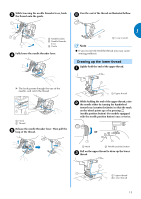
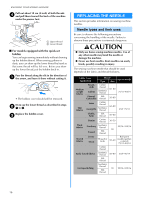
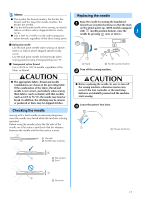
KNOWING YOUR SEWING MACHINE Pull up the spool pin as far as possible, and then c put a spool of thread on this pin. CAUTION ● If the spool of thread is in the wrong place, or is set incorrectly, the thread may tangle on the spool pin and cause the needle to break. Feed the upper thread as illustrated below. d Thread the needle from front to back and pull g out about 5 cm (2 inch) of thread. a 5 cm (2 inch) Note ● If the thread take-up lever is lowered, the upper thread cannot be wrapped around the thread takeup lever. Make sure you raise the presser foot lever and the thread take-up lever before you feed the upper thread. ● If you incorrectly feed the thread you may cause sewing problems. Make sure you guide the thread through the e thread take-up lever from right to left. a Thread take-up lever Put the thread behind the needle bar thread f guide. ■ Using the needle threader (for models equipped with the needle threader) CAUTION ● The needle threader can only be used with home sewing machine needles size 75/11-100/ 16. Check the table on page 16 for the appropriate needle and thread combinations. If you are using transparent nylon mono-filament thread, you can only use needles in the range of 90/14-100/16. ● You cannot use the needle threader if you are using decorative threads or special needles, such as the twin needle and wing needle. If you are using those types of threads or needles, thread the eye of the needle by hand. Make sure the main power switch is off when threading the needle by hand. Follow steps 1 through 6 of the procedure in a "Upper threading". Lower the presser foot lever. b a Needle bar thread guide 14
-
 1
1 -
2
-
3
-
4
-
5
-
6
-
7
-
8
-
9
-
10
-
 11
11 -
 12
12 -
 13
13 -
 14
14 -
 15
15 -
 16
16 -
 17
17 -
 18
18 -
 19
19 -
 20
20 -
 21
21 -
22
-
23
-
24
-
25
-
26
-
27
-
28
-
29
-
30
-
31
-
32
-
33
-
34
-
35
-
36
-
37
-
38
-
39
-
40
-
41
-
42
-
43
-
44
-
45
-
46
-
47
-
48
-
49
-
50
-
51
-
52
-
53
-
54
-
55
-
56
-
57
-
58
-
59
-
60
 |
 |