Brother International HL-5070N Quick Setup Guide - English - Page 6
Getting Started, Carton Components
 |
View all Brother International HL-5070N manuals
Add to My Manuals
Save this manual to your list of manuals |
Page 6 highlights
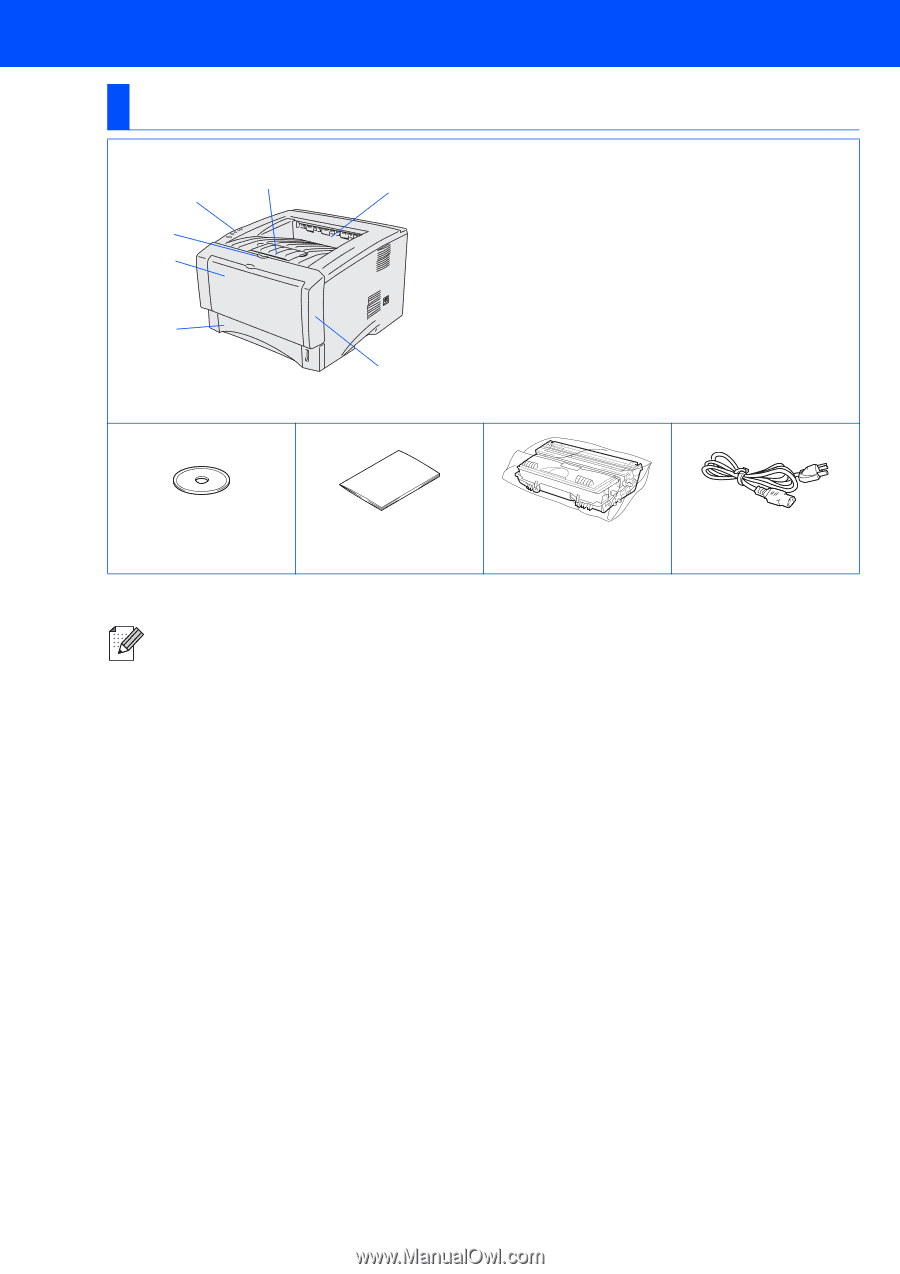
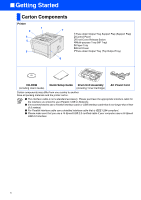
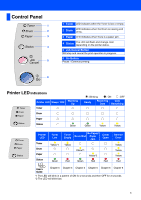
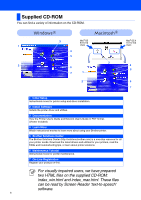
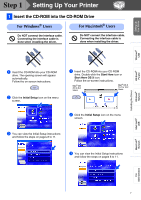
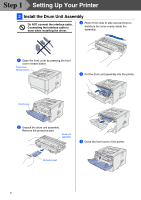
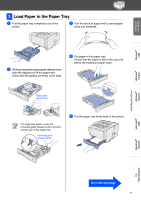
■ Getting Started Carton Components Printer 1 2 7 3 4 5 6 1 Face-down Output Tray Support Flap (Support Flap) 2 Control Panel 3 Front Cover Release Button 4 Multi-purpose Tray (MP Tray) 5 Paper Tray 6 Front Cover 7 Face-down Output Tray (Top Output Tray) CD-ROM (including User's Guide) Quick Setup Guide Drum Unit Assembly (including Toner Cartridge) AC Power Cord Carton components may differ from one country to another. Save all packing materials and the printer carton. ■ The interface cable is not a standard accessory. Please purchase the appropriate interface cable for the interface you intend to use (Parallel, USB or Network). ■ It's recommended to use a Parallel interface cable or USB interface cable that is not longer than 6 feet (2.0 meters). ■ For Parallel interface cable use a shielded interface cable that is IEEE 1284-compliant. ■ Please make sure that you use a Hi-Speed USB 2.0 certified cable if your computer uses a Hi-Speed USB 2.0 interface. 4
-
 1
1 -
 2
2 -
 3
3 -
 4
4 -
 5
5 -
 6
6 -
 7
7 -
 8
8 -
 9
9 -
 10
10 -
 11
11 -
 12
12 -
13
-
14
-
15
-
16
-
17
-
18
-
19
-
20
-
21
-
22
-
23
-
24
-
25
-
26
-
27
-
28
-
29
-
30
-
31
-
32
-
33
-
34
-
35
-
36
-
37
-
38
 |
 |