Brother International MFC 9160 Owners Manual - Page 56
Accessing the Scanner, Scanning a Document into your PC, Settings in the Scanner Window, Image
 |
View all Brother International MFC 9160 manuals
Add to My Manuals
Save this manual to your list of manuals |
Page 56 highlights
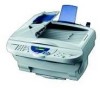
Accessing the Scanner To choose TWAIN_32 Brother MFL Pro Colour as your scanner driver, select it under the "Select scanner"-OR-"Select source" option in your software. From the PaperPort® window, select Acquire from the File drop-down menu or select the TWAIN or Scan button. The Colour Setup dialog box will appear: Scanning a Document into your PC 1 Insert the document face up in the ADF, or face down on the glass platen. 2 Adjust the following settings, if needed, in the Scanner Setup window: x Resolution x Scan Type (Black & White, Grey [Error Diffusion], True Grey, 256 Colour, 24 bit colour, 24 bit colour (fast)) x Brightness x Contrast x Size 3 Select the Start button from the Scanner window. When scanning is completed, close the scanner window. The PaperPort® screen will appear showing the image you scanned highlighted in red. Settings in the Scanner Window Image Resolution Select the scanning resolution from the Resolution drop down list. Higher resolutions take more memory and transfer time, but can achieve a finer scanned image. 50 Chapter 6
-
 1
1 -
2
-
3
-
4
-
5
-
6
-
7
-
8
-
9
-
10
-
11
-
12
-
13
-
14
-
15
-
16
-
17
-
18
-
19
-
20
-
21
-
22
-
23
-
24
-
25
-
26
-
27
-
28
-
29
-
30
-
31
-
32
-
33
-
34
-
35
-
36
-
37
-
38
-
39
-
40
-
41
-
42
-
43
-
44
-
45
-
46
-
47
-
48
-
49
-
50
-
 51
51 -
 52
52 -
 53
53 -
 54
54 -
 55
55 -
 56
56 -
 57
57 -
 58
58 -
 59
59 -
 60
60 -
 61
61 -
62
-
63
-
64
-
65
-
66
-
67
-
68
-
69
-
70
-
71
-
72
-
73
-
74
-
75
-
76
-
77
-
78
-
79
-
80
-
81
-
82
-
83
-
84
-
85
-
86
-
87
-
88
-
89
-
90
-
91
-
92
-
93
-
94
-
95
-
96
 |
 |
