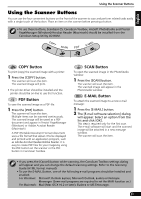
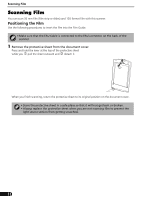
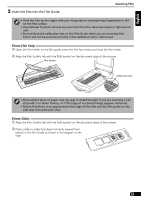
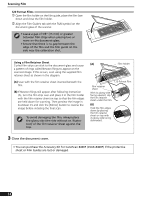
Canon 8400F CanoScan 8400F Quick Start Guide - Page 10
Select the [Output Size]. - canoscan manual
 |
UPC - 013803045703
View all Canon 8400F manuals
Add to My Manuals
Save this manual to your list of manuals |
Page 10 highlights
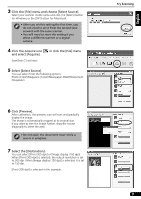
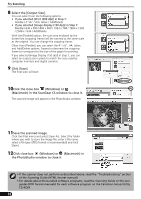
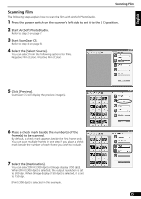
Try Scanning 8 Select the [Output Size]. You can select from the following options. • If you selected [Print (300 dpi)] in Step 7: Flexible / 4"x6" / A4 / Letter / Add/Delete • If you selected [Image display (150 dpi)] in Step 7: Flexible / 640 x 480 / 800 x 600 / 1024 x 768 / 1600 x 1200 / 2048 x 1536 / Add/Delete With the [Flexible] option, the scan area enclosed by the dotted line (cropping frame) will be scanned at the same scale as the original. You can change the cropping frame. Other than [Flexible], you can select the 4" x 6", A4, Letter, and Add/Delete options. Expand or decrease the cropping frame to correspond to the size of the paper for printing. If you selected [Image Display (150 dpi)] in Step 7, you can select an output size in pixels to match the sizes used by computer monitors and digital cameras. 9 Click [Scan]. The final scan will start. 10Click the close box (Windows) or (Macintosh) in the ScanGear CS window to close it. The scanned image will appear in the PhotoStudio window. 11Save the scanned image. Click the [File] menu and select [Save As]. Select the folder where you wish to store the image file, enter a file name, select a file type (JPEG format is recommended) and click [Save]. 12Click close box (Windows) or (Macintosh) in the PhotoStudio window to close it. • If the scanner does not perform as described above, read the "Troubleshooting" section of the Scanning Guide (HTML format manual). • For details about the bundled software programs, read the Scanning Guide or the user guides (PDF format manuals) for each software program on the CanoScan Setup Utility CD-ROM. 10
-
 1
1 -
2
-
3
-
4
-
 5
5 -
 6
6 -
 7
7 -
 8
8 -
 9
9 -
 10
10 -
 11
11 -
 12
12 -
 13
13 -
 14
14 -
 15
15 -
16
-
17
-
18
 |
 |