Canon 8400F CanoScan 8400F Quick Start Guide - Page 15
Select the [Select Source]. - scan negatives
 |
UPC - 013803045703
View all Canon 8400F manuals
Add to My Manuals
Save this manual to your list of manuals |
Page 15 highlights
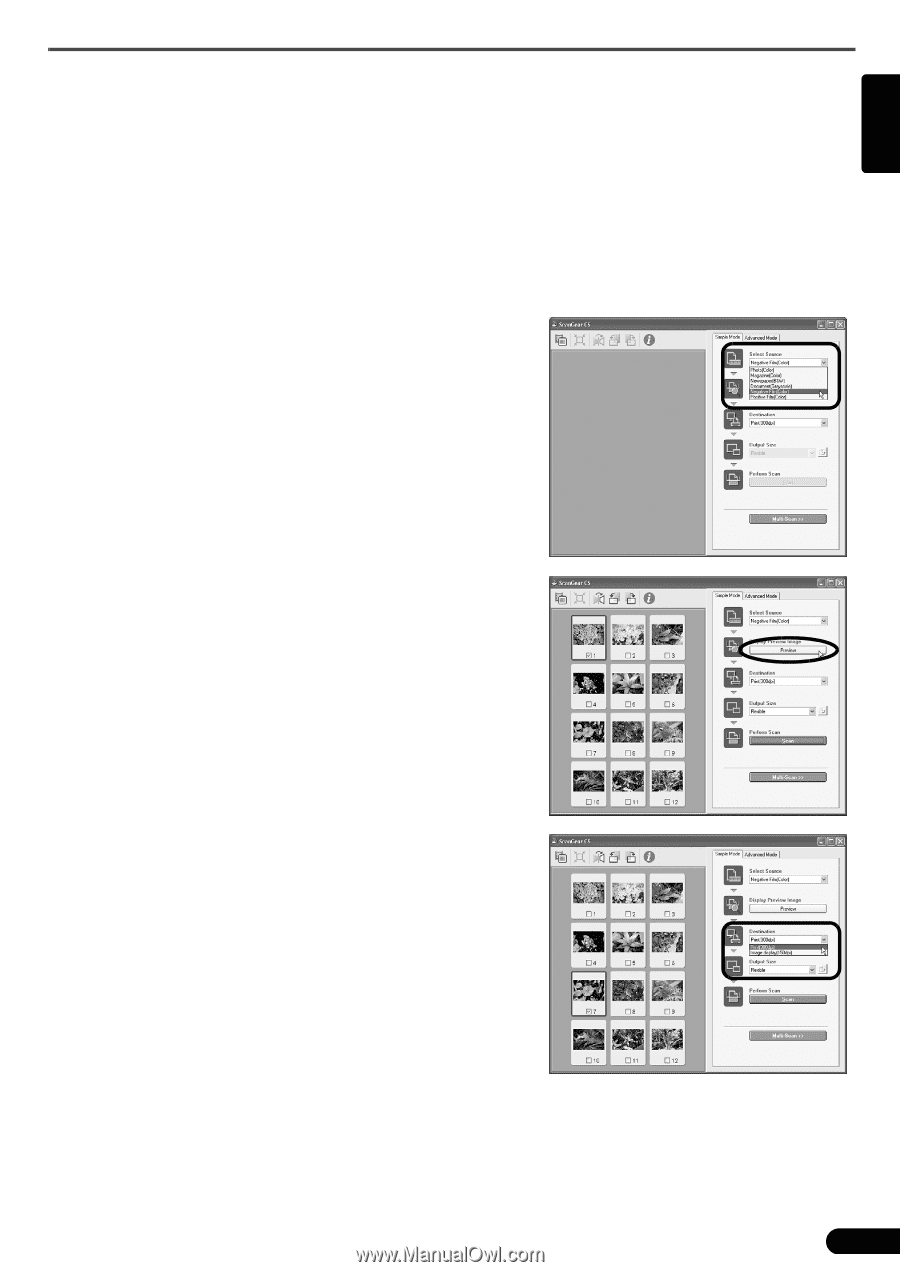
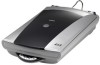
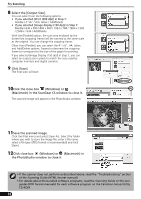
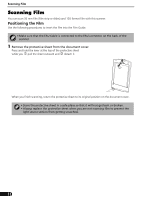
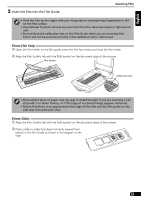
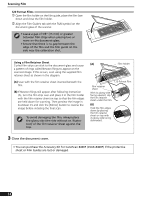
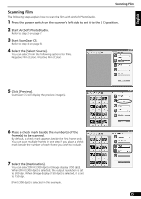
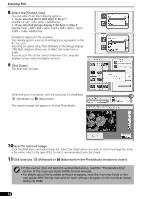
English Scanning Film Scanning Film The following steps explain how to scan the film with ArcSoft PhotoStudio. 1 Press the power switch on the scanner's left side to set it to the ( I ) position. 2 Start ArcSoft PhotoStudio. Refer to step 2 on page 7. 3 Start ScanGear CS. Refer to step 4 on page 8. 4 Select the [Select Source]. You can select from the following options for films. Negative Film (Color) / Positive Film (Color) 5 Click [Preview]. ScanGear CS will display the preview image(s). 6 Place a check mark beside the number(s) of the frame(s) to be scanned. By default, a check mark appears beside the first frame only. You can scan multiple frames in one step if you place a check mark beside the number of each frame you wish to include. 7 Select the [Destination]. You can select [Print (300 dpi)] or [Image display (150 dpi)]. When [Print (300 dpi)] is selected, the output resolution is set to 300 dpi. When [Image display (150 dpi)] is selected, it is set to 150 dpi. [Print (300 dpi)] is selected in this example. 15
-
 1
1 -
2
-
3
-
4
-
5
-
6
-
7
-
8
-
9
-
 10
10 -
 11
11 -
 12
12 -
 13
13 -
 14
14 -
 15
15 -
 16
16 -
 17
17 -
 18
18
 |
 |