Canon BJC 6000 Service Manual - Page 51
Connecting the Interface Cable, 3 Installation - orange light
 |
View all Canon BJC 6000 manuals
Add to My Manuals
Save this manual to your list of manuals |
Page 51 highlights
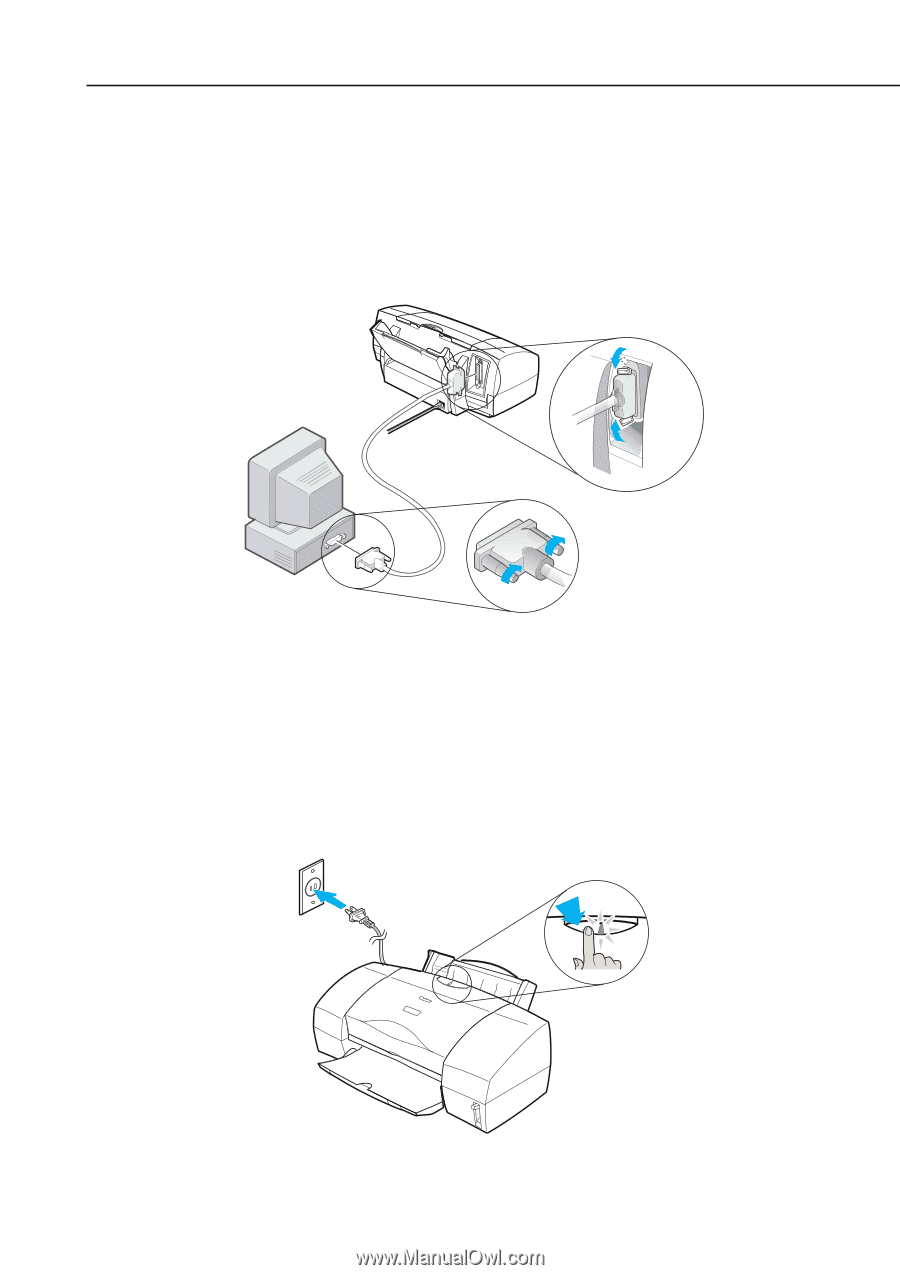
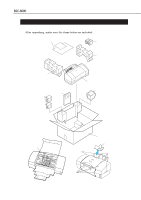
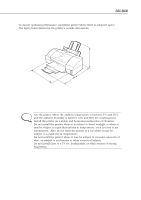
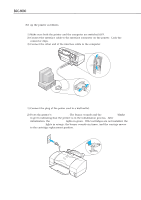
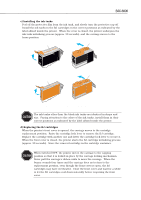
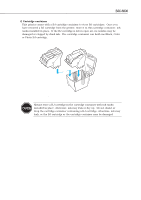
BJC-6000 Part 3: Operating Instructions 1.3 Installation Set up the printer as follows. 1.3.1 Connecting the interface cable 1) Make sure both the printer and the computer are switched OFF. 2) Connect the interface cable to the interface connector on the printer. Lock the connector clips. 3) Connect the other end of the interface cable to the computer. Figure 3-3 Connecting the Interface Cable 1.3.2 Connecting the power cord 1) Connect the plug of the power cord to a wall outlet. 2) Press the printer's POWER button. The buzzer sounds and the POWER lamp blinks in green indicating that the printer is in the initialization process. After initialization, the POWER lamp lights in green. If BJ cartridges are not installed, the POWER lamp lights in orange, the buzzer sounds six times, and the carriage moves to the cartridge replacement position. Figure 3-4 Connecting the Power Cord 3-3
-
 1
1 -
2
-
3
-
4
-
5
-
6
-
7
-
8
-
9
-
10
-
11
-
12
-
13
-
14
-
15
-
16
-
17
-
18
-
19
-
20
-
21
-
22
-
23
-
24
-
25
-
26
-
27
-
28
-
29
-
30
-
31
-
32
-
33
-
34
-
35
-
36
-
37
-
38
-
39
-
40
-
41
-
42
-
43
-
44
-
45
-
 46
46 -
 47
47 -
 48
48 -
 49
49 -
 50
50 -
 51
51 -
 52
52 -
 53
53 -
 54
54 -
 55
55 -
 56
56 -
57
-
58
-
59
-
60
-
61
-
62
-
63
-
64
-
65
-
66
-
67
-
68
-
69
-
70
-
71
-
72
-
73
-
74
-
75
-
76
-
77
-
78
-
79
-
80
-
81
-
82
-
83
-
84
-
85
-
86
-
87
-
88
-
89
-
90
-
91
-
92
-
93
-
94
-
95
-
96
-
97
-
98
-
99
-
100
-
101
-
102
-
103
-
104
-
105
-
106
-
107
-
108
-
109
-
110
-
111
-
112
-
113
-
114
-
115
-
116
-
117
-
118
-
119
-
120
-
121
-
122
-
123
-
124
-
125
-
126
-
127
-
128
-
129
-
130
-
131
-
132
-
133
-
134
-
135
-
136
-
137
-
138
-
139
-
140
-
141
-
142
-
143
-
144
-
145
-
146
-
147
-
148
-
149
-
150
-
151
-
152
-
153
-
154
-
155
-
156
-
157
-
158
-
159
-
160
-
161
-
162
-
163
-
164
-
165
-
166
-
167
-
168
-
169
-
170
-
171
-
172
-
173
-
174
 |
 |