Canon Color imageCLASS MF8170c imageCLASS MF8170c Basic Guide - Page 71
Adjusting the Color Balance
 |
View all Canon Color imageCLASS MF8170c manuals
Add to My Manuals
Save this manual to your list of manuals |
Page 71 highlights
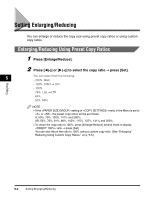
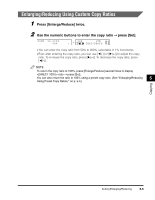
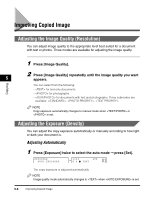
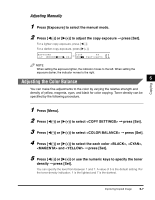
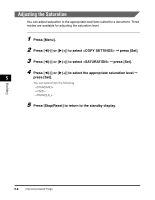
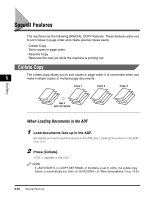
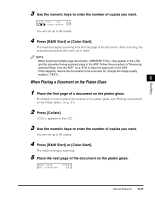
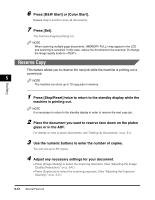
Copying Adjusting Manually 1 Press [Exposure] to select the manual mode. 2 Press [((-)] or [)(+)] to adjust the copy exposure ➞ press [Set]. For a lighter copy exposure, press [((-)]. For a darker copy exposure, press [)(+)]. EXPOSURE -LT 01 1 0 0 % A4 DK+ ➞ TEXT/PHOTO NOTE When setting the exposure lighter, the indicator moves to the left. When setting the exposure darker, the indicator moves to the right. 5 Adjusting the Color Balance You can make fine adjustments to the color by varying the relative strength and density of yellow, magenta, cyan, and black for color copying. Toner density can be specified by the following procedure. 1 Press [Menu]. 2 Press [((-)] or [)(+)] to select ➞ press [Set]. 3 Press [((-)] or [)(+)] to select ➞ press [Set]. 4 Press [((-)] or [)(+)] to select the each color , , and ➞ press [Set]. 5 Press [((-)] or [)(+)] or use the numeric keys to specify the toner density ➞ press [Set]. You can specify the level from between 1 and 7. A value of 5 is the default setting. For the toner density indication, 1 is the lightest and 7 is the darkest. Improving Copied Image 5-7
-
 1
1 -
2
-
3
-
4
-
5
-
6
-
7
-
8
-
9
-
10
-
11
-
12
-
13
-
14
-
15
-
16
-
17
-
18
-
19
-
20
-
21
-
22
-
23
-
24
-
25
-
26
-
27
-
28
-
29
-
30
-
31
-
32
-
33
-
34
-
35
-
36
-
37
-
38
-
39
-
40
-
41
-
42
-
43
-
44
-
45
-
46
-
47
-
48
-
49
-
50
-
51
-
52
-
53
-
54
-
55
-
56
-
57
-
58
-
59
-
60
-
61
-
62
-
63
-
64
-
65
-
 66
66 -
 67
67 -
 68
68 -
 69
69 -
 70
70 -
 71
71 -
 72
72 -
 73
73 -
 74
74 -
 75
75 -
 76
76 -
77
-
78
-
79
-
80
-
81
-
82
-
83
-
84
-
85
-
86
-
87
-
88
-
89
-
90
-
91
-
92
-
93
-
94
-
95
-
96
-
97
-
98
-
99
-
100
-
101
-
102
-
103
-
104
-
105
-
106
-
107
-
108
-
109
-
110
-
111
-
112
-
113
-
114
-
115
-
116
-
117
-
118
-
119
-
120
-
121
-
122
-
123
-
124
-
125
-
126
-
127
-
128
-
129
-
130
-
131
-
132
-
133
-
134
-
135
-
136
-
137
-
138
-
139
-
140
-
141
-
142
-
143
-
144
-
145
-
146
-
147
-
148
-
149
-
150
-
151
-
152
-
153
-
154
-
155
-
156
-
157
-
158
-
159
-
160
-
161
-
162
-
163
-
164
-
165
-
166
-
167
-
168
-
169
-
170
-
171
-
172
-
173
-
174
-
175
-
176
 |
 |