Canon EOS M3 EF-M 18-55mm IS STM Kit User Guide - Page 159
Saving Images to a Computer
 |
View all Canon EOS M3 EF-M 18-55mm IS STM Kit manuals
Add to My Manuals
Save this manual to your list of manuals |
Page 159 highlights
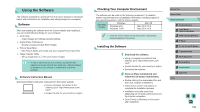
Saving Images to a Computer Use an interface cable (=2) to connect your camera and save images to a personal computer. Windows 7 and Mac OS X 10.8 are used here for the sake of illustration. 1 Connect the camera to the computer. ●●With the camera turned off, open the cover (1). With the smaller plug of the cable in the orientation shown, insert the plug fully into the camera terminal (2). ●●Insert the larger plug of the cable into the computer's USB port. For details about USB connections on the computer, refer to the computer user manual. 2 Turn on the camera and bring up EOS Utility. ●●Press the [ ] button to turn the camera on. ●●On Windows, double-click on the EOS Utility icon on the desktop. ●●On Mac OS, click on the EOS Utility icon in the Dock (the bar at the bottom of the desktop screen). ●●On subsequent connections, EOS Utility will start up automatically when you connect the camera to the computer and turn on the camera. 3 Import images. ●●Click on [Download images to computer], then [Start automatic download]. ●●Images will be loaded into the computer and saved to the Pictures folder, in separate folders named by date. Digital Photo Professional will then start up automatically and display the loaded images. ●●After the image-loading process is complete, close EOS Utility, press the power button to turn the camera off, and unplug the cable. ●●To view images loaded into your computer, use Digital Photo Professional; to view movies imported onto your computer, use software that supports the movies shot with your camera (i.e. software installed as standard on your computer or software that is generally available). Before Use Basic Guide Advanced Guide 1 Camera Basics 2 Auto Mode / Hybrid Auto Mode 3 Other Shooting Modes 4 P Mode 5 Tv, Av, aMn,danMdMCoMdeodes 6 Playback Mode 7 Wi-Fi Functions 8 Set-Up Menu 9 Accessories 10 Appendix Index 159
-
 1
1 -
2
-
3
-
4
-
5
-
6
-
7
-
8
-
9
-
10
-
11
-
12
-
13
-
14
-
15
-
16
-
17
-
18
-
19
-
20
-
21
-
22
-
23
-
24
-
25
-
26
-
27
-
28
-
29
-
30
-
31
-
32
-
33
-
34
-
35
-
36
-
37
-
38
-
39
-
40
-
41
-
42
-
43
-
44
-
45
-
46
-
47
-
48
-
49
-
50
-
51
-
52
-
53
-
54
-
55
-
56
-
57
-
58
-
59
-
60
-
61
-
62
-
63
-
64
-
65
-
66
-
67
-
68
-
69
-
70
-
71
-
72
-
73
-
74
-
75
-
76
-
77
-
78
-
79
-
80
-
81
-
82
-
83
-
84
-
85
-
86
-
87
-
88
-
89
-
90
-
91
-
92
-
93
-
94
-
95
-
96
-
97
-
98
-
99
-
100
-
101
-
102
-
103
-
104
-
105
-
106
-
107
-
108
-
109
-
110
-
111
-
112
-
113
-
114
-
115
-
116
-
117
-
118
-
119
-
120
-
121
-
122
-
123
-
124
-
125
-
126
-
127
-
128
-
129
-
130
-
131
-
132
-
133
-
134
-
135
-
136
-
137
-
138
-
139
-
140
-
141
-
142
-
143
-
144
-
145
-
146
-
147
-
148
-
149
-
150
-
151
-
152
-
153
-
 154
154 -
 155
155 -
 156
156 -
 157
157 -
 158
158 -
 159
159 -
 160
160 -
 161
161 -
 162
162 -
 163
163 -
 164
164 -
165
-
166
-
167
-
168
-
169
-
170
-
171
-
172
-
173
-
174
-
175
-
176
-
177
-
178
-
179
-
180
-
181
-
182
-
183
-
184
-
185
-
186
-
187
-
188
-
189
-
190
-
191
-
192
-
193
-
194
-
195
-
196
-
197
-
198
-
199
-
200
-
201
 |
 |
