Canon LV-7545 Owners Manual - Page 33
VIDEO INPUT, IMAGE LEVEL ADJUSTMENT, Contrast, Brightness, Gamma, Color, Sharpness, White balance Red
 |
View all Canon LV-7545 manuals
Add to My Manuals
Save this manual to your list of manuals |
Page 33 highlights
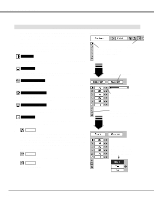
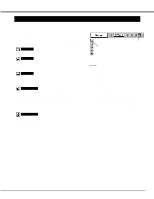
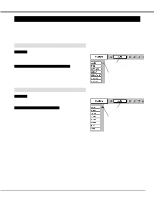
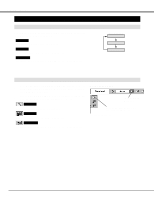
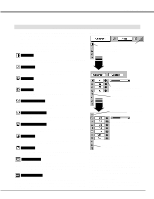
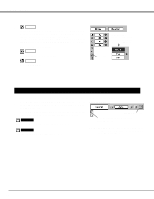
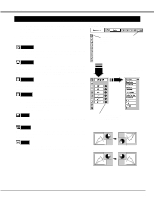
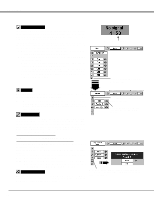
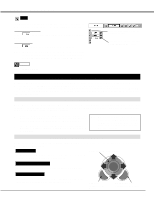
VIDEO INPUT IMAGE LEVEL ADJUSTMENT 1 Press MENU button and ON-SCREEN MENU will appear. Press POINT LEFT/RIGHT button(s) to move a red frame pointer to IMAGE ADJUST Menu icon. 2 Press POINT DOWN button to move a red frame pointer to the item that you want to adjust and then press SET button. The level of each item is displayed. Adjust each level by pressing POINT LEFT/RIGHT button(s). Contrast Press POINT LEFT button to decrease contrast, and POINT RIGHT button to increase contrast. (From 0 to 63.) Brightness Press POINT LEFT button to adjust image darker, and POINT RIGHT button to adjust brighter. (From 0 to 63.) Color Press POINT LEFT button to lighten color, and POINT RIGHT button to deeper color. (From 0 to 63.) Tint Press POINT LEFT button or POINT RIGHT button to obtain proper color. (From 0 to 63.) White balance (Red) Press POINT LEFT button to lighten red tone and POINT RIGHT button to deeper tone. (From 0 to 63.) White balance (Green) Press POINT LEFT button to lighten green tone and POINT RIGHT button to deeper tone. (From 0 to 63.) White balance (Blue) Press POINT LEFT button to lighten blue tone and POINT RIGHT button to deeper tone. (From 0 to 63.) Sharpness Press POINT LEFT button to soften the image, and POINT RIGHT button to sharpen the image. (From 0 to 31.) Gamma Press either POINT LEFT button or POINT RIGHT button to obtain better balance of contrast. (From 0 to 15.) Noise reduction Press POINT LEFT/RIGHT button(s) to change noise reduction mode. Dialog box display is changed to "On to reduce noise (rough parts) of image. Press POINT LEFT/RIGHT button(s) again, to change noise reduction mode to off. Progressive scan Press POINT LEFT/RIGHT button(s) to change progressive scan mode. Dialog box display is changed to "Off" and progressive scan mode to off. Press POINT LEFT/RIGHT button(s) again, progressive scan mode to on. IMAGE ADJUST MENU Move a red frame pointer to the item to be selected and then press SET button. IMAGE ADJUST Menu icon Press POINT LEFT/RIGHT buttons to adjust value. Press SET button at this icon to display other items. Press SET button at this icon to display previous items. Press POINT LEFT/RIGHT buttons to adjust value. Press SET button at this icon to store the value. NOTE : Tint cannot be adjusted when the video system is PAL, SECAM, PAL-M or PAL-N. Noise Reduction cannot be operated when the video signal types and systems as follow. q Composite video signal (SECAM, NTSC4.43, PAL-M and PAL-N systems). q S-video signal (SECAM, PAL-M and PAL-N systems). q Component video signal. Progressive cannot be operated when "480p", "575p", "720p", "1035i" or "1080i" is selected on AV SYSTEM MENU (P31). 33
-
 1
1 -
2
-
3
-
4
-
5
-
6
-
7
-
8
-
9
-
10
-
11
-
12
-
13
-
14
-
15
-
16
-
17
-
18
-
19
-
20
-
21
-
22
-
23
-
24
-
25
-
26
-
27
-
 28
28 -
 29
29 -
 30
30 -
 31
31 -
 32
32 -
 33
33 -
 34
34 -
 35
35 -
 36
36 -
 37
37 -
 38
38 -
39
-
40
-
41
-
42
-
43
-
44
 |
 |
