Canon MultiPASS C5500 User Guide - Page 90
Working With Address Book Entries, Sorting the Address Book, Address Book Entries, Status Bar
 |
View all Canon MultiPASS C5500 manuals
Add to My Manuals
Save this manual to your list of manuals |
Page 90 highlights
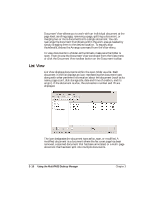
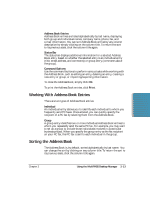
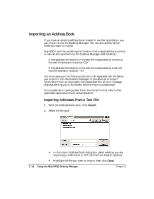
Address Book Entries Address Book entries are listed alphabetically by last name, displaying both group and individual names, company name, phone, fax, and e-mail information. You can sort Address Book entries by any column description by simply clicking on the column title. To return the sort to its previous state, click the column title again. Status Bar The status bar displays additional information for a selected Address Book entry, based on whether the selected entry is an individual entry (title, street address, and comments) or group entry (comments about the group). Command Buttons Use the command buttons to perform various tasks while working with the Address Book, such as editing an entry, deleting an entry, creating a new entry or group, or importing/exporting information. To close the Address Book, simply click OK. To print the Address Book entries, click Print. Working With Address Book Entries There are two types of Address Book entries: Individual An individual entry allows you to identify each individual to whom you frequently send PC faxes. Once entered, you can quickly specify the recipient of a PC fax by selecting them from the Address Book. Group A group entry identifies two or more individual Address Book entries to whom you repeatedly send the same PC fax. For example, you may want to set up a group to include those individuals involved in a particular business project. When you specify the group entry as the fax recipient on your PC fax, the PC fax is sent to each individual in the group. Sorting the Address Book The Address Book is, by default, sorted alphabetically by last name. You can change the sort by clicking on any column title. To return the sort to its previous state, click the column title again. MultiPASS Desktop Manager Chapter 3 Using the MultiPASS Desktop Manager 3-13
-
 1
1 -
2
-
3
-
4
-
5
-
6
-
7
-
8
-
9
-
10
-
11
-
12
-
13
-
14
-
15
-
16
-
17
-
18
-
19
-
20
-
21
-
22
-
23
-
24
-
25
-
26
-
27
-
28
-
29
-
30
-
31
-
32
-
33
-
34
-
35
-
36
-
37
-
38
-
39
-
40
-
41
-
42
-
43
-
44
-
45
-
46
-
47
-
48
-
49
-
50
-
51
-
52
-
53
-
54
-
55
-
56
-
57
-
58
-
59
-
60
-
61
-
62
-
63
-
64
-
65
-
66
-
67
-
68
-
69
-
70
-
71
-
72
-
73
-
74
-
75
-
76
-
77
-
78
-
79
-
80
-
81
-
82
-
83
-
84
-
 85
85 -
 86
86 -
 87
87 -
 88
88 -
 89
89 -
 90
90 -
 91
91 -
 92
92 -
 93
93 -
 94
94 -
 95
95 -
96
-
97
-
98
-
99
-
100
-
101
-
102
-
103
-
104
-
105
-
106
-
107
-
108
-
109
-
110
-
111
-
112
-
113
-
114
-
115
-
116
-
117
-
118
-
119
-
120
-
121
-
122
-
123
-
124
-
125
-
126
-
127
-
128
-
129
-
130
-
131
-
132
-
133
-
134
-
135
-
136
-
137
-
138
-
139
-
140
-
141
-
142
-
143
-
144
-
145
-
146
-
147
-
148
-
149
-
150
-
151
-
152
-
153
-
154
-
155
-
156
-
157
-
158
-
159
-
160
-
161
-
162
-
163
-
164
-
165
-
166
-
167
-
168
-
169
-
170
-
171
-
172
-
173
-
174
-
175
-
176
-
177
-
178
-
179
-
180
-
181
-
182
-
183
-
184
-
185
-
186
-
187
-
188
-
189
-
190
-
191
-
192
-
193
-
194
-
195
-
196
-
197
-
198
-
199
-
200
-
201
-
202
-
203
-
204
-
205
-
206
-
207
-
208
-
209
-
210
-
211
-
212
-
213
-
214
-
215
-
216
-
217
-
218
-
219
-
220
-
221
-
222
-
223
-
224
-
225
-
226
-
227
-
228
-
229
-
230
-
231
-
232
-
233
-
234
-
235
-
236
-
237
-
238
-
239
-
240
-
241
-
242
-
243
-
244
-
245
-
246
-
247
-
248
-
249
-
250
-
251
-
252
-
253
-
254
-
255
-
256
-
257
-
258
-
259
-
260
-
261
-
262
-
263
-
264
-
265
-
266
-
267
-
268
-
269
-
270
-
271
-
272
-
273
-
274
-
275
-
276
-
277
-
278
-
279
-
280
-
281
-
282
-
283
-
284
-
285
-
286
-
287
-
288
-
289
-
290
-
291
-
292
-
293
-
294
-
295
-
296
-
297
-
298
-
299
-
300
-
301
-
302
-
303
-
304
-
305
-
306
-
307
-
308
-
309
-
310
-
311
-
312
-
313
-
314
-
315
-
316
-
317
-
318
-
319
-
320
-
321
-
322
-
323
-
324
-
325
-
326
-
327
-
328
-
329
-
330
-
331
-
332
 |
 |