Canon PIXMA MX472 User Manual - Page 24
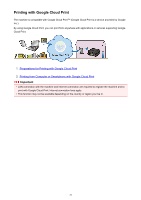
Deleting the Machine from Google Cloud Print, If your printer has a LCD monitor, If your printer
 |
View all Canon PIXMA MX472 manuals
Add to My Manuals
Save this manual to your list of manuals |
Page 24 highlights
4. When the confirmation screen to register the machine is displayed, select Yes 5. In the print setup for Google Cloud Print, select the display language, and then select Authentication 6. When the registration completion message appears, select OK Deleting the Machine from Google Cloud Print If the machine's owner changes or if you want to re-register the machine, delete the machine from Google Cloud Print by following the steps below. 1. Make sure that the machine is turned on If your printer has a LCD monitor 2. From the Home screen, select Setup (or press the Setup button on the operation panel) 3. Select Web service setup -> Connection setup -> Google Cloud Print setup (GoogleCloudPrint) -> Delete from Google Cloud Print (Delete from service) 4. When the confirmation screen to delete the machine is displayed, select Yes If your printer does not have a LCD monitor 2. Remote UI startup 3. Select Google Cloud Print setup -> Delete from Google Cloud Print 4. When the confirmation screen to delete the machine is displayed, select Yes 24
-
 1
1 -
2
-
3
-
4
-
5
-
6
-
7
-
8
-
9
-
10
-
11
-
12
-
13
-
14
-
15
-
16
-
17
-
18
-
 19
19 -
 20
20 -
 21
21 -
 22
22 -
 23
23 -
 24
24 -
 25
25 -
 26
26 -
 27
27 -
 28
28 -
 29
29 -
30
-
31
-
32
-
33
-
34
-
35
-
36
-
37
-
38
-
39
-
40
-
41
-
42
-
43
-
44
-
45
-
46
-
47
-
48
-
49
-
50
-
51
-
52
-
53
-
54
-
55
-
56
-
57
-
58
-
59
-
60
-
61
-
62
-
63
-
64
-
65
-
66
-
67
-
68
-
69
-
70
-
71
-
72
-
73
-
74
-
75
-
76
-
77
-
78
-
79
-
80
-
81
-
82
-
83
-
84
-
85
-
86
-
87
-
88
-
89
-
90
-
91
-
92
-
93
-
94
-
95
-
96
-
97
-
98
-
99
-
100
-
101
-
102
-
103
-
104
-
105
-
106
-
107
-
108
-
109
-
110
-
111
-
112
-
113
-
114
-
115
-
116
-
117
-
118
-
119
-
120
-
121
-
122
-
123
-
124
-
125
-
126
-
127
-
128
-
129
-
130
-
131
-
132
-
133
-
134
-
135
-
136
-
137
-
138
-
139
-
140
-
141
-
142
-
143
-
144
-
145
-
146
-
147
-
148
-
149
-
150
-
151
-
152
-
153
-
154
-
155
-
156
-
157
-
158
-
159
-
160
-
161
-
162
-
163
-
164
-
165
-
166
-
167
-
168
-
169
-
170
-
171
-
172
-
173
-
174
-
175
-
176
-
177
-
178
-
179
-
180
-
181
-
182
-
183
-
184
-
185
-
186
-
187
-
188
-
189
-
190
-
191
-
192
-
193
-
194
-
195
-
196
-
197
-
198
-
199
-
200
-
201
-
202
-
203
-
204
-
205
-
206
-
207
-
208
-
209
-
210
-
211
-
212
-
213
-
214
-
215
-
216
-
217
-
218
-
219
-
220
-
221
-
222
-
223
-
224
-
225
-
226
-
227
-
228
-
229
-
230
-
231
-
232
-
233
-
234
-
235
-
236
-
237
-
238
-
239
-
240
-
241
-
242
-
243
-
244
-
245
 |
 |
