Canon PIXMA SELPHY CP510 SELPHY CP710/CP510 User Guide - Page 39
Printing All Images ALL
 |
View all Canon PIXMA SELPHY CP510 manuals
Add to My Manuals
Save this manual to your list of manuals |
Page 39 highlights
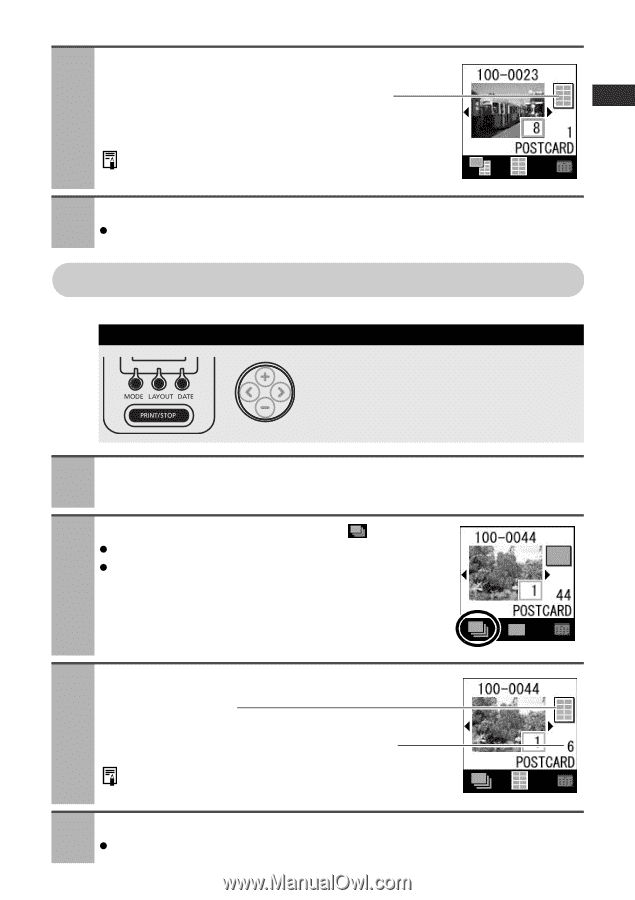
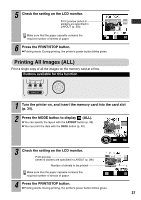
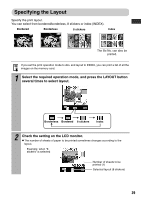
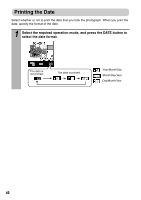
5 Check the setting on the LCD monitor. Print preview (when 8 stickers are specified in LAYOUT (p. 39)) Make sure that the paper cassette contains the required number of sheets of paper. 6 Press the PRINT/STOP button. z Printing starts. During printing, the printer's power button blinks green. Printing All Images (ALL) Print a single copy of all the images on the memory card at a time. Buttons available for this function 1 Turn the printer on, and insert the memory card into the card slot (p. 34). 2 Press the MODE button to display (ALL). z You can specify the layout with the LAYOUT button (p. 39). z You can print the date with the DATE button (p. 40). 3 Check the setting on the LCD monitor. Print preview (when 8 stickers are specified in LAYOUT (p. 39)) Number of sheets to be printed Make sure that the paper cassette contains the required number of sheets of paper. 4 Press the PRINT/STOP button. z Printing starts. During printing, the printer's power button blinks green. 37
-
 1
1 -
2
-
3
-
4
-
5
-
6
-
7
-
8
-
9
-
10
-
11
-
12
-
13
-
14
-
15
-
16
-
17
-
18
-
19
-
20
-
21
-
22
-
23
-
24
-
25
-
26
-
27
-
28
-
29
-
30
-
31
-
32
-
33
-
 34
34 -
 35
35 -
 36
36 -
 37
37 -
 38
38 -
 39
39 -
 40
40 -
 41
41 -
 42
42 -
 43
43 -
 44
44 -
45
-
46
-
47
-
48
-
49
-
50
-
51
-
52
-
53
-
54
-
55
-
56
-
57
-
58
-
59
-
60
-
61
-
62
-
63
-
64
-
65
-
66
-
67
-
68
-
69
 |
 |