Canon PIXMA SELPHY CP510 SELPHY CP710/CP510 User Guide - Page 6
Quick Start Continued
 |
View all Canon PIXMA SELPHY CP510 manuals
Add to My Manuals
Save this manual to your list of manuals |
Page 6 highlights
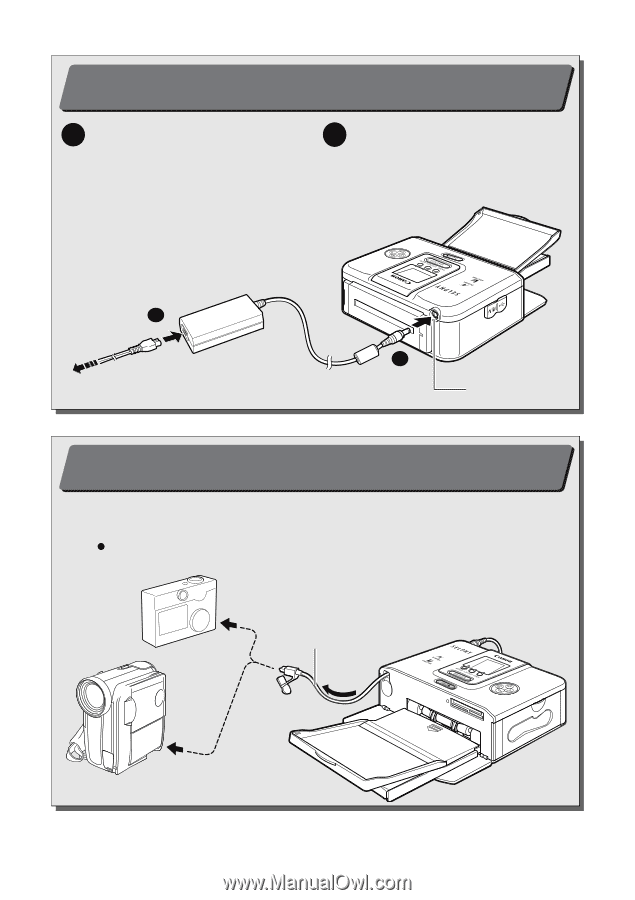
Quick Start (Continued) 4 Connecting the Printer to a Power Source (p. 30) 1 Insert the power cord into the compact power adapter and plug the other end into a power outlet. 2 Connect the compact power adapter to the printer's DC IN terminal. 1 To power outlet 2 DC IN terminal 5 Connecting the Camera to the Printer (p. 31) Pull out the retractable USB cable, and connect to the camera's DIGITAL terminal. zIf the connector on the camera side does not match up, use the USB cable included with your camera. To DIGITAL terminal Retractable USB cable To USB terminal 4
-
 1
1 -
 2
2 -
 3
3 -
 4
4 -
 5
5 -
 6
6 -
 7
7 -
 8
8 -
 9
9 -
 10
10 -
 11
11 -
 12
12 -
13
-
14
-
15
-
16
-
17
-
18
-
19
-
20
-
21
-
22
-
23
-
24
-
25
-
26
-
27
-
28
-
29
-
30
-
31
-
32
-
33
-
34
-
35
-
36
-
37
-
38
-
39
-
40
-
41
-
42
-
43
-
44
-
45
-
46
-
47
-
48
-
49
-
50
-
51
-
52
-
53
-
54
-
55
-
56
-
57
-
58
-
59
-
60
-
61
-
62
-
63
-
64
-
65
-
66
-
67
-
68
-
69
 |
 |
4
Quick Start (Continued)
4
Connecting the Printer to a Power Source (p. 30)
Insert the power cord into the
compact power adapter and plug
the other end into a power outlet.
1
DC IN terminal
Connect the compact power
adapter to the printer’s
DC IN terminal.
2
1
2
To power outlet
5
Connecting the Camera to the Printer (p. 31)
To DIGITAL terminal
Pull out the retractable USB cable, and connect to the camera’s DIGITAL
terminal.
If the connector on the camera side does not match up, use the USB cable included
with your camera.
To USB terminal
Retractable
USB cable