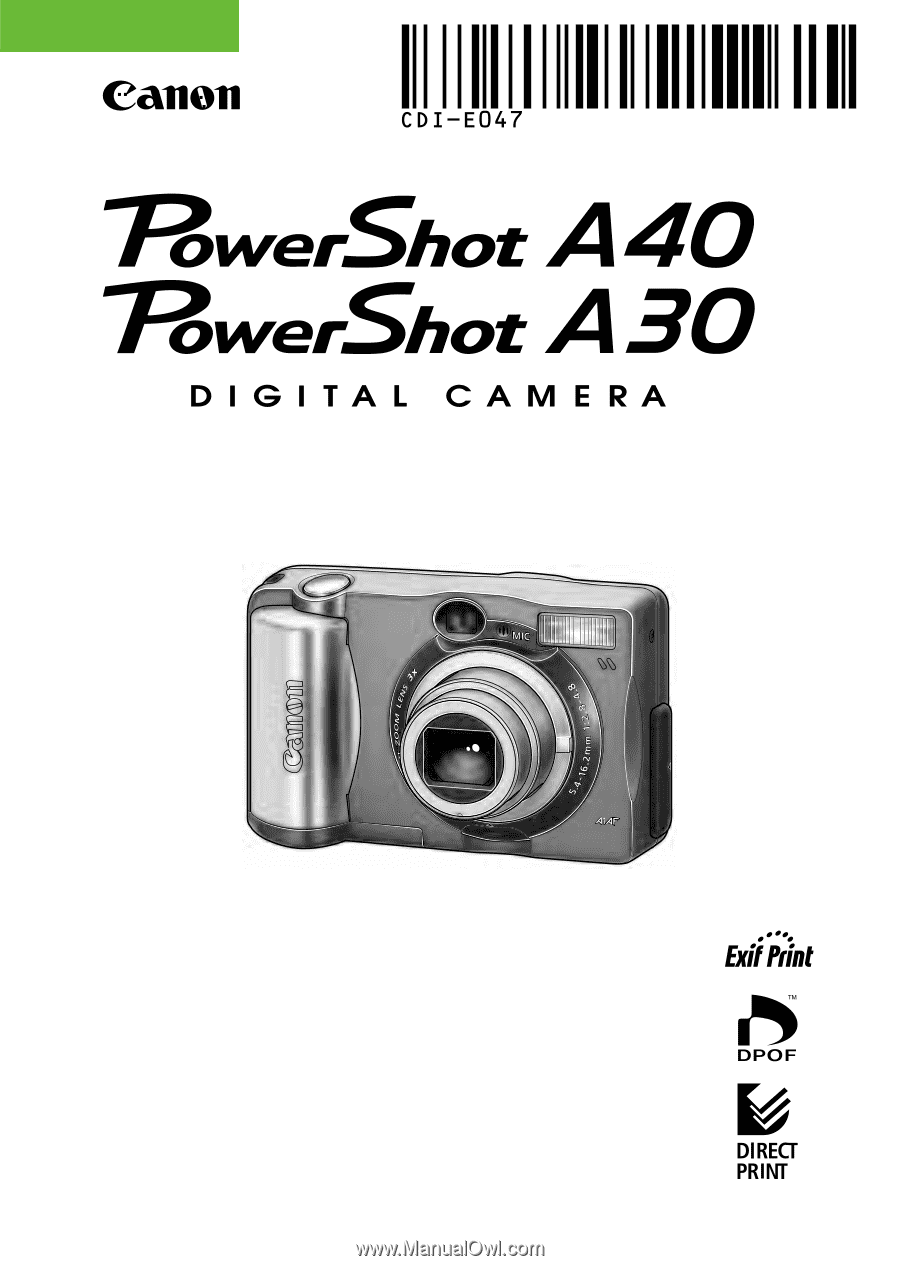
Canon PowerShot A40 PowerShot A40/A30 Camera User Guide
Canon PowerShot A40 Manual
 |
View all Canon PowerShot A40 manuals
Add to My Manuals
Save this manual to your list of manuals |
Canon PowerShot A40 manual content summary:
- Canon PowerShot A40 | PowerShot A40/A30 Camera User Guide - Page 1
ENGLISH Camera User Guide • Please read the "Read this First" section (p. 5). • Please refer to the Quick Start section for a simple explanation of shooting, replaying and erasing (p. 12). • Please refer to the Software Starter Guide for information on installing the software and downloading images. - Canon PowerShot A40 | PowerShot A40/A30 Camera User Guide - Page 2
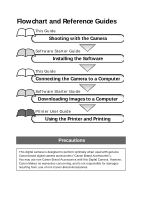
Camera Software Starter Guide Installing the Software This Guide Connecting the Camera to a Computer Software Starter Guide Downloading Images to a Computer Printer User Guide Using the Printer and Printing Precautions This digital camera is designed to perform optimally when used with genuine Canon - Canon PowerShot A40 | PowerShot A40/A30 Camera User Guide - Page 3
data due to a mistaken operation or malfunction of the camera, the software, the CompactFlash™ cards (CF cards), personal computers, peripheral devices, or use of non-Canon CF cards. ¡ Canon and PowerShot are trademarks of Canon, Inc. ¡ CompactFlash is a trademark of SanDisk Corporation. ¡ iBook and - Canon PowerShot A40 | PowerShot A40/A30 Camera User Guide - Page 4
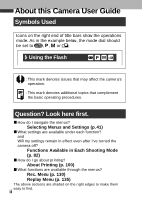
About this Camera User Guide Symbols Used Icons on the right end of title bars show the operations mode. As in the example below, the mode dial should be set to , , or . Using the Flash : This mark denotes issues that may affect the camera's operation. : This mark denotes additional topics that - Canon PowerShot A40 | PowerShot A40/A30 Camera User Guide - Page 5
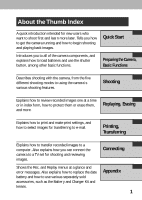
how to transfer recorded images to a computer. Also explains how you can connect the camera to a TV set for shooting and reviewing images. Connecting Shows the Rec. and Replay menus at a glance and error messages. Also explains how to replace the date Appendix battery and how to use various - Canon PowerShot A40 | PowerShot A40/A30 Camera User Guide - Page 6
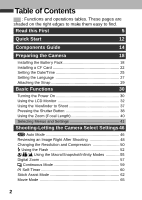
5 Quick Start 12 Components Guide 14 Preparing the Camera 18 Installing the Batter y Pack 18 Installing a CF Card 22 Setting the Date/Time Selecting Menus and Settings 41 Shooting-Letting the Camera Select Settings 46 Auto Mode 46 Reviewing an Image Right After Shooting 48 Changing - Canon PowerShot A40 | PowerShot A40/A30 Camera User Guide - Page 7
Selecting Particular Effects 67 Program AE 67 Manually Setting the Shutter Speed and Aper Protecting Images 94 Erasing 96 Erasing Images Individually 96 Erasing All Images 97 Formatting a CF Card 98 Printing 100 About Printing 100 Selecting from the Pr int Order Menu 102 Connecting - Canon PowerShot A40 | PowerShot A40/A30 Camera User Guide - Page 8
Images on a TV Set 124 Downloading Images to a Computer 126 Downloading Directly from a CF Card 126 Connecting the Camera to a Computer Via the USB Cable and Lens Adapter 148 Camera Care and Maintenance 154 Troubleshooting 155 Specifications 161 Index 170 Canon Customer Support 174 4 - Canon PowerShot A40 | PowerShot A40/A30 Camera User Guide - Page 9
its digital cameras are not liable for any consequential damages arising from any malfunction of the Canon digital camer a or CompactFlash™ card (CF card) for personal use. Warranty Limitations This camera's warranty is only effective in the country of sale. If a problem arises while the camer a is - Canon PowerShot A40 | PowerShot A40/A30 Camera User Guide - Page 10
to instruct you in the safe and correct operation of the camera and guide. Disassembly or alteration may result in high-voltage electrical shock. Internal inspections, alterations and repairs should be conducted by qualified service personnel author ized by your camera distributor or a Canon - Canon PowerShot A40 | PowerShot A40/A30 Camera User Guide - Page 11
exposed as a result of damage . There is a risk of high-voltage electrical shock. Please take the first opportunity to consult your camera distributor or a Canon Customer Support Help Desk. ¡Stop operating the equipment immediately if it emits smok e or noxious fumes. Failure to do so may result in - Canon PowerShot A40 | PowerShot A40/A30 Camera User Guide - Page 12
¡Remove the power cord on a regular per iodic basis and wipe away the dust and dir t that collects on the plug, the e xterior of the electrical outlet and the surrounding area. In dusty, humid or greasy environments, the dust that collects around the plug over long periods of time may become - Canon PowerShot A40 | PowerShot A40/A30 Camera User Guide - Page 13
ies and accessories. ¡If using AA-size NiMH batter ies, use only Canon AA-siz e NiMH batteries and charger recommended f or use with these batteries both the camera and electrical outlet after recharging and when the camera is not in use to avoid fires and other hazards. ¡The camera terminal of - Canon PowerShot A40 | PowerShot A40/A30 Camera User Guide - Page 14
cause deformation of the casing. Ensure that there is good ventilation when using the compact power adapter to charge the batter y pack or power the camera. ¡Do not store the equipment in humid or dusty areas . Storage in such areas could lead to fire , electrical shock or other damage. ¡Be careful - Canon PowerShot A40 | PowerShot A40/A30 Camera User Guide - Page 15
Inside the Camera Stop using the camera immediately if you detect condensation. Continued use may damage the equipment. Remove the CF card and battery from the camera or battery charger and store the equipment in a safe place. Storing the camera for extended periods with batteries installed will run - Canon PowerShot A40 | PowerShot A40/A30 Camera User Guide - Page 16
the batteries. ¡For important information about batter ies, see "Proper Battery Handling" (p. 19). 2 Install the CF card (p. 22). Open the CF card slot cover and insert a CF card. 3 Press the ON/OFF button to turn the camera on (p. 30). Hold the ON/OFF button down until the indicator next to the - Canon PowerShot A40 | PowerShot A40/A30 Camera User Guide - Page 17
twice when the focus is set. 5, 6 6 Shoot the image (p. 38). Press the shutter button all the way down. The camera beeps once to indicate that it has taken the shot. 7 View the recorded image. The recorded image displays on the LCD monitor for approximately 2 seconds (p. - Canon PowerShot A40 | PowerShot A40/A30 Camera User Guide - Page 18
Guide Shutter Button (p. 38) Optical Viewfinder Window (p. 37) Microphone (PowerShot A40 only) AF-assist Beam (p. 39) Red-Eye Reduction Lamp (p. 52) Self-Timer Lamp (p. 60) Flash (p. 52) Terminal Cover Lens Ring Release Button DIGITAL Terminal* A/V OUT (Audio/Video Out) Terminal (PowerShot A40 - Canon PowerShot A40 | PowerShot A40/A30 Camera User Guide - Page 19
LCD Monitor* (p. 32) Viewfinder (p. 37) CF Card Slot Cover (p. 22) ON/OFF Button (p. 30) Strap Eyelet (p. 29) Date Battery Holder (p. 142) Battery Cover (p. 18) monitor is covered with a thin plastic sheet for protection against scratches during shipment. Remove it befor e using the camera. 15 - Canon PowerShot A40 | PowerShot A40/A30 Camera User Guide - Page 20
the shutter button. Upper Indicator Green: Ready to shoot, or ready to comm unicate with your computer. Flashing Green: Camera is busy processing (star ting up; accessing the CF card, or tr ansmitting data to your computer). Orange: Ready to shoot, using the flash. Flashing Orange: Ready to shoot - Canon PowerShot A40 | PowerShot A40/A30 Camera User Guide - Page 21
camera's operating mode. (Auto) The camera automatically makes most of the settings for you (p. 46). (Program AE) You can manually adjust the exposure, white balance, and other settings before shooting (p. 67). (Manual) You can manually from the CF card (pp. 86, 96). ¡Download and display images at - Canon PowerShot A40 | PowerShot A40/A30 Camera User Guide - Page 22
Preparing the Camera Installing the Battery Pack The camera uses four AA-size alkaline batteries supplied with the camera. You may use optional nickel metal hydride (NiMH) batteries. 1 Be sure that the camera power is off. 2 Slide the battery cover lock, and push the battery cover slightly forward. - Canon PowerShot A40 | PowerShot A40/A30 Camera User Guide - Page 23
not turn off the power or open the batter y cover. The camera is writing, reading, erasing or transmitting an image to or from the CF card. ¡We recommend that you use the optional AC Adapter Kit ACK600 to power the camera during long usage sessions (p. 146). ¡The optional batter y charger kit lets - Canon PowerShot A40 | PowerShot A40/A30 Camera User Guide - Page 24
circuit. ¡If you do not plan to use the camer a for a long time, remove the batteries from the camera and store them in a saf e place. Batteries may leak and damage the camera if left installed during prolonged periods of non-use. WARNING Never use damaged batter ies or batteries whose outer seal is - Canon PowerShot A40 | PowerShot A40/A30 Camera User Guide - Page 25
The positive electrode (plus ter minal) is flat. The negative terminal is correctly formed (protruding from the metal base), but the seal does not extend up over the edge of the metal base. Battery Status Indications The LCD monitor displays an icon or message to let you know when batteries are low - Canon PowerShot A40 | PowerShot A40/A30 Camera User Guide - Page 26
a CF Card Installing a CF Card 1 Be sure that the camera is turned off. 2 Slide the CF card slot cover in the direction of the arrow, and open it. 2 1 3 Insert the CF card into the slot, in the direction shown in the illustration. ¡Insert the CF card all the way into the slot, so that the CF card - Canon PowerShot A40 | PowerShot A40/A30 Camera User Guide - Page 27
turn off the power or open the CF card slot cover. ¡Be aware that use of CF cards whose contents ha ve been edited at another camer a or with another company's software may cause the camera to operate incorrectly. ¡For more information on CF cards, see "CF Cards and Estimated Capacities (Recordab le - Canon PowerShot A40 | PowerShot A40/A30 Camera User Guide - Page 28
vibration. ¡Do not attempt to disassemb le or alter a CF card. ¡Moving a CF card rapidly between temperature extremes will cause condensation to form in the card and lead to a malfunction. To avoid condensation, place the CF card in a sealed plastic bag before moving it into a different temperature - Canon PowerShot A40 | PowerShot A40/A30 Camera User Guide - Page 29
then reset the date and time starting from step 6 below. 1 Press the ON/OFF button to turn on the camera (p. 30). 2 Turn the mode dial to , , , or . 3 Press the MENU button. The [Rec. Menu] will display. Display on the PowerShot A40 4 Press or button to select then press the SET button. , and 25 - Canon PowerShot A40 | PowerShot A40/A30 Camera User Guide - Page 30
5 Press or button to select , and then press the SET button. 6 Set the date and time. ¡Use or button to change the value of the highlighted field. ¡Press the SET button to set the value and advance to the next field. ¡The final item selects the date displa y type. Use or button to select, and then - Canon PowerShot A40 | PowerShot A40/A30 Camera User Guide - Page 31
Setting the Language Use this feature to select the language of r the LCD monitor displays. 1 Turn the mode dial to , , , or . 2 Press the MENU button. The [Rec. Menu] will display. Display on the PowerShot A40 3 Press or button to select then press the SET button. , and 27 - Canon PowerShot A40 | PowerShot A40/A30 Camera User Guide - Page 32
button to select , and press the SET button. 5 Select the desired language. ¡Use and button to select a language. The Language menu may appear differently on cameras in some regions. 6 Press the SET button. ¡If you wish to cancel, press the MENU button instead. 7 Press the MENU button. Hint for Easy - Canon PowerShot A40 | PowerShot A40/A30 Camera User Guide - Page 33
Attaching the Strap ¡Be careful when carr ying the camera by the strap. Don't swing the camera on the strap, and keep the strap and camera body clear of obstacles. 29 - Canon PowerShot A40 | PowerShot A40/A30 Camera User Guide - Page 34
turn the mode dial to , the lens will retract after approximately 1 minute. mode The LCD monitor displays an image. Power Save Function When the camera's power save function is turned on and it activates, restore power by pressing the ON/OFF button. Shooting Mode The power will automatically shut - Canon PowerShot A40 | PowerShot A40/A30 Camera User Guide - Page 35
accessed. The power will automatically shut off appro ximately 1 minute later if no functions are accessed. ¡The power save function will not activate while the camera is in auto play mode (p. 93). ¡The camera's settings can be changed to tur n off the power save function (p. 133). 31 - Canon PowerShot A40 | PowerShot A40/A30 Camera User Guide - Page 36
monitor is tur ned on and the "Change the Batter y Pack" message appears, the LCD monitor may not automatically tur n on the next time the camera is started. ¡When the LCD monitor is set to Standard or Off , shooting information appears for approximately 6 seconds when you take any of the following - Canon PowerShot A40 | PowerShot A40/A30 Camera User Guide - Page 37
¡Set the flash to on or affix the camer a to a tripod when the upper indicator flashes or ange and the camera shake warning icon ( ) appears in the LCD monitor after the metering preparations are complete. Mode ¡The LCD monitor always comes on when you turn the - Canon PowerShot A40 | PowerShot A40/A30 Camera User Guide - Page 38
400 2 (red) (PowerShot A40) ×3.8 ×4.7 ×6.0 ×7.5 (PowerShot A30) ×3.8 ×4.8 ×6.0 Shooting Mode Exposure Compensation White Balance Photo Effect Compression Resolution ISO Speed Focus Lock Flash Shooting Method Macro / Snapshot / Infinity Movie Recording Mode Digital Zoom Setting* Camera Shake Warning - Canon PowerShot A40 | PowerShot A40/A30 Camera User Guide - Page 39
movie time (sec.) are displayed as in the example to the left. * Zoom powers reflect the combined optical and digital zoom ef fects. These figures appear when the digital zoom is activated. Mode In simple display mode, the following information appears. File Number Image Number and Total (Display - Canon PowerShot A40 | PowerShot A40/A30 Camera User Guide - Page 40
files. An audio file other than a w av file, or a file with an unrecognized format, is attached. A JPEG file not suppor ted by "Design rule for Camera File system" (DCF) standards. RAW format file A file with an unrecogniz ed format. ¡Please note that image information recorded by this - Canon PowerShot A40 | PowerShot A40/A30 Camera User Guide - Page 41
has a field of vision of appro ximately 80% of the actual shooting image . Viewfinder AF brackets About the Autofocus Function ¡This camera employs AiAF (artificial intelligence autofocus) technology which uses a broad meter ing field to calculate the focal distance with high precision. It delivers - Canon PowerShot A40 | PowerShot A40/A30 Camera User Guide - Page 42
complete (two beeps sound) ¡ Orange: Flash will fire ¡ Flashing Orange: Camera shake warning / Insufficient exposure Lower Indicator ¡ Yellow: Macro / Snapshot / Do not move the camera until you hear this sound. ¡The upper indicator flashes g reen while the image is recording onto the CF card. 38 - Canon PowerShot A40 | PowerShot A40/A30 Camera User Guide - Page 43
are your subject, turn off the beam when shooting in the dark to avoid startling them (this may however, make it more difficult for the camera to focus). 39 - Canon PowerShot A40 | PowerShot A40/A30 Camera User Guide - Page 44
: Press this button to zoom out for a wide-angle shot. Digital Zoom When the LCD monitor is on, you can digitally zoom in on a subject with the zoom button. Images can be zoomed up to 7.5 times (PowerShot A40), or 6 times (PowerShot A30), which combines the effect of the optical zoom (p. 57). ¡Note - Canon PowerShot A40 | PowerShot A40/A30 Camera User Guide - Page 45
Selecting Menus and Settings Use the menus as shown below to operate the various shooting and replaying settings. For information on menu items and settings, see "Menu Settings and Default Settings" (p. 44). 1 Press the MENU button. The menu appears. , , , , and modes mode 2 Press the or button - Canon PowerShot A40 | PowerShot A40/A30 Camera User Guide - Page 46
Selecting Menus and Settings, cont'd Rec. Menu ( , , , , Modes) s ➔ Available items differ by mode Replay Menu ( mode) s ➔ * For information on (print settings) ➔ "Selecting from the Print Order Menu" (p. 102) : Turns the menu on/off : Selects items and settings : Sets items and settings 42 - Canon PowerShot A40 | PowerShot A40/A30 Camera User Guide - Page 47
➔ (Operation complete) (Protect), (Rotate) ➔ (Operation complete) (Erase all), (Transfer) s (Images erased), (Image marked for transferring) (Auto Play) (Auto Play starts) 43 - Canon PowerShot A40 | PowerShot A40/A30 Camera User Guide - Page 48
.* / 2 sec. p. 60 Review Off / 2 sec.* / 10 sec. p. 49 AF-assist Beam File No. Reset On* / Off On / Off* p. 132 p. 80 Set up Auto Power Down On* / Off Date / Time Sets the date and time p. 133 p. 25 Video System NTSC / PAL p. 134 Beep Format On* / Off Formats the CF card p. 132 p. 98 - Canon PowerShot A40 | PowerShot A40/A30 Camera User Guide - Page 49
image protection on and off Reference Pages p. 94 Rotate Rotates the image in the display p. 92 Erase all Erases all images on the CF card p. 97 Auto Play Replays selected images in a slide show p. 93 Print Order Sets the print settings p. 102 Transfer Order Sets the transfer settings - Canon PowerShot A40 | PowerShot A40/A30 Camera User Guide - Page 50
Select Settings Auto Mode In this mode, all you have to do is press the shutter button and let the camera do everything else. 1 Aim the camera at the subject. 2 Use the zoom lever to achieve the desired composition (relative subject size in the viewfinder). 3 Press the shutter button halfway (p. 38 - Canon PowerShot A40 | PowerShot A40/A30 Camera User Guide - Page 51
¡For information on the settings you can change, see "Functions Available in Each Shooting Mode" (p. 82). ¡With the Review function, you can change the length of time images show on the LCD monitor after shooting, or set it so they do not show at all (p. 49). 47 - Canon PowerShot A40 | PowerShot A40/A30 Camera User Guide - Page 52
Reviewing an Image Right After Shooting After a photo is taken, the image displays on the LCD monitor for two seconds (To change, see "Changing the Image - Canon PowerShot A40 | PowerShot A40/A30 Camera User Guide - Page 53
] and press the SET button. ¡For information on using the men u, see "Selecting Menus and Settings" (p. 41). 2 Select a Review setting with the / buttons and press the SET button. ¡With the [Off] option, the image will not automatically display. ¡With the [2 sec.] or [10 sec.] - Canon PowerShot A40 | PowerShot A40/A30 Camera User Guide - Page 54
). Select (Superfine) for a higher quality image, or (Normal) if you wish to fit more images on a CF card. The (Fine) setting provides adequate quality for standard shots. Resolution (excluding ) PowerShot A40 (Large) 1600 × 1200 pixels (Medium) 1024 × 768 pixels (Small) 640 × 480 pixels - Canon PowerShot A40 | PowerShot A40/A30 Camera User Guide - Page 55
(Compression) Display on the PowerShot A40 3 Press the MENU button. ¡For more information, see "Functions Available in Each Shooting Mode" (p. 82). ¡For information on necessar y space per image (approximate), types of CF cards and the n umber of images per card see, "Specifications" (p. 165). 51 - Canon PowerShot A40 | PowerShot A40/A30 Camera User Guide - Page 56
Using the Flash Auto Red-Eye Reduction, Auto On Off Red-eye reduction, Flash on SlowSynchro The flash fires automatically as required b y the light level. The flash may fire automatically as required b y the light level. The red-eye reduction lamp fires with each shot. The flash will fire. The - Canon PowerShot A40 | PowerShot A40/A30 Camera User Guide - Page 57
under these conditions. - Shooting in Mode Be careful to hold the camer a still to avoid camera Shake. - Shooting in (when ISO Speed is set to AUTO) or Mode Fix the camera to a tripod to shoot in the or mode since the shutter speed will be slo wer than in the mode. If - Canon PowerShot A40 | PowerShot A40/A30 Camera User Guide - Page 58
¡The flash may take approximately 10 seconds to charge. Recharging time may vary with the state of the battery charge. ¡In mode, the flash fires at full intensity (b ut less than full intensity when in macro mode). The flash intensity is automatically adjusted except in mode. ¡The flash fires twice. - Canon PowerShot A40 | PowerShot A40/A30 Camera User Guide - Page 59
/ / Using the Macro/Snapshot/ Infinity Modes Macro Mode Snapshot Mode Infinity Mode Use this mode to record subjects in the r ange of 16 to 76 cm (6.3 in. to 2.5 ft.) from the lens tip when at maximum wide angle and in the range of 26 to 76 cm (10.2 in. to 2.5 ft.) when at the maximum telephoto - Canon PowerShot A40 | PowerShot A40/A30 Camera User Guide - Page 60
¡Use the LCD monitor to compose close-ups in macro mode since the parallax phenomenon may cause images composed with the optical vie wfinder to be offcenter. ¡The exposure may not be optimal when the flash is used in macro mode in the r ange of 16 to 26 cm (6.3 to 10.2 in.). ¡When the lens is zoomed - Canon PowerShot A40 | PowerShot A40/A30 Camera User Guide - Page 61
can be zoomed with the combined optical and digital zoom functions as follows (figures are approximate). PowerShot A40: 3.8 times, 4.7 times, 6.0 times, and 7.5 times PowerShot A30: 3.8 times, 4.8 times, and 6.0 times 1 In the [Rec.] menu, select (Digital Zoom) and press the SET button. ¡For - Canon PowerShot A40 | PowerShot A40/A30 Camera User Guide - Page 62
5 Shoot the image. ×3.8 The combined magnifications of the optical zoom and digital zoom are displayed. ¡Digital zoom is unavailable in some modes (p. 82). ¡Images become coarser the more the y are digitally zoomed. 58 - Canon PowerShot A40 | PowerShot A40/A30 Camera User Guide - Page 63
Continuous Mode The camera will shoot continuously at the speed of approx. 2.5 images per second* (When the LCD monitor is OFF in Large/Fine mode). * The figures reflect standard shooting conditions established by Canon. Actual figures may vary according to the subject and shooting conditions. 1 - Canon PowerShot A40 | PowerShot A40/A30 Camera User Guide - Page 64
Self-Timer 1 Press the / button as necessary so that the appears on the LCD monitor. 2 Shoot the image. ¡The self-timer star ts and the self-timer lamp flashes when you press the shutter button down all the way. Changing the self-timer countdown time 1 In the [Rec.] menu, select [Self-timer] and - Canon PowerShot A40 | PowerShot A40/A30 Camera User Guide - Page 65
2 Select [ (10 sec.)] or [ (2 sec.)] with the / buttons and press the SET button. ¡When [ (10 sec.)] is selected, the self-timer sounds and the flashing gets faster 2 seconds before the shutter activates. ¡When [ (2 sec.)] is selected, the self-timer sounds at the same time the shutter button is - Canon PowerShot A40 | PowerShot A40/A30 Camera User Guide - Page 66
itself, you must stitch the images together at your computer. ¡To create the panorama at your computer, use the PhotoStitch software that came with your camera. Framing a Subject The PhotoStitch program detects the overlapping portions of adjoining images and merges them.When shooting, try to - Canon PowerShot A40 | PowerShot A40/A30 Camera User Guide - Page 67
will appear unnatur al if the difference in brightness is too great. ¡For good results, pan (swivel) the camera to take successive shots. ¡To shoot close-ups, slide the camera over the subject, keeping it parallel as you move. Shooting 1 Press the or button to select the sequence direction - Canon PowerShot A40 | PowerShot A40/A30 Camera User Guide - Page 68
subsequent shots. ¡It is not possible to display the images that appear on the LCD monitor on a TV monitor when shooting in Stitch Assist mode. 64 - Canon PowerShot A40 | PowerShot A40/A30 Camera User Guide - Page 69
this time elapses or when the CF card becomes full. * The data reflects standard Canon testing conditions. The actual figures will vary according to the shooting objects and conditions. ¡Be careful not to touch the microphone while shooting (PowerShot A40 only). ¡The exposure, focus, white balance - Canon PowerShot A40 | PowerShot A40/A30 Camera User Guide - Page 70
¡Sound is recorded monaur ally (PowerShot A40 only). ¡There is no shutter sound in mo vie mode. ¡QuickTime 3.0 or higher is required to repla y movie files (AVI / Motion JPEG) on a computer . QuickTime 5.0 is included on the Canon Digital Camer a Solution Disk. 66 - Canon PowerShot A40 | PowerShot A40/A30 Camera User Guide - Page 71
Some settings such as exposure compensation and white balance can be set manually. 1 Shoot the image. ¡The nature of CCD image sensors is such that noise in the recorded image increases at slo w shutter speeds. This camera, however, applies special processing to images shot at shutter speeds slo wer - Canon PowerShot A40 | PowerShot A40/A30 Camera User Guide - Page 72
Differences and Similarities between the and Modes. ¡Both modes automatically select the shutter speed and aperture settings. ¡The following settings can be adjusted in mode, but not in mode. ¡ Exposure Compensation ¡ White Balance ¡ Flash (Red-Eye Reduction, Flash On, Slow-Synchro) ¡ Continuous - Canon PowerShot A40 | PowerShot A40/A30 Camera User Guide - Page 73
Setting the Shutter Speed and Aperture You can manually set the shutter speed and aperture to achieve a particular effect. This is convenient for shooting fireworks and other images where it is difficult to set - Canon PowerShot A40 | PowerShot A40/A30 Camera User Guide - Page 74
¡For information about noise reduction, see "Program AE" (p. 67). Shutter Speed Display The numbers in the table below indicate the shutter speed in seconds. For slower speeds, quote marks indicate the decimal place, so that 0"3 indicates 0.3 second and 2" indicates 2 seconds. 1/1500 1/1250 1/1000 - Canon PowerShot A40 | PowerShot A40/A30 Camera User Guide - Page 75
shoot as close to the glass as possib le to reduce the chances of light reflecting bac k off the glass. Focus Lock Method 1 1 Aim the camera so that a subject at the same focal distance as the main subject is centered in the brackets in the optical viewfinder or LCD monitor. 2 Press - Canon PowerShot A40 | PowerShot A40/A30 Camera User Guide - Page 76
as the main subject is centered in the selected AF frame. 3 Press and hold the shutter button halfway to lock focus, and wait until the camera beeps twice. Without releasing your finger, press the / / button. appears in the LCD monitor. 4 Recompose the image and press the shutter button all the way - Canon PowerShot A40 | PowerShot A40/A30 Camera User Guide - Page 77
frame (AF frame) selection method. The AF frame will appear when the LCD monitor is turned on (p. 38). On (Auto Selection) OFF (Center) The camera automatically selects the AF frame to focus according to the shooting conditions. Of three AF frames, the middle one is selected to focus. This is - Canon PowerShot A40 | PowerShot A40/A30 Camera User Guide - Page 78
modes to shoot. Evaluative Light Metering Appropriate for standard shooting conditions, including backlit scenes. The camera divides images into several zones for light metering. The camera evaluates the complex lighting conditions, such as the position of the subject, the br ightness, the - Canon PowerShot A40 | PowerShot A40/A30 Camera User Guide - Page 79
Adjusting the Exposure If you are shooting against a bright background or strong backlight, you may need to correct the exposure so that the subject doesn't come out too dark. 1 Press the / button once. 2 Adjust the compensation. ¡You can set the adjustment from -2 to +2, in 1/3-step increments. ¡If - Canon PowerShot A40 | PowerShot A40/A30 Camera User Guide - Page 80
colors more accuar tely. Set the white balance mode to a natural or artificial light setting according to the circumstances. Auto The camera sets the white balance automatically according to shooting conditions. Daylight Use when shooting outdoors in sunlight on a clear day. Cloudy Use - Canon PowerShot A40 | PowerShot A40/A30 Camera User Guide - Page 81
2 Select the white balance. ¡If the LCD monitor is on, y ou can check the results by viewing the image on the LCD monitor . ¡A shot can be taken immediately by pressing the shutter button. The menu will reappear after the shot, allo wing you to adjust the setting. 3 Press the SET button. ¡The white - Canon PowerShot A40 | PowerShot A40/A30 Camera User Guide - Page 82
Switching Between Photo Effect Modes Effect Off Vivid Neutral Low Sharpening Sepia B/W Records with no photo effect. Emphasizes the contrast and color saturation to record in bold color. Tones down the contrast and color satur ation to record neutral hues. Records subjects with softened outlines . - Canon PowerShot A40 | PowerShot A40/A30 Camera User Guide - Page 83
Changing the ISO Speed Change the ISO speed when shooting in dark places or when you want to shoot with a faster shutter speed. 1 In the [Rec.] menu, select (ISO Speed). ¡For information on using the men u, see "Selecting Menus and Settings" (p. 41). 2 Select an ISO speed. 3 Press the MENU button. ¡ - Canon PowerShot A40 | PowerShot A40/A30 Camera User Guide - Page 84
You can use this feature to select whether the camera resets the file number each time you insert a new CF card. The camera resets the file number to 100-0001 each time you inser t a new (unused) CF card. If you inser t a On card that already contains some images , numbering resumes from the - Canon PowerShot A40 | PowerShot A40/A30 Camera User Guide - Page 85
CF cards. This is useful if you are planning to download images from the cards to y our computer, since it helps avoid accidental overwrites that may occur if filenames are duplicated. About file numbering... ¡Image files are assigned numerical file names over the range 0001 to 9900. The camera - Canon PowerShot A40 | PowerShot A40/A30 Camera User Guide - Page 86
Functions Available in Each Shooting Mode The following chart shows the functions and settings available in each shooting mode. The camera stores settings separately for each mode, and retains these settings even if you switch to a different mode. Function Large Medium Resolution Small movie - Canon PowerShot A40 | PowerShot A40/A30 Camera User Guide - Page 87
available : Setting is retained even after power off. (1) The ISO speed is automatically set between the equivalent of 50 and 150. (2) [AUTO] cannot be selected. Manual Stitch Assist J* J J J J* J J J* J J J J Movie Reference page p. 50 p. 50 p. 52 p. 55 p. 71 83 - Canon PowerShot A40 | PowerShot A40/A30 Camera User Guide - Page 88
Function Shooting Method Single Continuous Self-Timer Auto Focus Frame AF-assist Beam Light Evaluative Metering Metering Spot Metering Digital Zoom Exposure Compensation White Balance Photo Effect ISO Speed Auto 1) Program 84 - Canon PowerShot A40 | PowerShot A40/A30 Camera User Guide - Page 89
Manual 2) Stitch Assist J* J J J J (1) Movie 1) Reference page p. 59 p. 60 p. 73 p. 132 p. 74 p. 57 p. 75 p. 76 p. 78 p. 79 85 - Canon PowerShot A40 | PowerShot A40/A30 Camera User Guide - Page 90
Replaying Displaying Images Individually Use this feature to view recorded images one at a time on the LCD monitor (Single Image Replay). 1 Turn the mode dial to . The LCD monitor displays the last recorded image. 2 Use and button to display different images. ¡Hold down or button to cycle - Canon PowerShot A40 | PowerShot A40/A30 Camera User Guide - Page 91
Magnifying Images 1 Press the button. The image enlarges gradually by up to approximately 10 times. Approximate Location of the Magnified Area ¡When you hold down the SET button and press the button, the image enlarges in the order : approximately 2.5 times ➞ approximately 5 times ➞ approximately 10 - Canon PowerShot A40 | PowerShot A40/A30 Camera User Guide - Page 92
Viewing Images in Sets of Nine (Index View) View nine images at a time on the LCD monitor (Index View). You can also jump by sets of nine to search for a certain image conveniently. 1 Press the button twice. Nine images appear at a time. 2 Press or button to change the displayed images. The - Canon PowerShot A40 | PowerShot A40/A30 Camera User Guide - Page 93
4 Press the or button to select the image and press the button. The selected image displays in Single Image Replay. ¡Hold the SET button and press the or button to jump to the first or last image . 89 - Canon PowerShot A40 | PowerShot A40/A30 Camera User Guide - Page 94
Viewing Movies 1 Press or button to display an image shot in (movie) mode. ¡A movie displays with the instruction on it. 2 Press the SET button. The movie starts playing. ¡When a movie has finished playing, it will display the last frame. If the SET button - Canon PowerShot A40 | PowerShot A40/A30 Camera User Guide - Page 95
¡You may experience frame dropping and audio breakup when replaying a movie on a computer with insufficient system resources. ¡You can hear the audio when a mo vie is played on a TV. Adjust the volume on the TV set (PowerShot A40 only) (p. 124). 91 - Canon PowerShot A40 | PowerShot A40/A30 Camera User Guide - Page 96
. 3 Press the MENU button. ¡Movie images cannot be rotated. ¡If an image has been rotated in the camer a before being loaded onto a computer, the particular software in use will determine whether or not the rotation settings are retained. 92 - Canon PowerShot A40 | PowerShot A40/A30 Camera User Guide - Page 97
Auto Play Use this feature to automatically replay all of the images in the CF card (Auto Play). The LCD monitor displays each image for approximately 3 seconds. 1 In the Replay menu, select (Auto Play). ¡For information on using the men u, see " - Canon PowerShot A40 | PowerShot A40/A30 Camera User Guide - Page 98
Protecting Images Use the protect feature to protect important images from accidental erasure. 1 In the Replay menu, select (Protect). ¡For information on using the men u, see "Selecting Menus and Settings" (p. 41). 2 Press or button to select an image you wish to protect, and then press the - Canon PowerShot A40 | PowerShot A40/A30 Camera User Guide - Page 99
¡Please note that even protected images are erased when a CF card is reformatted (p. 98). 95 - Canon PowerShot A40 | PowerShot A40/A30 Camera User Guide - Page 100
Erasing ¡Remember that erased images cannot be recovered. Be careful to avoid accidental erasures. ¡This function will not erase protected images (p. 94). Erasing Images Individually 1 Press or button to select the image you want to erase and press the button. 2 Press or button to select [ - Canon PowerShot A40 | PowerShot A40/A30 Camera User Guide - Page 101
Erasing All Images 1 In the Replay menu, select (Erase all) and press the SET button. The LCD monitor asks for confirmation. 2 Press or button to select [OK], and then press the SET button. ¡If you decide you don't want to erase all unprotected images, select [Cancel] instead of [OK]. 97 - Canon PowerShot A40 | PowerShot A40/A30 Camera User Guide - Page 102
Formatting a CF Card You should format new CF cards before using them. ¡Formatting a CF card will per manently erase all data already on the card, including all of its protected images. Before formatting a card that has already been used, be sure to check its contents. 1 In the [Rec.] menu, select - Canon PowerShot A40 | PowerShot A40/A30 Camera User Guide - Page 103
]. ¡If the camera is not operating correctly, the CF card may be corrupted. Formatting the card may solve the problem. ¡If you are using a CF card from another man ufacturer and the card is not functioning correctly, you may be able to correct the problem by formatting the card. ¡CF cards that were - Canon PowerShot A40 | PowerShot A40/A30 Camera User Guide - Page 104
you want (DPOF* Print Settings), and then take the CF card to a participating photo lab to have them printed out later. Refer to the System Map included with this camera kit for printer information. * Digital Print Order Format Optional Canon printer with the direct print function Printed images - Canon PowerShot A40 | PowerShot A40/A30 Camera User Guide - Page 105
(p. 116) ¡Standard / Index ¡Date On / Off ¡File Numbers On / Off Transfer Settings ¡Select the image you want to send through e-mail* (p. 122) * The DPOF-compliant software is needed for actually transferring the images. 101 - Canon PowerShot A40 | PowerShot A40/A30 Camera User Guide - Page 106
Selecting from the Print Order Menu Use the Print Order Menu as shown below to select all print settings. Direct Print Function Set the mode dial to ➔s DPOF Settings Set the mode dial to s ➔s 102 - Canon PowerShot A40 | PowerShot A40/A30 Camera User Guide - Page 107
: Turns the menu on/off : Selects items and settings : Sets items and settings Image (p. 110) Style ➔ Borders (p. 110) Date (p. 110) Number of copies (p. 109) Printing area (p. 112) Order Number of copies (p. 114) Print Type (p. 116) ➔ Set up Date (p. 116) File No. (p. 116) Reset (p. 118) - Canon PowerShot A40 | PowerShot A40/A30 Camera User Guide - Page 108
begin. ¡Refer to the System Map included with this camer a kit for printer information. ¡Please see your printer's user guide for instructions on loading paper and installing ink car tridges. 1 Turn off the Camera. 2 Attach the power cable to the printer and plug the other end into power supply. Or - Canon PowerShot A40 | PowerShot A40/A30 Camera User Guide - Page 109
. ¡When you insert the cable, make sure the mark of the cable faces the rear of the camer a (monitor side). to Printer DIGITAL Terminal 4 Turn the mode dial to camera on. Direct Interface Cable DIF-100 and turn the If the printer is correctly connected, the icon will appear on the LCD - Canon PowerShot A40 | PowerShot A40/A30 Camera User Guide - Page 110
¡When disconnecting the cab le from the camera's Digital terminal, be sure to hold the connector at its sides and pull it straight out. ¡Movies cannot be played when the camera is connected to a pr inter. ¡When the printer is disconnected, the symbol will disappear from the LCD monitor and the camer - Canon PowerShot A40 | PowerShot A40/A30 Camera User Guide - Page 111
Printing An image can be printed when displayed in single replay or selected in index replay. 1 Press or button to select the image you wish to print, and then press the SET button. 2 Set the number of prints, the print style and printing area settings as required. ¡Selecting the number of - Canon PowerShot A40 | PowerShot A40/A30 Camera User Guide - Page 112
image is pr inted and then cancel before the next one starts. The display will revert to standard replay mode. Printing Errors ¡An error message appears if an error occurs f or some reason during the printing process (p. 140). Select [Stop] or [Resume] using or button and press the SET button - Canon PowerShot A40 | PowerShot A40/A30 Camera User Guide - Page 113
Print Settings (Direct Print Function) You can specify print settings while the camera is connected to the printer. Selecting the Number of Copies 1 While displaying the image, press the SET button. Press or button to select [copies], and - Canon PowerShot A40 | PowerShot A40/A30 Camera User Guide - Page 114
right to the edges of the page . Borders Bordered Prints with a border. Date Prints the image's creation date. * This setting is only available for Card Size paper. 1 While displaying the image, press the SET button. Press or button to select [Style], and press the SET button. 2 Press or - Canon PowerShot A40 | PowerShot A40/A30 Camera User Guide - Page 115
3 Press or button to select the desired setting, and press the SET button. Image Borders Date Choose [Standard] Choose [Borderless] Choose [On] or [Off]. or [Multiple]. or [Bordered]. 4 Press the MENU button. ¡If [Borderless] or [Multiple] is selected as the pr int style, the center por - Canon PowerShot A40 | PowerShot A40/A30 Camera User Guide - Page 116
Specifying the Printing Area Choose from three printing area options. Before specifying the printing area ¡Please set the Print Style (Image, Borders and Date) first before setting the pr inting area (p. 110). ¡Printing area can only be specified with the border less print style. 1 While displaying - Canon PowerShot A40 | PowerShot A40/A30 Camera User Guide - Page 117
f ollowing operations. - Printing - When you set the printing area setting for another image. - When you close the Print mode, i.e. • turn the camera off • change the camera mode • after setting the pr inting area, you select [Cancel] and don't print • detach the DIF-100 direct interf ace cable 113 - Canon PowerShot A40 | PowerShot A40/A30 Camera User Guide - Page 118
DPOF Print Settings On your CF card, select which image or images you want to print and how many copies you want. This is convenient for printing on optional Canon printers with the direct print function or at participating photo labs. Selecting Images for Printing 1 Display the [Print Order] menu - Canon PowerShot A40 | PowerShot A40/A30 Camera User Guide - Page 119
set by your camera. ¡The output of some digital pr inters or photo lab services may not reflect the specified pr int settings. ¡Movies cannot be pr inted. ¡Images are printed in order from oldest to ne west by the shooting date. ¡A maximum of 998 images can be mar ked per CF card. ¡Press the - Canon PowerShot A40 | PowerShot A40/A30 Camera User Guide - Page 120
Setting the Print Style You can set up the print style as follows. Print Type Date File No. Standard Index Both Print one image per sheet. Print index prints (multiple reduced-size images per page). Print selected images both in standard and index format. Include the date on the pr int. Include - Canon PowerShot A40 | PowerShot A40/A30 Camera User Guide - Page 121
4 Press or button to make the desired setting, and then press the SET button. (Print Type) Select [Standard], [Index], or [Both]. (Date) Select [On] or [Off]. (File No.) Select [On] or [Off]. 5 Press the MENU button. ¡If you have chosen [Index] as the print type, you cannot set [Date] and [ - Canon PowerShot A40 | PowerShot A40/A30 Camera User Guide - Page 122
Resetting the Print Settings The Reset feature clears all print selections, and resets Print Type to [Standard], Date to [On], and File No. to [Off]. 1 Display the [Print Order] menu. ¡For selecting from the men u, see "Selecting from the Print Order Menu" (p. 102). 2 Press or button to select - Canon PowerShot A40 | PowerShot A40/A30 Camera User Guide - Page 123
Printing with DPOF Print Settings You can use the DPOF print settings to print with an optional printer with the direct print function. 1 Display the [Print Order] menu. ¡For selecting from the men u, see "Selecting from the Print Order Menu" (p. 102). 2 Press or button to select [Print], and - Canon PowerShot A40 | PowerShot A40/A30 Camera User Guide - Page 124
4 Press or button to select [OK], and press the SET button. The image will start to print and, when it is completely finished, the display will revert to the standard replay mode. ¡To print the date, set the [Date] setting in the pr int order menu in Step 2 on the previous page to [On]. You - Canon PowerShot A40 | PowerShot A40/A30 Camera User Guide - Page 125
settings were set has been deleted before restarting. - If there was very little free space on the CF card when the printing was cancelled. If these circumstances apply, you can select [OK] ). After replacing the spent battery pack, turn the camera power on again. Printing Errors (p. 108) 121 - Canon PowerShot A40 | PowerShot A40/A30 Camera User Guide - Page 126
Image Transfer Settings (DPOF Transfer Order) Using the camera, you can make marks on images you wish to transfer and attach to e-mails. (Please use the supplied software for actually transferring images.) These settings are compatible with the Digital Print Order Format (DPOF) standards. ¡The mark - Canon PowerShot A40 | PowerShot A40/A30 Camera User Guide - Page 127
MENU button. ¡Images are transferred in order from oldest to ne west by the shooting date. ¡A maximum of 998 images can be mar ked per CF card. ¡Transfer settings can also be assigned to images with the supplied software programs on a computer. 123 - Canon PowerShot A40 | PowerShot A40/A30 Camera User Guide - Page 128
and set it to display video input. To the Audio In Jack (PowerShot A40) (Black Plug) To the Video In Jack (Yellow Plug) 2 Turn on the camera. ¡The image display that normally appears on the LCD monitor now appears or r ight input jack on a stereo TV. Please consult the TV's manual for details. 124 - Canon PowerShot A40 | PowerShot A40/A30 Camera User Guide - Page 129
¡The video output signal can be s witched (NTSC or PAL) to accommodate different regional standards (p. 134). The default setting will vary between regions. NTSC: Japan, U.S. A., Canada, Taiwan, etc. PAL: Europe, Asia (excluding Taiwan), Oceania, etc. 125 - Canon PowerShot A40 | PowerShot A40/A30 Camera User Guide - Page 130
from the CF card ¡ Connect the camera to a computer with the USB cable After installing the supplied softw are, download images automatically download images, refer to the Software Starter Guide. Downloading Directly from a CF Card 1 Eject the CF card from the camera, and insert it into a CF card - Canon PowerShot A40 | PowerShot A40/A30 Camera User Guide - Page 131
olders located under the [DCIM] folder (where xxx is a threedigit number from 100 to 998). ¡Some computers or PC card readers require the po wer to be off when the CF card or PC card adapter is inserted. Since this requirement varies between models, please consult the man ual for your equipment. 127 - Canon PowerShot A40 | PowerShot A40/A30 Camera User Guide - Page 132
Connect the supplied USB interface cable to the computer's USB port and the camera's Digital terminal. ¡You do not need to tur n off the computer or camer a when making this connection. ¡Please refer to your computer manual for information regarding the location of the USB por t. USB port 128 USB - Canon PowerShot A40 | PowerShot A40/A30 Camera User Guide - Page 133
the cable from the camera: Hold the cable connector firmly at both sides and le while the camera is on, the camera will automatically tur n off. ¡If you leave the camera unused for any action within the next minute, the camera turns off. You can turn the camera back on by pressing the ON/OFF - Canon PowerShot A40 | PowerShot A40/A30 Camera User Guide - Page 134
Resolution (Still images) Setting Content Reference Page Sets the number of pixels used to record images to CF cards. • L Large* PowerShot A40 (1600 x1200 pixels) PowerShot A30 (1280 x 960 pixels) • M Medium (1024 x 768 pixels) • S Small (640 x 480 pixels) p. 50 Resolution (Movies) Sets the - Canon PowerShot A40 | PowerShot A40/A30 Camera User Guide - Page 135
• 100 • 200 • 400 • AUTO p. 79 Sets the AiAF to on (the camera automatically selects the AF frame when taking a picture) or off (AF frame is set to the middle frame). • On* • Off p. 73 Digital Zoom Turns the digital zoom on (the digital zoom combines with the optical zoom to zoom images) or off - Canon PowerShot A40 | PowerShot A40/A30 Camera User Guide - Page 136
Item/ Menu Screen Review Setting Content Reference Page Sets the duration images display on the LCD . • On* • Off p. 39 File No. Reset Sets how file numbers are assigned to images when new CF cards are inserted. • On • Off* p. 80 Set up... Beep Sets whether or not the beep sounds when - Canon PowerShot A40 | PowerShot A40/A30 Camera User Guide - Page 137
Sets whether or not the camera automatically powers down after a specified period of time elapses without something being pressed. • On* • Off p. 30 Set up... Date/Time Sets the date, time and date format. p. 25 Set up... Format Formats (initializes) a CF card. p. 98 Set up... Language Sets - Canon PowerShot A40 | PowerShot A40/A30 Camera User Guide - Page 138
Item/ Menu Screen Set up... Video System Setting Content Sets the video output signal standard. • NTSC • PAL Reference Page p. 125 * Default setting 134 - Canon PowerShot A40 | PowerShot A40/A30 Camera User Guide - Page 139
Page Protects images from accidental erasure. p. 94 Rotate Rotates images 90 or 270 degrees p.92 clockwise in the display. Erase all Erases all images from a CF card p. 97 (excluding protected images). Auto Play Plays images automatically one after the p. 93 other. 135 - Canon PowerShot A40 | PowerShot A40/A30 Camera User Guide - Page 140
Item/ Menu Screen Print Order Setting Content Reference Page Sets which images and how many copies p. 114 will be printed on a printer with the direct print function or at a photo lab service. Transfer Order Sets the images that will be transferred p. 122 with your e-mail software. 136 - Canon PowerShot A40 | PowerShot A40/A30 Camera User Guide - Page 141
Default You can reset all of the menu and button operation settings to default except for [Date/Time], [Language], and [Video System]. 1 Turn on the camera. ¡The mode dial can be tur ned to any setting. 2 Press the MENU button for longer than 5 seconds. The message "Reset settings to default - Canon PowerShot A40 | PowerShot A40/A30 Camera User Guide - Page 142
or repla y with no CF card installed. Cannot record! You attempted to shoot with no CF card installed. CF card error! There is something wrong with the CF card. CF card full The CF card is too full to store images or accept new print settings. Naming error! The camera cannot generate a file - Canon PowerShot A40 | PowerShot A40/A30 Camera User Guide - Page 143
pr int settings for a image non-JPEG file. Exx Camera malfunction (where xx is the tw o-digit error code). Try turning the camera off and back on. If this message recurs frequently, note down the error and call a Canon Customer Suppor t Help Desk. If this message appears immediately after - Canon PowerShot A40 | PowerShot A40/A30 Camera User Guide - Page 144
appear depending on the printer). No Paper Paper cassette is empty or is not installed correctly. No Ink No ink cassette in the pr inter, or the ink int with an ink car tridge type incompatible with this camera. Ink Cassette Error There is a problem with the ink cassette. Paper and ink do not - Canon PowerShot A40 | PowerShot A40/A30 Camera User Guide - Page 145
to pr int an image shot by a different camera, or in an incompatible format, or downloaded to and edited on a computer. You attempted to pr int xx number of images with DPOF settings that w ere shot by a different camera, or in an incompatible format, or downloaded to and edited on a computer. 141 - Canon PowerShot A40 | PowerShot A40/A30 Camera User Guide - Page 146
on the camera, this means that the Date battery has run down and the clock has stopped running. Please purchase a replacement battery (battery type CR2016) and install it as follows wall. 1 Be sure that the camera is turned off. 2 Open the CF card slot cover. 3 Pull out the date battery holder. 142 - Canon PowerShot A40 | PowerShot A40/A30 Camera User Guide - Page 147
6 Replace the date battery holder back into its original position, and close the CF card slot cover. 7 When the LCD monitor displays the Set Date/Time menu, date batter y is depleted. If you should dispose of your camera, first remove the date battery for recycling according to the recycling - Canon PowerShot A40 | PowerShot A40/A30 Camera User Guide - Page 148
charging is finished. 144 ¡This charger can be used only to charge Canon AAsize NiMH batter ies. Please do not attempt to charge any other type ies that have been used in other devices. ¡When recharging batter ies from the camera, always recharge all four of them at the same time . ¡All batteries - Canon PowerShot A40 | PowerShot A40/A30 Camera User Guide - Page 149
different, unused batteries. If you are purchasing new batteries, look for Canon's AA-size NiMH batteries (four-piece set). ¡Leaving batteries in the camera or charger may damage it causing batter y leakage. Remove batteries from the camera or charger and store in a dry cool location when not in use - Canon PowerShot A40 | PowerShot A40/A30 Camera User Guide - Page 150
stop and replace the batteries. Use of the kit is recommended when you are planning long sessions with the camera, and whenever you connect the camera to a computer. ¡Be sure that the camera is turned off before connecting or disconnecting the compact po wer adapter. 1 Connect the power cord to the - Canon PowerShot A40 | PowerShot A40/A30 Camera User Guide - Page 151
¡Please do not attempt to use an y AC adapter other than AC Adapter Kit ACK600 with your camera. Use of a different adapter may result in damage to the camer a or to the adapter. 147 - Canon PowerShot A40 | PowerShot A40/A30 Camera User Guide - Page 152
Using the Optional Lenses and Lens Adapter The camera supports use of the optional Wide Converter WC-DC52, Tele- it on securely. If the wide converter or close-up lens comes lose it may fall from the camera, posing risk of injury from shattered glass. ¡Never look into the sun or into strong light - Canon PowerShot A40 | PowerShot A40/A30 Camera User Guide - Page 153
Tele-converter TC-DC52 This 52 mm-threaded diameter magnifying conversion lens is for taking telephoto shots. The lens changes the focal length of the camera body's lens by a factor of 2.4x. ¡It is not possible to attach a lens hood or filter to the wide converter or tele-converter. ¡If you - Canon PowerShot A40 | PowerShot A40/A30 Camera User Guide - Page 154
Close-Up Lens 250D (52 mm) This lens makes it easy to take macro shots. With the camera set to Macro mode, you can use this option to shoot subjects that are 10 to 25 cm (3.9 to 9.8 in.) at maximum wide angle and - Canon PowerShot A40 | PowerShot A40/A30 Camera User Guide - Page 155
mm) This optional adapter is required for attaching the wide converter, tele-converter and close-up lens (all optional). Attaching a Lens 1 Be sure that the camera is turned off. 2 Press the ring release button and hold it down, and turn the ring in the direction of the arrow. 2 1 Ring Ring - Canon PowerShot A40 | PowerShot A40/A30 Camera User Guide - Page 156
4 Align the ¡ marks on the Conversion Lens Adapter and the camera, and turn the adapter in the direction of the arrows as far as the C mark on the camera. ➔ 5 Set the lens on the adapter, and attach it securely by turning it in the indicated direction. 152 - Canon PowerShot A40 | PowerShot A40/A30 Camera User Guide - Page 157
and dirt from conversion lenses with a lens blower brush before use. The camera may focus on any dirt that remains. ¡Exercise due caution when handling Although it is possible to select this mode at the camera, the PhotoStitch softw are will not be able to stitch the images together at the computer . - Canon PowerShot A40 | PowerShot A40/A30 Camera User Guide - Page 158
a lens b lower brush, then wipe lightly with a soft cloth. ¡ Never wipe the camera body or lens with organic solvents or other synthetic cleaning solutions. If you are unable to remove the dirt from the lens, contact Canon Customer Suppor t Help Desk. Viewfinder: Clean with a lens blower brush. If - Canon PowerShot A40 | PowerShot A40/A30 Camera User Guide - Page 159
Troubleshooting Problem The camera doesn't function (no power). Cause The camera is turned off. The battery cover or CF card slot cover is Use a household power source. Use only unused AAsize alkaline batteries or Canon AA-size NiMH batteries. (For the information about alkaline batteries, see - Canon PowerShot A40 | PowerShot A40/A30 Camera User Guide - Page 160
the indicator glows a steady orange. • Insert a new CF card. • Download images to your computer, then erase them from the card to free up more space. • Format the card (p. 98). • The card may be defective (its physical format may be corrupted). Contact Canon Customer Help Desk. Close the covers, and - Canon PowerShot A40 | PowerShot A40/A30 Camera User Guide - Page 161
Problem Cause The batteries Batteries are not the are consumed right type. quickly batteries: The batteries have lost their effectiveness. Solution Use only unused AAsize alkaline batteries or Canon AA-size NiMH batteries. (For the information about alkaline batteries, see "Proper Battery Handling - Canon PowerShot A40 | PowerShot A40/A30 Camera User Guide - Page 162
Problem Cause If using rechargeable batteries: Batteries do not charge. Batteries were placed in the charger in the wrong direction. Poor electrical contact. Battery terminals are dirty. Battery life exceeded. Shots are blurry or unfocused. The camera ones. Hold the camera steady when shooting - Canon PowerShot A40 | PowerShot A40/A30 Camera User Guide - Page 163
Problem Shots are blurry or unfocused. Cause The subject was outside the range over which the camera can focus. The in. to 2.5 ft.) when set to telephoto. • When shooting distant subjects, set the camera to infinity mode. Set the flash on. Set exposure compensation to a positive value or use - Canon PowerShot A40 | PowerShot A40/A30 Camera User Guide - Page 164
Problem The subject comes out overexposed (too bright). The flash doesn't fire. Image not showing on TV. Zoom does not operate. Cause The subject is too close to the flash. The subject is brighter than the surroundings. Light is shining or reflecting into the camera. The flash mode is set so that - Canon PowerShot A40 | PowerShot A40/A30 Camera User Guide - Page 165
Canon's standard testing methods. Subject to change without notice. PowerShot A40 / PowerShot A30 Camera A40 : Approx. 2 million effective pixels A30 : Approx. 1.2 million Image A40 (W) - 4.8 (T) Digital Zoom A40 : Maximum 2.5× ( sec. • 15 - 1.3 sec. in manual mode with the flash off or in slow - Canon PowerShot A40 | PowerShot A40/A30 Camera User Guide - Page 166
cm (10.2 in. - 2.5 ft.) (W/T) Shooting Modes : Auto/program/manual/stitch assist/movie Continuous Shooting : Approx. 2.5 images/sec. (Large/Fine mode software program "RemoteCapture" is included in the camera kit.) Recording Media : CompactFlash card (Type I) File Format : Design rule for Camera - Canon PowerShot A40 | PowerShot A40/A30 Camera User Guide - Page 167
, Español, Chinese or Japanese (depending on the region) Interface A40 : Universal Serial Bus (USB) (mini-B), Audio/Video Output (NTSC ) Weight : Approx. 250 g (8.8 oz.) (excluding batteries and CF card) *1 This digital camera supports Exif 2.2 (also called " Exif Print" ). Exif Print is - Canon PowerShot A40 | PowerShot A40/A30 Camera User Guide - Page 168
Battery Performance AA Alkaline Batteries (included with the camera) AA NiMH Battery NB-1AH Number of Shots LCD Monitor ON LCD Monitor OFF Approx. 200 shots Approx. 500 shots Approx. 350 shots Approx. 1000 - Canon PowerShot A40 | PowerShot A40/A30 Camera User Guide - Page 169
CF Cards and Estimated Capacities (Recordable Images) PowerShot A40 L M S Movie (in seconds) FC-8M 7 11 24 16 24 46 35 50 87 18 48 FC-16M 15 24 48 32 49 92 70 99 172 36 97 FC-32M 31 49 99 67 102 189 143 206 353 75 198 FC-64M 64 100 200 135 - Canon PowerShot A40 | PowerShot A40/A30 Camera User Guide - Page 170
the compression setting. ¡In the previous tables, L (Large), M (Medium), S (Small), , and refer to the following image resolutions (in pix els). PowerShot A40 PowerShot A30 L (Large) 1600 ×1200 pixels 1280 × 960 pixels M (Medium) 1024 × 768 pixels 1024 × 768 pixels S (Small) 640 × 480 pixels 640 - Canon PowerShot A40 | PowerShot A40/A30 Camera User Guide - Page 171
NiMH Battery NB-1AH Supplied with the optional NiMH Batter y NB4-100 set and the Batter y/ Charger Kit CBK100. Type Nominal Voltage Typical Capacity Cycle Life Operating Temperature Dimensions Weight Rechargeable nickel metal hydride batter y 1.2 V DC 1600 mAh Approx. 300 times 0 - 35 °C (32 - 95 - Canon PowerShot A40 | PowerShot A40/A30 Camera User Guide - Page 172
CompactFlash™ Card Card Slot Type Dimensions Weight Type I 36.4 × 42.8 × 3.3 mm (1.4 × 1.7 × 0.1 in.) : approx. 252 mm) Approx. 200 mm (Approx. 7.9 in.) - ∞ (when mounted on PowerShot A40 or A30, at maximum wide angle) Thread Diameter 52 mm standard filter thread (Conversion Lens Adapter LA - Canon PowerShot A40 | PowerShot A40/A30 Camera User Guide - Page 173
250 mm 100 - 250 mm (3.9 - 9.8 in.) (W)/130 - 250 mm (5.1 - 9.8 in.) (T) (when mounted on PowerShot A40 or A30) 52 mm standard filter thread (Conversion Lens Adapter LA-DC52 is required for mounting to PowerShot A40 or A30) Diameter: 54 mm (2.1 in. ) Length: 10.2 mm (0.4 in.) Approx. 55 g (1.9 oz - Canon PowerShot A40 | PowerShot A40/A30 Camera User Guide - Page 174
a CF Card 98 Installing 22 Slot Cover 22 Components Guide 14 Compression 50 Computer, Downloading Images to a 126 Connecting the Camera to a Computer 128 From a CF Card 126 D Date Setting 25 Date Battery 142 DC IN Terminal 146 Default Settings 44 DIGITAL Terminal 14 Digital Zoom - Canon PowerShot A40 | PowerShot A40/A30 Camera User Guide - Page 175
All Images 97 Single Image 96 F File Number 35 About File Numbering 81 Resetting 80 Flash 52 Focal Length 40 Focus Lock 71 Functions Available 82 I Image Number 35 Image Transfer Setting 122 Remove All 122 Selecting Images 122 Indicator 16 Infinity 55 ISO Speed 79 L Language 27 LCD - Canon PowerShot A40 | PowerShot A40/A30 Camera User Guide - Page 176
Movie Time 35 Red-Eye Reduction 54 Red-Eye Reduction Lamp 52 Replaying 86 Auto Play 93 Index View 88 Magnifying Images 87 Movies 90 Reviewing an Image Right After Shooting 48 Rotating Images 92 Single Image Replay 86 View Individually 86 View Nine Images 88 Resolution 50 Ring Release - Canon PowerShot A40 | PowerShot A40/A30 Camera User Guide - Page 177
S Self-Timer 60 Setting 44 Date ...25 Language 27 Resetting the Settings to Default 137 Time ...25 Shoot Continuously 59 Shooting 46 Camera Select Settings 46 Selecting Particular Effects 67 Shooting Date/Time 35 Shooting Modes 82 Functions Available 82 Shooting on a TV Set 124 Shutter - Canon PowerShot A40 | PowerShot A40/A30 Camera User Guide - Page 178
Canon Customer Support Canon Inc. 30-2 Shimomar uko 3-chome, Ohta-ku, Tokyo 146-8501, Japan NORTH AMERICA Canon U.S.A., Inc. Canon Customer Care Center Phone (US): 1-800-828-4040 (Available Mon. - Fri., 9 AM to 8 PM Eastern Time) www.powershot.com Canon Canada Inc. Phone (Canada): 1-800-OK-CANON (1- - Canon PowerShot A40 | PowerShot A40/A30 Camera User Guide - Page 179
2000 E-mail: [email protected] Canon Belgium N.V. / S.A. Helpdesk: 0900-10627 Tel.: (02) 722.04.11 Fax: (02) 721.32.74 Canon Luxembourg S.A. Tel.: (352) 48 47 961 Fax: (352) 48 47 96232 Canon Nederland N.V. Helpdesk: 023 - 5 681 681 Tel.: 023 - 5 670 123 Fax: 023 - 5 670 124 Canon Danmark A/S Phone - Canon PowerShot A40 | PowerShot A40/A30 Camera User Guide - Page 180
Wien Vienna Helpdesk Tel: 01 66 146 412 Fax: 01 66 146 308 OCEANIA Canon Australia Pty. Ltd. Info-Line: (02) 9805 2864 www.canon.com.au Canon New Zealand Ltd. Info-Line: 0900-522666 www.canon.co.nz ASIA Canon Singapore Pte. Ltd. 79 Anson Road, #09-01 / 06, Singapore 079906 Phone: (65) 532 - Canon PowerShot A40 | PowerShot A40/A30 Camera User Guide - Page 181
Canon Marketing Services No.1 Jalan Kilang Timor, #09-00, Pacific Tech Centre, Singapore 159303 Phone: (65) 799 8888 Fax: (65) 273 3317 Canon Marketing (Malaysia) Sdn. Bhd. Wisma General Lumber, Block D, Peremba Square, Saujana Resort, Section U2, 40150, Shah Alam, Selangor Dar ul Ehsan, Malaysia - Canon PowerShot A40 | PowerShot A40/A30 Camera User Guide - Page 182
installation. This equipment generates, uses and can radiate radio frequency energy and, if not installed and used in accordance with the instructions technician for help. The cables with the ferrite core provided with the digital camera must be used with this equipment in order to comply with Class - Canon PowerShot A40 | PowerShot A40/A30 Camera User Guide - Page 183
CDI-E047-010 XXXXXXXXX © 2002 CANON INC. PRINTED IN JAPAN
-
 1
1 -
 2
2 -
 3
3 -
 4
4 -
 5
5 -
 6
6 -
 7
7 -
8
-
9
-
10
-
11
-
12
-
13
-
14
-
15
-
16
-
17
-
18
-
19
-
20
-
21
-
22
-
23
-
24
-
25
-
26
-
27
-
28
-
29
-
30
-
31
-
32
-
33
-
34
-
35
-
36
-
37
-
38
-
39
-
40
-
41
-
42
-
43
-
44
-
45
-
46
-
47
-
48
-
49
-
50
-
51
-
52
-
53
-
54
-
55
-
56
-
57
-
58
-
59
-
60
-
61
-
62
-
63
-
64
-
65
-
66
-
67
-
68
-
69
-
70
-
71
-
72
-
73
-
74
-
75
-
76
-
77
-
78
-
79
-
80
-
81
-
82
-
83
-
84
-
85
-
86
-
87
-
88
-
89
-
90
-
91
-
92
-
93
-
94
-
95
-
96
-
97
-
98
-
99
-
100
-
101
-
102
-
103
-
104
-
105
-
106
-
107
-
108
-
109
-
110
-
111
-
112
-
113
-
114
-
115
-
116
-
117
-
118
-
119
-
120
-
121
-
122
-
123
-
124
-
125
-
126
-
127
-
128
-
129
-
130
-
131
-
132
-
133
-
134
-
135
-
136
-
137
-
138
-
139
-
140
-
141
-
142
-
143
-
144
-
145
-
146
-
147
-
148
-
149
-
150
-
151
-
152
-
153
-
154
-
155
-
156
-
157
-
158
-
159
-
160
-
161
-
162
-
163
-
164
-
165
-
166
-
167
-
168
-
169
-
170
-
171
-
172
-
173
-
174
-
175
-
176
-
177
-
178
-
179
-
180
-
181
-
182
-
183
 |
 |
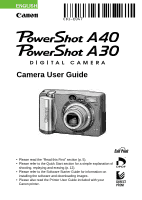
Camera User Guide
ENGLISH
•
Please read the “Read this First” section (p. 5).
•
Please refer to the Quick Start section for a simple explanation of
shooting, replaying and erasing (p. 12).
•
Please refer to the Software Starter Guide for information on
installing the software and downloading images.
•
Please also read the Printer User Guide included with your
Canon printer.