Canon PowerShot A40 PowerShot A40/A30 Camera User Guide - Page 67
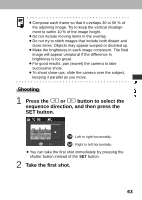
Shooting, Press the, button to select the, sequence direction, and then press the, SET button., Take
 |
View all Canon PowerShot A40 manuals
Add to My Manuals
Save this manual to your list of manuals |
Page 67 highlights
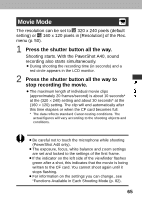
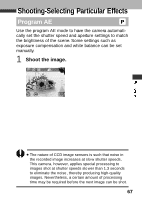
¡Compose each frame so that it overlaps 30 to 50 % of the adjoining image. Try to keep the vertical misalign- ment to within 10 % of the image height. ¡Do not include moving items in the overlap. ¡Do not try to stitch images that include both distant and close items. Objects may appear warped or doubled up. ¡Make the brightness in each image consistent. The final image will appear unnatur al if the difference in brightness is too great. ¡For good results, pan (swivel) the camera to take successive shots. ¡To shoot close-ups, slide the camera over the subject, keeping it parallel as you move. Shooting 1 Press the or button to select the sequence direction, and then press the SET button. : Left to right horizontally. : Right to left horizontally. ¡You can take the first shot immediately b y pressing the shutter button instead of the SET button. 2 Take the first shot. 63
-
 1
1 -
2
-
3
-
4
-
5
-
6
-
7
-
8
-
9
-
10
-
11
-
12
-
13
-
14
-
15
-
16
-
17
-
18
-
19
-
20
-
21
-
22
-
23
-
24
-
25
-
26
-
27
-
28
-
29
-
30
-
31
-
32
-
33
-
34
-
35
-
36
-
37
-
38
-
39
-
40
-
41
-
42
-
43
-
44
-
45
-
46
-
47
-
48
-
49
-
50
-
51
-
52
-
53
-
54
-
55
-
56
-
57
-
58
-
59
-
60
-
61
-
 62
62 -
 63
63 -
 64
64 -
 65
65 -
 66
66 -
 67
67 -
 68
68 -
 69
69 -
 70
70 -
 71
71 -
 72
72 -
73
-
74
-
75
-
76
-
77
-
78
-
79
-
80
-
81
-
82
-
83
-
84
-
85
-
86
-
87
-
88
-
89
-
90
-
91
-
92
-
93
-
94
-
95
-
96
-
97
-
98
-
99
-
100
-
101
-
102
-
103
-
104
-
105
-
106
-
107
-
108
-
109
-
110
-
111
-
112
-
113
-
114
-
115
-
116
-
117
-
118
-
119
-
120
-
121
-
122
-
123
-
124
-
125
-
126
-
127
-
128
-
129
-
130
-
131
-
132
-
133
-
134
-
135
-
136
-
137
-
138
-
139
-
140
-
141
-
142
-
143
-
144
-
145
-
146
-
147
-
148
-
149
-
150
-
151
-
152
-
153
-
154
-
155
-
156
-
157
-
158
-
159
-
160
-
161
-
162
-
163
-
164
-
165
-
166
-
167
-
168
-
169
-
170
-
171
-
172
-
173
-
174
-
175
-
176
-
177
-
178
-
179
-
180
-
181
-
182
-
183
 |
 |
