Canon SELPHY DS700 DS700 Photo Print Guide - Page 8
Installing an Ink Tank
 |
View all Canon SELPHY DS700 manuals
Add to My Manuals
Save this manual to your list of manuals |
Page 8 highlights
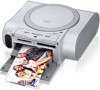
Easy Setup Instructions 5 Lock the print head into place by lowering the lever. Press down the lock button until it clicks. Do not touch the lock lever once the print head has been installed. Installing an Ink Tank Caution • For safety reasons, store an ink tank out of the reach of small children. • Do not drop or shake an ink tank as this may cause the ink to leak out and stain your clothes and hands. 1 Take out the ink tank. Ink ports 2 Hold the ink tank as shown in the diagram and remove the protective cap. note • Do not touch the ink port. • Do not attempt to reattach the protective cap once it has been removed. 3 Insert the ink tank slant into the slot aligning the X mark with the W mark. 4 Press the until it clicks into place. 5 Close the cover. note Wait until the preparatory operation is complete: it takes about 80 seconds. 6
-
 1
1 -
2
-
 3
3 -
 4
4 -
 5
5 -
 6
6 -
 7
7 -
 8
8 -
 9
9 -
 10
10 -
 11
11 -
 12
12 -
 13
13 -
14
-
15
-
16
-
17
-
18
-
19
-
20
-
21
-
22
-
23
-
24
-
25
-
26
-
27
-
28
-
29
-
30
-
31
-
32
-
33
-
34
-
35
-
36
-
37
-
38
-
39
-
40
-
41
-
42
-
43
-
44
-
45
-
46
-
47
-
48
-
49
-
50
-
51
-
52
-
53
-
54
-
55
-
56
-
57
-
58
-
59
-
60
-
61
-
62
-
63
-
64
-
65
-
66
-
67
-
68
-
69
-
70
-
71
-
72
-
73
-
74
-
75
-
76
-
77
-
78
-
79
-
80
-
81
-
82
-
83
-
84
-
85
-
86
-
87
 |
 |
