Canon SELPHY ES40 SELPHY ES40 Printer User Guide - Page 47
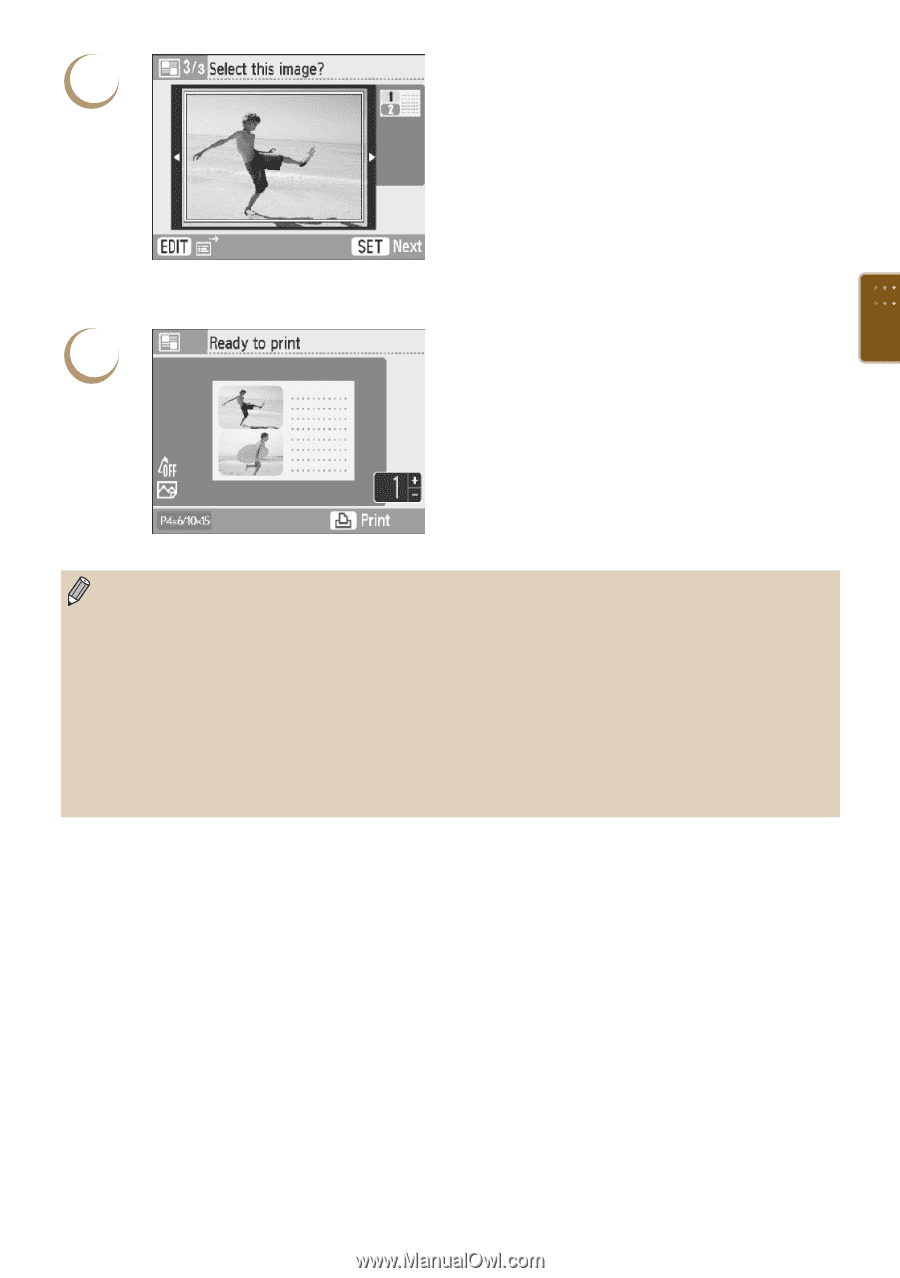
Confirm the images and print., Choose an image.
 |
View all Canon SELPHY ES40 manuals
Add to My Manuals
Save this manual to your list of manuals |
Page 47 highlights
4 Choose an image. Press the l r buttons, or turn the w wheel to choose the image to be printed in the area marked [1] and press the o button. You can use the trimming function (p. 36) or search images using the jump function (p. 27) by pressing the m(EDIT) button and displaying the edit menu. Use the same steps to choose an image to be printed in the area marked [2] and press the o button. 5 Confirm the images and print. Press the ., buttons to choose the number of copies to be printed. Press the p button to start printing. With the exception of [Correct Red-Eye] (p. 34), [Image Optimize] (p. 34), [Adjust Image] (p. 34), and [My Colors] (p. 35), settings made in "Printing a Variety of Images" will not be applied. In layouts with more than 2 images, [Correct Red-Eye] (p. 34) settings made in "Printing a Variety of Images" will not be applied. Changing the settings in [My Colors] (p. 35) will change the color settings on the image but will not affect the background color. Images with a resolution lower than 640×480 cannot be printed in multi layout. When a cartridge is replaced mid-way through printing, automatic adjustments (trimming frames, image placement, etc.) will be made depending on the paper size of the new cartridge. However, if settings incompatible with the new cartridge have been selected, the printer will restore the [Creative Print] screen. 47
-
 1
1 -
2
-
3
-
4
-
5
-
6
-
7
-
8
-
9
-
10
-
11
-
12
-
13
-
14
-
15
-
16
-
17
-
18
-
19
-
20
-
21
-
22
-
23
-
24
-
25
-
26
-
27
-
28
-
29
-
30
-
31
-
32
-
33
-
34
-
35
-
36
-
37
-
38
-
39
-
40
-
41
-
 42
42 -
 43
43 -
 44
44 -
 45
45 -
 46
46 -
 47
47 -
 48
48 -
 49
49 -
 50
50 -
 51
51 -
 52
52 -
53
-
54
-
55
-
56
-
57
-
58
-
59
-
60
-
61
-
62
-
63
-
64
-
65
-
66
-
67
-
68
-
69
-
70
-
71
-
72
-
73
-
74
-
75
-
76
-
77
-
78
-
79
-
80
-
81
-
82
 |
 |