Canon SELPHY ES40 SELPHY ES40 Printer User Guide - Page 62
Downloading Frames and Stamps (Contents Data)
 |
View all Canon SELPHY ES40 manuals
Add to My Manuals
Save this manual to your list of manuals |
Page 62 highlights
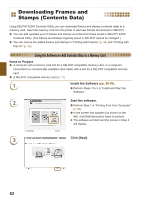
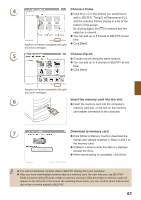
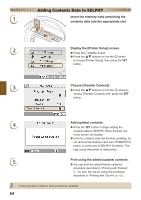
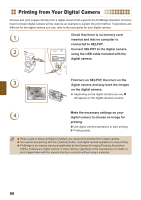
Downloading Frames and Stamps (Contents Data) Using SELPHY ES40 Contents Utility, you can download frames and stamps (contents data) to a memory card. Insert the memory card into the printer to add new frames and stamps to SELPHY. You can add (update) up to 5 frames and stamps at a time from those saved in SELPHY ES40 Contents Utility. (The frames and stamps originally saved in SELPHY cannot be changed ) You can choose the added frames and stamps in "Printing with Frames" (p. 40) and "Printing with Clip Art" (p. 42). Using the Software to Add Contents Data to a Memory Card Items to Prepare A computer with a memory card slot for a SELPHY compatible memory card, or a computer connected to a commercially available card reader with a slot for a SELPHY compatible memory card. A SELPHY compatible memory card (p. 11) 1 Install the Software (pp. 58-59). Perform Steps 1 to 5 in "Install and Start the Software". 2 Start the software. Perform Step 1 in "Printing from Your Computer" (p. 60). In the screen that appears (as shown on the left), click [Add decoration items to printer]. The software will start and the screen in Step 3 will display. 3 Click [Next]. 62
-
 1
1 -
2
-
3
-
4
-
5
-
6
-
7
-
8
-
9
-
10
-
11
-
12
-
13
-
14
-
15
-
16
-
17
-
18
-
19
-
20
-
21
-
22
-
23
-
24
-
25
-
26
-
27
-
28
-
29
-
30
-
31
-
32
-
33
-
34
-
35
-
36
-
37
-
38
-
39
-
40
-
41
-
42
-
43
-
44
-
45
-
46
-
47
-
48
-
49
-
50
-
51
-
52
-
53
-
54
-
55
-
56
-
 57
57 -
 58
58 -
 59
59 -
 60
60 -
 61
61 -
 62
62 -
 63
63 -
 64
64 -
 65
65 -
 66
66 -
 67
67 -
68
-
69
-
70
-
71
-
72
-
73
-
74
-
75
-
76
-
77
-
78
-
79
-
80
-
81
-
82
 |
 |
