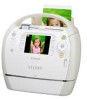
Canon SELPHY ES40 SELPHY ES40 Printer User Guide - Page 59
Windows, Macintosh, Confirm that the software has been - user guide
 |
View all Canon SELPHY ES40 manuals
Add to My Manuals
Save this manual to your list of manuals |
Page 59 highlights
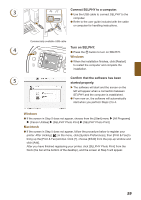
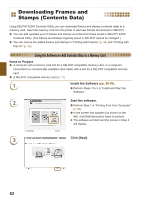
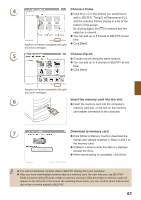
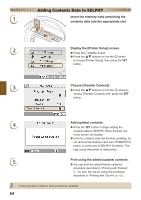
3 Connect SELPHY to a computer. Use the USB cable to connect SELPHY to the computer. Refer to the user guide included with the cable or computer for handling instructions. Commercially available USB cable 4 Turn on SELPHY. Press the q button to turn on SELPHY. Windows When the installation finishes, click [Restart] to restart the computer and complete the installation. 5 Confirm that the software has been started properly. The software will start and the screen on the left will appear when a connection between SELPHY and the computer is established. From now on, the software will automatically start when you perform Steps 2 to 4. Windows If the screen in Step 5 does not appear, choose from the [Start] menu r [All Programs] r [Canon Utilities] r [SELPHY Photo Print] r [SELPHY Photo Print]. Macintosh If the screen in Step 5 does not appear, follow the procedure below to register your printer. After clicking [ ] in the menu, click [System Preferences], then [Print & Fax] to bring up the [Print & Fax] window. Click [+], choose [ES40] from the pop-up window and click [Add]. After you have finished registering your printer, click [SELPHY Photo Print] from the Dock (the bar at the bottom of the desktop), and the screen at Step 5 will appear. 59
-
 1
1 -
2
-
3
-
4
-
5
-
6
-
7
-
8
-
9
-
10
-
11
-
12
-
13
-
14
-
15
-
16
-
17
-
18
-
19
-
20
-
21
-
22
-
23
-
24
-
25
-
26
-
27
-
28
-
29
-
30
-
31
-
32
-
33
-
34
-
35
-
36
-
37
-
38
-
39
-
40
-
41
-
42
-
43
-
44
-
45
-
46
-
47
-
48
-
49
-
50
-
51
-
52
-
53
-
 54
54 -
 55
55 -
 56
56 -
 57
57 -
 58
58 -
 59
59 -
 60
60 -
 61
61 -
 62
62 -
 63
63 -
 64
64 -
65
-
66
-
67
-
68
-
69
-
70
-
71
-
72
-
73
-
74
-
75
-
76
-
77
-
78
-
79
-
80
-
81
-
82
 |
 |
